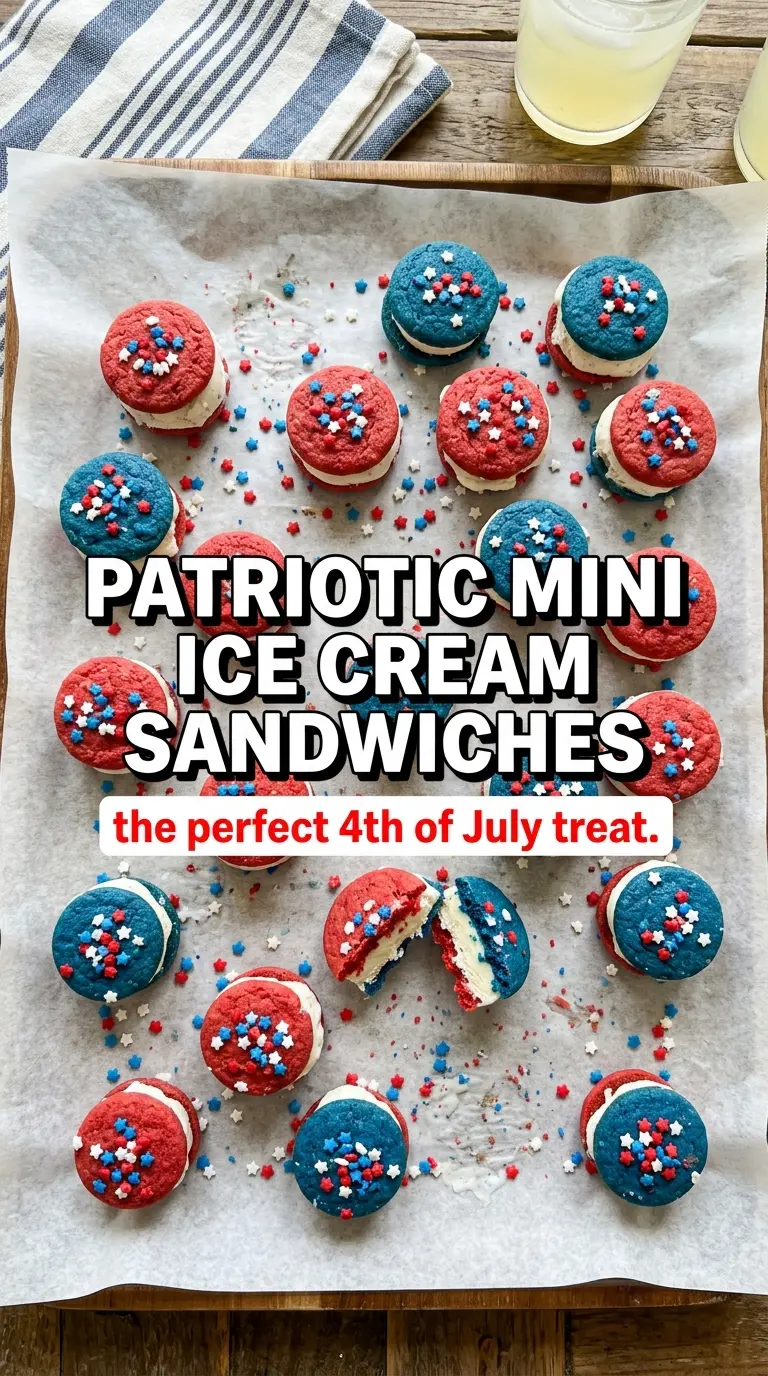
Mini star-shaped ice cream sandwiches bring the kind of red, white, and blue contrast that looks party-ready the second they hit the tray. The cookies stay crisp at the edges, the ice cream sits in a neat layer instead of sliding out the sides, and the whole thing feels festive without needing any extra fuss.
The trick is to let the cookies cool all the way before you fill them. Warm cookies soften the ice cream too fast, and that’s how you end up with a messy squeeze-out instead of clean little sandwiches. Softened ice cream helps too, but it should still hold its shape when scooped. You want spreadable, not melted.
Below, I’ve included the small details that matter most: how to keep the sandwiches tidy, what to do if your ice cream is too firm, and the easiest way to make these ahead for a summer get-together.
The cookies stayed crisp even after freezing, and the strawberry and blueberry layers looked so sharp when I served them. I was worried they’d be hard to assemble, but the softened ice cream spread evenly and froze up perfectly.
These patriotic mini ice cream sandwiches are the easiest way to bring red, white, and blue to the dessert table without turning on the oven again.
The Freeze Point That Keeps the Sandwiches Neat
The difference between a tidy mini sandwich and a slippery mess comes down to temperature. The cookies need to be completely cool, and the ice cream needs to be softened just enough to scoop without tearing. If either one is too warm, the layers blur together before you ever get them into the freezer.
These are also easier to assemble on parchment-lined trays than directly on a plate. Parchment gives the bottoms a little grip, which matters when you’re pressing on the top cookie and trying not to push the filling out sideways. A gentle press is enough. The ice cream should reach the edges on its own.
- Sugar cookie dough — This gives you the sturdy, sweet base that holds up after freezing. Homemade dough gives the cleanest star shape, but a good store-bought dough works if it bakes into a firm cookie instead of a soft puffy one.
- Strawberry ice cream — The red layer is easiest to flavor with strawberry because it keeps a bold color and a clean, familiar berry taste. If your pint is packed with big chunks, let it soften a few minutes longer so it spreads evenly instead of cracking the cookie.
- Blueberry or vanilla ice cream with blue food coloring — Blueberry ice cream gives you the most natural blue layer, while vanilla tinted blue makes the color brighter and keeps the flavor neutral. If you use food coloring, add it while the ice cream is soft so you don’t have to overmix later.
- Patriotic sprinkles — These do more than decorate. They help seal the exposed ice cream edge and keep the outside of the sandwiches from looking plain once frozen. Add them right after assembling, while the filling is still tacky.
What Each Ingredient Is Actually Doing in This Ice Cream Sandwich
- Cookie or bread base (the structural holder) — This needs to be sturdy enough to hold ice cream without crumbling, but tender enough to bite through. Freshness matters.
- Ice cream or frozen yogurt (the filling) — This should be slightly soft so it adheres to the cookies without melting off. Temperature matters here.
- Texture of the cookies (crispy vs. soft) — Crispy cookies stay crunchy; soft cookies meld with the ice cream. Choose based on the texture experience you want.
- Coating (optional chocolate, sprinkles, or nuts) — This adds visual appeal and texture. Dip in melted chocolate while ice cream is still cold so it sets immediately.
- Sandwich technique (speed matters) — Assemble sandwiches quickly so the ice cream doesn’t melt. Work in batches and keep ice cream scoops in the freezer.
- Freezing before serving (the set-up) — Let assembled sandwiches freeze for 30 minutes so they hold together when eaten. This also prevents ice cream from squishing out.
- Flavor pairing (cookies and ice cream together) — The cookie flavor should complement the ice cream, not compete. Think chocolate with vanilla or peanut butter with chocolate.
- Storage in the freezer (wrapped well) — Wrap individually so they don’t absorb freezer odors. They last 2-3 weeks when wrapped tightly.
How to Assemble Them Before the Ice Cream Wins
Baking the Stars
Roll the sugar cookie dough to an even thickness so the stars bake at the same rate. Pull them when the edges are set and just starting to color; if they go too far, they turn hard instead of crisp enough to bite cleanly after freezing. Let them cool on the pan first, then move them to a rack so the bottoms don’t steam and soften.
Filling and Pressing
Line up half the cookies flat side up on parchment. Drop a small scoop of softened ice cream onto each one, then top with the remaining cookies and press gently until the filling reaches the edges. If the ice cream squishes out in thick ribbons, it’s too soft; pop it back in the freezer for a few minutes before continuing.
Finishing and Freezing
Roll the exposed edges in sprinkles right away, before the ice cream firms up. Then move the tray to the freezer and let the sandwiches set until solid enough to lift without bending, at least 1 hour. If you serve them too soon, the middle will slide when you bite into them instead of holding that neat frozen layer.
How to Make These Work for Different Crowds
Use Vanilla and Strawberry Only for a Milder Flavor
If blueberry ice cream isn’t a hit in your house, use vanilla instead and keep the red-white look with the strawberry layer and white cookies. You lose the deeper blue contrast, but the final sandwich tastes cleaner and more kid-friendly.
Gluten-Free Version
Use a gluten-free sugar cookie dough that bakes into a firm, not crumbly, cookie. The sandwich will still work, but the cookies need to cool fully before handling because gluten-free doughs can be more fragile while warm.
Make Them Ahead for a Party
Assemble the sandwiches, freeze them on a tray until firm, then stack them with parchment between layers in an airtight container. That keeps the cookies from sticking and helps the ice cream stay centered instead of getting knocked loose in the freezer.
Storage and Reheating
- Refrigerator: Not recommended. These soften fast and lose their shape within minutes.
- Freezer: Freeze up to 1 week in an airtight container with parchment between layers. After that, the cookies can start to pick up freezer flavor.
- Reheating: No reheating needed. Let them sit at room temperature for 2 to 3 minutes before serving so the cookies bite cleanly and the ice cream doesn’t crack when you cut or bite in.
Questions I Get Asked About This Recipe

Patriotic Mini Ice Cream Sandwiches
Ingredients
Equipment
Method
- Bake the 2-inch star-shaped sugar cookies at 350F for 8-10 minutes, until lightly golden at the edges (visual cue: cookies look set, not raw in the centers). Cool completely so the ice cream won’t melt during assembly.
- Line a baking sheet with parchment (visual cue: parchment lies flat with no wrinkles where cookies will sit).
- Place half of the cookies on the parchment with the flat side up (visual cue: you’ll see the star points facing upward).
- Drop a small scoop of strawberry or blueberry ice cream onto each bottom cookie (visual cue: a mound sits centered and doesn’t spread yet).
- Top each with a second cookie and press gently to spread the ice cream to the edges (visual cue: ice cream reaches near the cookie edges but doesn’t overflow).
- Roll the exposed ice cream edges in red, white, and blue sprinkles (visual cue: a thin sprinkle “rim” forms around each sandwich).
- Freeze the mini ice cream sandwiches at least 1 hour before serving on a patriotic platter (visual cue: they are firm enough to hold their shape when lifted).


