Silky, scoopable salted caramel ice cream is exactly what the Ninja Creami does best when the base has enough fat, sugar, and body to shave into a smooth dessert instead of turning icy. This version lands in that sweet spot: deep caramel flavor, a buttery finish, and just enough salt to keep each bite from leaning flat or cloying.
The trick is balancing the base before it ever hits the freezer. Cream cheese adds the tiniest bit of stabilizing richness, brown sugar deepens the caramel notes, and a full 24-hour freeze gives the machine a firm block it can process cleanly. If the pint goes in under-frozen or the base is too thin, the texture suffers fast.
Below, I’ll walk through the small details that matter most, including how to keep the caramel flavor front and center and what to do if your pint comes out a little crumbly on the first spin.
The first spin looked a little crumbly, but after a quick re-spin with a splash of milk it turned into the smoothest caramel ice cream I’ve made in the Creami. The salty finish kept it from tasting too sweet.
Creamy salted caramel Ice Cream that spins up smooth, rich, and perfectly balanced — save this one for the nights you want a caramel dessert with a salty-sweet finish.
The Step That Keeps Caramel Ice Cream From Turning Icy
The biggest mistake with Ninja Creami ice cream is assuming the machine can fix a thin base. It can’t. The pint needs enough dissolved sugar and fat to freeze into a dense, even block, and this recipe gets there by combining cream, whole milk, caramel sauce, and brown sugar before freezing. That combination matters because caramel sauce brings flavor, but the sugar and dairy balance give the finished ice cream its soft, scoopable texture.
Give the mixture a serious blend until the cream cheese disappears completely. Those little lumps don’t melt out later; they freeze into tiny dense spots that show up in the final spin. Once the pint is frozen solid, the Ice Cream setting does the work. If the texture looks dry or sandy after the first spin, that’s not a failure — it just needs a small splash of milk and a re-spin to loosen the shaved ice cream into something creamy.
What Each Ingredient Is Doing in the Pint

- Whole milk — This gives the pint enough structure without making it heavy. Lower-fat milk can work, but the ice cream will freeze harder and need more re-spins.
- Heavy cream — This is where the velvet texture comes from. You can’t fully replace it and get the same result, though half-and-half will work in a pinch with a slightly icier finish.
- Caramel sauce — Use a sauce that tastes good on its own, because this is the main flavor here. A thin ice cream topping can work, but a thicker sauce blends in better and helps the base freeze with more body.
- Brown sugar — This deepens the caramel note and keeps the sweetness from tasting one-dimensional. Dark brown sugar gives a stronger molasses edge; light brown sugar keeps it softer.
- Cream cheese — The tiny amount here is there for texture, not cheesecake flavor. It helps emulsify the base, which makes the spin smoother and less icy.
- Sea salt — Salt sharpens the caramel and keeps the dessert from tasting flat. If you’re using a very salty caramel sauce, reduce the salt slightly and taste the base before freezing.
Freezing It Right, Then Spinning It Smooth
Blending the Base Until It’s Truly Smooth
Add everything to a blender and run it long enough to completely dissolve the brown sugar and cream cheese. If you can still see tiny flecks of cream cheese, keep blending. That little extra time matters because frozen lumps stay lumpy, and they interrupt the smooth, even texture the Creami is built to create.
Freezing the Pint Until It’s Solid All the Way Through
Pour the base into the pint and leave about 1 inch of headspace so it has room to expand. Then freeze it for a full 24 hours. If the center is still soft, the machine can’t shave the base properly and you’ll get a slushy middle instead of ice cream.
Using the Re-Spin to Fix a Dry First Pass
Run the Ice Cream setting first and look at the texture before touching anything else. If it comes out powdery or crumbly, add a splash of milk and re-spin. That second pass is where the magic happens, because the milk hydrates the shavings just enough to turn them back into a creamy scoopable texture without thinning the flavor.
Finishing with the Salt and Extra Caramel
Top the finished ice cream with a drizzle of caramel sauce and a pinch of flaky sea salt. Don’t add the salt too early or it disappears into the base; the contrast on top is what gives each bite that classic salted caramel finish. Serve it right after spinning for the softest texture.
How to Adjust This Salted Caramel Ice Cream for Different Kitchens
Dairy-Free Version
Use full-fat canned coconut milk in place of the whole milk and cream, then choose a dairy-free caramel sauce. The texture will be a little softer and the coconut note will show through, but the base still spins well because the fat content stays high.
Extra-Rich Bakery-Style Finish
Swap the brown sugar for an extra tablespoon of caramel sauce and add a teaspoon of instant vanilla pudding mix. That pushes the texture closer to an ice-cream-shop style pint, though it also softens the sharp caramel edge a bit.
Less Sweet, More Salty
Cut the brown sugar down to 1 tablespoon and finish with flaky salt on top. This keeps the caramel flavor front and center instead of making the pint taste dessert-sweet from the first bite to the last.
Storage and Re-Spinning Leftovers
- Refrigerator: Not recommended. This is best eaten straight from the Creami because the texture softens quickly once it thaws.
- Freezer: Store the finished base in the pint with the lid on for up to 2 weeks. After that, the texture starts to get icier and the caramel flavor dulls.
- Reheating: There’s no reheating here, but if the frozen pint gets too hard, let it sit at room temperature for 5 to 10 minutes before re-spinning. Don’t microwave it; that melts the edges while the center stays frozen.
Questions I Get Asked About This Recipe
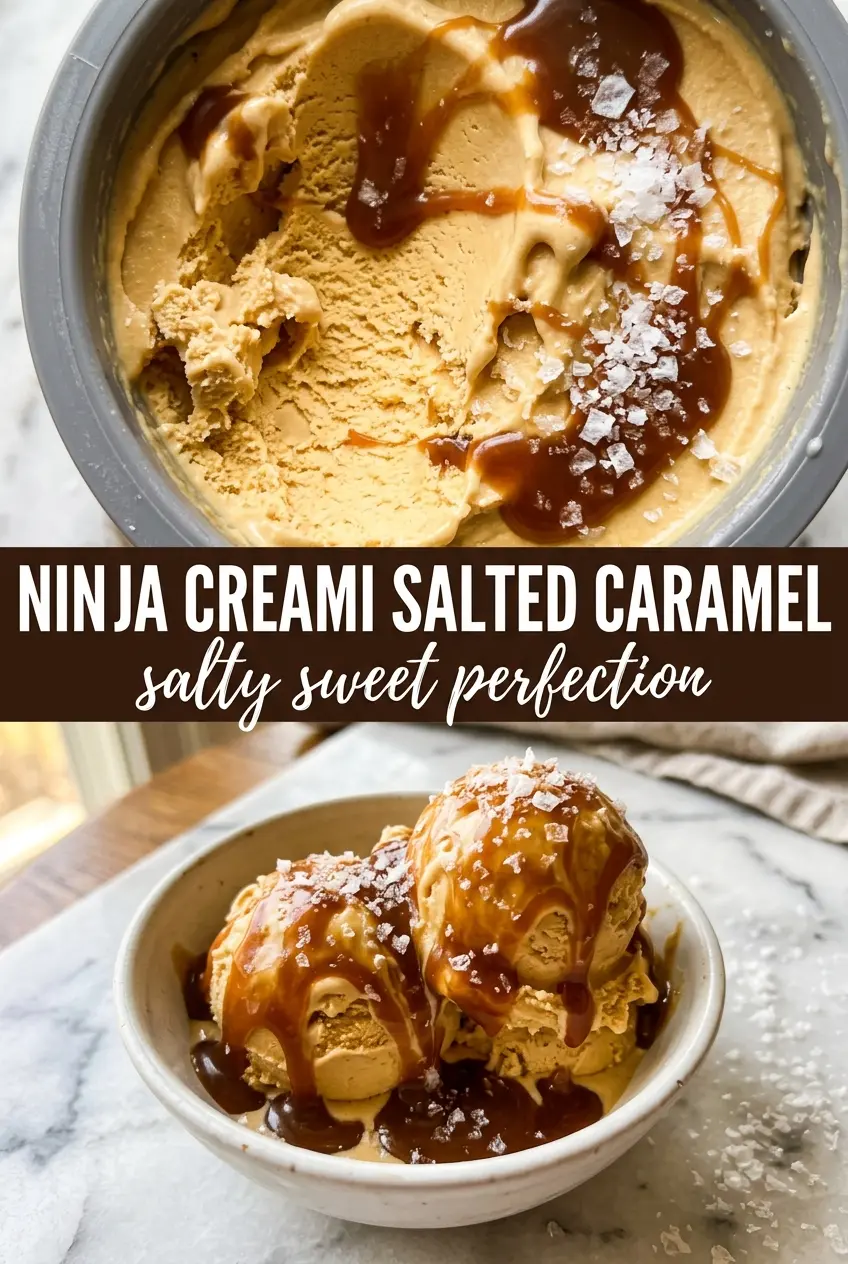
Ninja Creami Salted Caramel Ice Cream
Ingredients
Equipment
Method
- Blend the whole milk, heavy cream, caramel sauce, brown sugar, cream cheese, vanilla extract, and sea salt until completely smooth and no cream cheese lumps remain. Stop and scrape the blender if needed, so the mixture is uniform.
- Pour the mixture into the Ninja Creami pint container, leaving 1 inch of headspace. Freeze for 24 hours until solid.
- Process on the Ice Cream setting. If the texture is too firm, re-spin with a splash of milk until scoopable and smooth.
- Drizzle extra caramel sauce and flaky sea salt on top before serving to highlight the salted-sweet finish.


