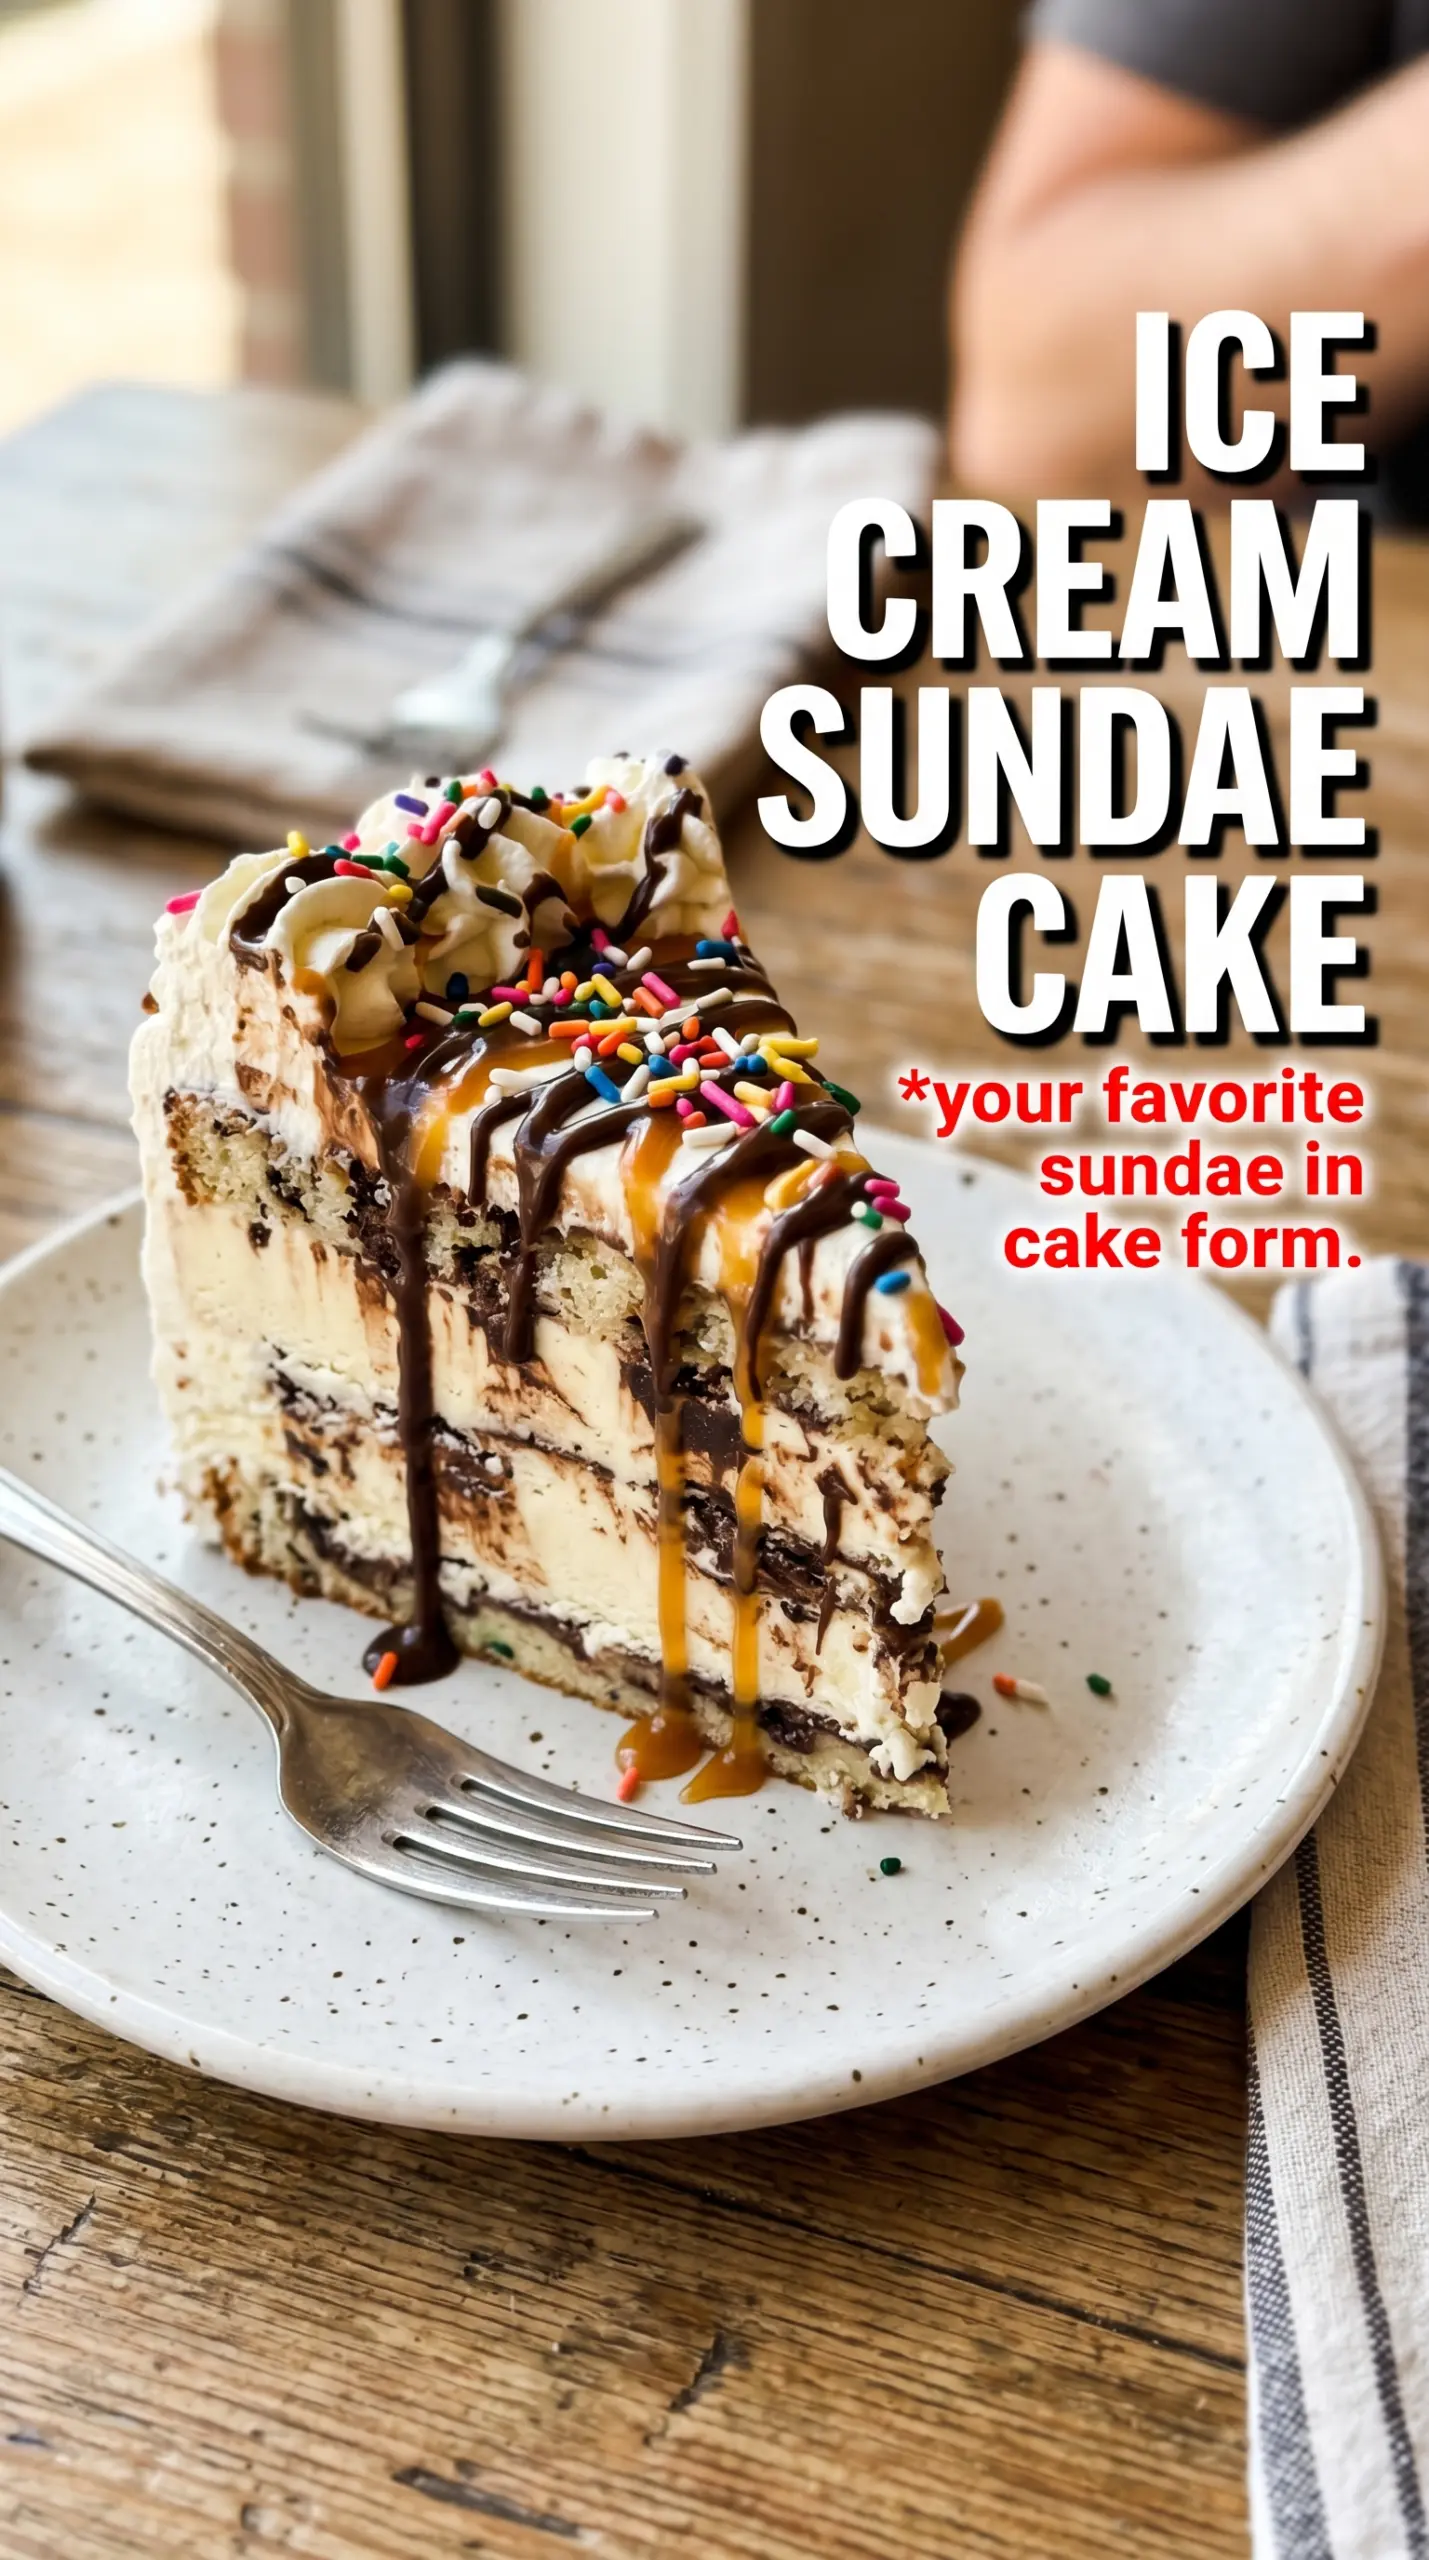
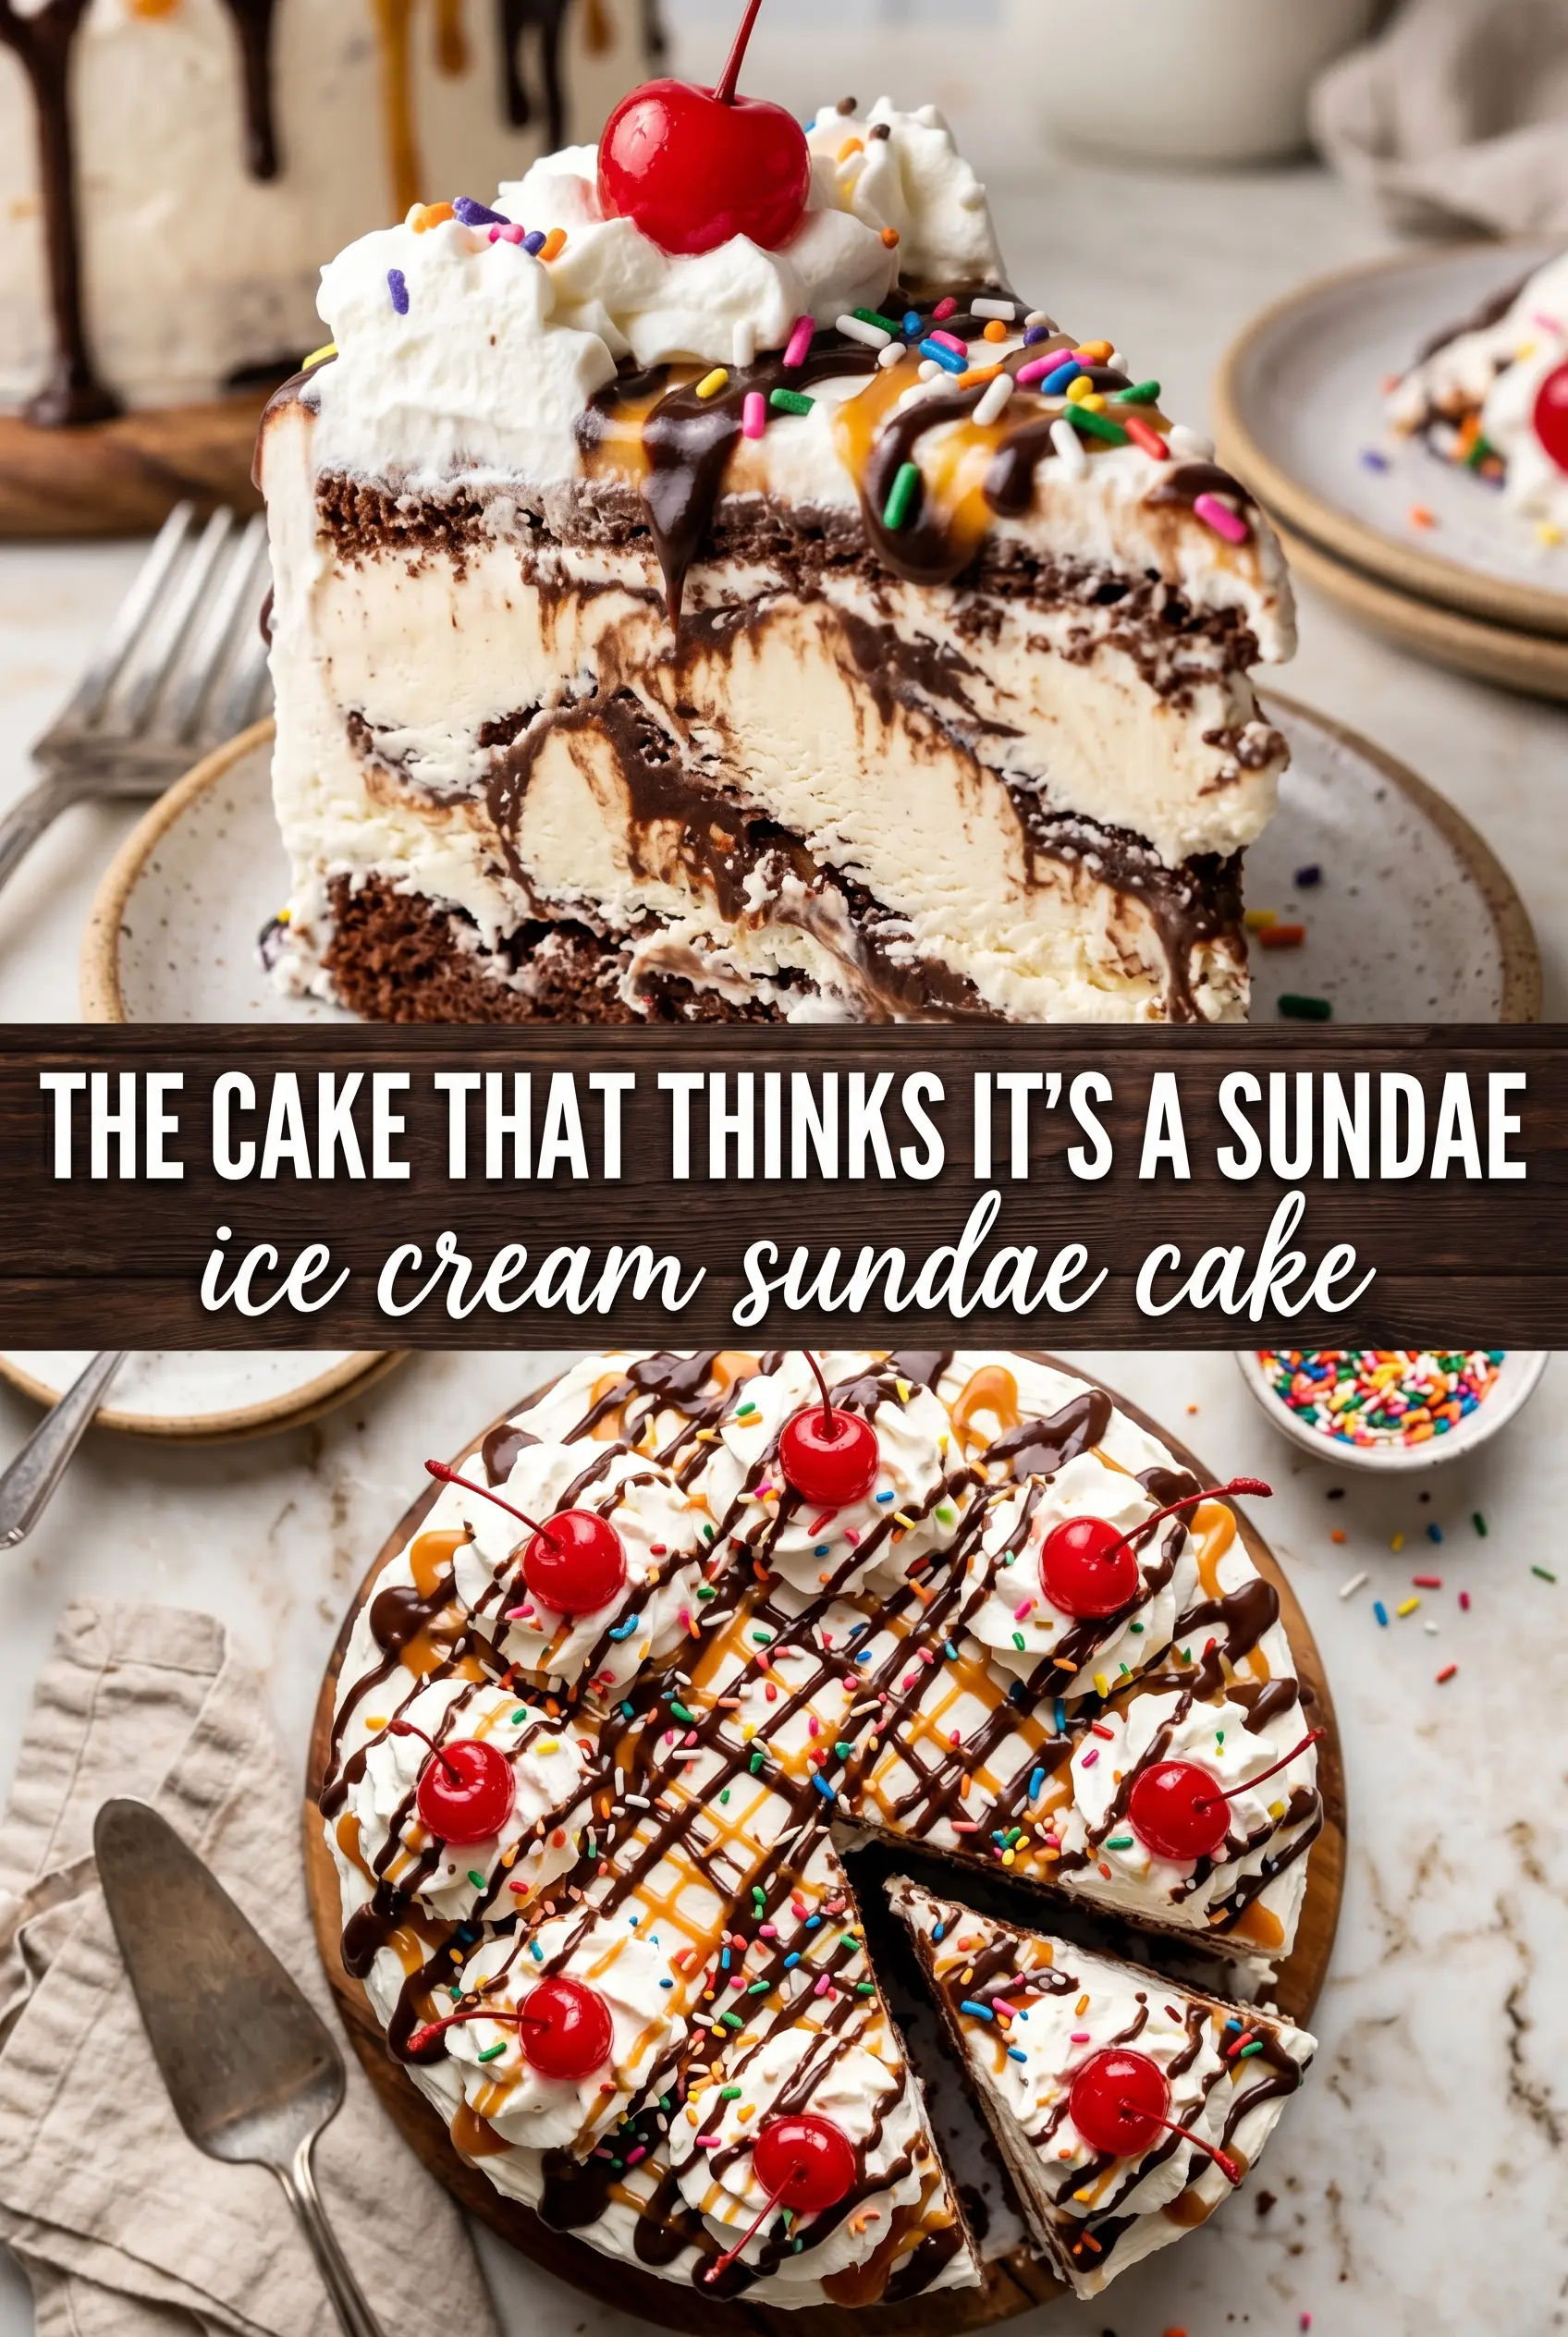
Cold, creamy slices with a fudgy base and ribbons of caramel are what make an ice cream sundae cake worth clearing freezer space for. Every bite gives you the full sundae experience: chocolate at the bottom, vanilla ice cream in the middle, and that classic finish of whipped topping, sprinkles, and a cherry on top. It looks playful, but the structure is sturdy enough to slice cleanly if you give it the right freeze time.
The trick is building it in layers that stay distinct without turning icy or messy. A firm brownie or cookie crust gives the cake something to cut against, while softened ice cream spreads evenly without tearing the base. The sauces go in after the ice cream is down, then get swirled just enough to keep those hot fudge and caramel pockets from disappearing completely.
Below, I’ll show you how to keep the layers neat, when to add the toppings so they don’t melt into a puddle, and the small freezing details that make this dessert slice like a real cake instead of a scoop in a pan.
I used brownie layers instead of cookies and it sliced like a dream after overnight freezing. The hot fudge stayed in little ribbons instead of sinking through, and the whole thing tasted like a real sundae from an old-fashioned ice cream shop.
Save this ice cream sundae cake for birthdays when you want a frozen dessert with brownie layers, hot fudge, and a cherry on top.
The Freeze Time That Keeps the Layers from Slumping
The part that trips people up here isn’t the flavor. It’s the structure. If the crust isn’t chilled first, the ice cream starts melting into it the second you spread it, and the whole middle turns soft before it ever has a chance to set. A short freeze after the base goes in gives you a firm foundation so the ice cream sits on top instead of sinking through.
Softened ice cream matters too. Rock-hard ice cream tears the crust and leaves air pockets, but melted ice cream turns grainy once it refreezes. You want it scoopable and spreadable, with just enough give that it smooths across the pan in one layer. That balance is what keeps the cake creamy instead of icy.
- The crust or brownie base — This is your anchor. Oreo crumbs give you a classic cookies-and-cream bite, while a cooled brownie layer makes the cake taste more like a true sundae dessert bar. Either one needs to be pressed firmly so the slices hold together.
- Vanilla ice cream — Use a good vanilla here because it’s the main flavor between all the toppings. Cheap ice cream works better than you’d think as long as it’s not icy, but premium ice cream gives a smoother, denser slice. Let it soften on the counter until it spreads without forcing.
- Hot fudge sauce — This brings that sundae-shop richness. A thicker sauce stays in visible ribbons better than a thin pourable one. Warm it just enough to drizzle; if it’s hot, it melts channels straight through the ice cream.
- Caramel sauce — Caramel adds contrast and keeps the dessert from tasting one-note. Jarred caramel is fine here, especially if it’s thick enough to zigzag over the ice cream. If yours is very loose, chill it briefly so it doesn’t run into the corners.
What Each Ingredient Is Actually Doing in This Ice Cream Cake
- Crust or base layer (cookies, brownies, or cake) — This provides structure and texture contrast. A sturdy base keeps the whole cake from crumbling when served.
- Ice cream (the main event) — Choose quality ice cream or frozen yogurt. Soft-serve or premium ice cream works better than hard-packed store brands.
- Cake layer (optional but recommended) — A thin cake layer adds substance and keeps the cake from being all frozen texture. Make it thin so it doesn’t overpower the ice cream.
- Sauce or syrup layer (fudge, caramel, or fruit) — This adds flavor depth and prevents the cake from tasting one-dimensional. Freeze between layers so sauces stay distinct.
- Toppings (chocolate chips, cookies, candy, or nuts) — These add texture and visual appeal. Mix-ins stay crispy longer if frozen separately first.
- Frosting or whipped cream (optional topping) — This adds richness to the outside. Keep it simple or it overwhelms the cake.
- Freezing time (the patience that pays off) — Each layer needs time to set so they stay distinct when sliced. Rushing this step means layers muddy together.
- Storage and serving technique (thaw 5 minutes before slicing) — A brief thaw makes slicing clean and easy. Serve slices immediately for best texture.
How to Layer It So the Cake Slices Cleanly
Pressing the Base into a Firm Floor
Pack the crushed Oreos or brownie layer into the springform pan and press it evenly all the way to the edges. You want a tight surface with no loose patches, because any gaps will turn crumbly when you cut the cake later. A 15-minute freeze firms the base just enough that the ice cream won’t slide as soon as it lands.
Spreading the Ice Cream Without Breaking the Base
Let the vanilla ice cream soften until it yields under a spoon but still holds shape. Spread it in an even layer from the center outward, using a spatula dipped in warm water if needed. If the base starts lifting, the ice cream is too cold and you’re pressing too hard; pause for a minute and let it relax.
Swirling in the Fudge and Caramel
Drizzle the hot fudge and caramel over the ice cream after it’s in the pan, not before. Then drag a spoon or knife through just a few times to create ribbons without fully mixing them in. Over-swirling turns the middle muddy, and you lose the contrast that makes each slice look like a sundae cross-section.
Finishing with the Topping Layer
Freeze the cake until the center is completely firm before adding the whipped topping. Spread it gently so you don’t dig into the ice cream beneath it, then decorate fast with sprinkles, peanuts if you’re using them, and cherries. A final freeze gives the topping enough structure to hold its shape when you slice, instead of smearing off the sides.
Three Ways to Change the Cake Without Losing the Sundae Feel
Brownie Base Instead of Oreo Crumbs
A cooled brownie layer makes this taste more like a hot fudge sundae in cake form. It gives you a denser, fudgier bite and slices neatly, but it adds a little more prep because the brownie has to be fully cool before the ice cream goes on. If you want a stronger chocolate note, this is the best swap.
Dairy-Free Sundae Cake
Use dairy-free vanilla ice cream and coconut-based whipped topping, then check that both the fudge and caramel are dairy-free as well. The texture stays close to the original, though the cake will freeze a little harder, so let slices sit at room temperature for 5 to 10 minutes before serving. This version still gives you the same layered look and the same frozen sundae vibe.
Gluten-Free Version
Swap in gluten-free sandwich cookies or a gluten-free brownie base and the rest of the recipe can stay the same. The biggest difference is crumb texture, since some gluten-free cookies are a little more delicate, so press the crust firmly and freeze it well before adding the ice cream. Once it sets, no one will miss the wheat.
No-Nut, Extra-Classic Topping
Skip the peanuts and lean on sprinkles, fudge, caramel, and cherries for that old-school ice cream parlor finish. You lose the salty crunch, but the dessert stays more kid-friendly and easier to serve at mixed-allergy gatherings. If you want crunch without nuts, add a few extra cookie crumbs over the top right before the final freeze.
Storage and Reheating
- Refrigerator: Don’t store this in the fridge. It softens too quickly and the layers collapse into a puddle.
- Freezer: Keep it covered in the springform pan or wrapped well for up to 1 week. After that, the whipped topping starts to pick up freezer flavor and the ice cream loses its clean texture.
- Reheating: No reheating needed. For the best slices, let the cake sit at room temperature for 8 to 12 minutes before cutting so the knife goes through the crust and ice cream without cracking the top.
Answers to the Questions Worth Asking
Ice Cream Sundae Cake
Ingredients
Equipment
Method
- Press the Oreo crust or layer cooled brownies into a 9-inch springform pan, packing it evenly across the bottom. Freeze for 15 minutes to set the base.
- Spread the softened vanilla ice cream over the base in an even layer. Drizzle the hot fudge sauce and caramel sauce over the ice cream and swirl gently to create ribbons.
- Freeze for 4 hours until completely firm. Keep it level so the layers stay even.
- Top with whipped topping and spread it smoothly over the top and sides. Work quickly so the ice cream base stays firm.
- Decorate with rainbow sprinkles, drizzled fudge and caramel, chopped peanuts if using, and maraschino cherries. Add decorations on top and along the sides for a sundae look.
- Freeze for 2 more hours before slicing. Let it sit at room temperature for 5 minutes for cleaner cuts.


