Ice cream cone cake lands somewhere between party centerpiece and childhood nostalgia, with a crunch that stays intact under every cold, creamy bite. The crushed sugar cone crust gives it a toasted, waffle-like snap instead of the usual cookie crust softness, and the layer of softened ice cream sets into a sliceable middle that still tastes like a giant celebration cake.
What makes this version work is the balance between the crust and the filling. The melted butter binds the cone crumbs just enough to hold in a springform pan, but not so much that they turn heavy or greasy. Softened ice cream spreads cleanly and freezes back into a smooth layer, while whipped topping gives you a stable, frosted finish that holds sprinkles and mini cones without collapsing the moment it hits the table.
Below, you’ll find the small timing details that keep the crust from crumbling and the top from melting into a mess, plus a few smart swaps if you want to change the flavor or make it ahead for a birthday.
The cone crust held together better than I expected, and the ice cream layer sliced cleanly after freezing overnight. My kids thought the mini cones on top were the best part.
Like this ice cream cone cake? Save it for birthdays when you want a crunchy cone crust, a frozen center, and a sprinkle-covered finish that looks party-ready.
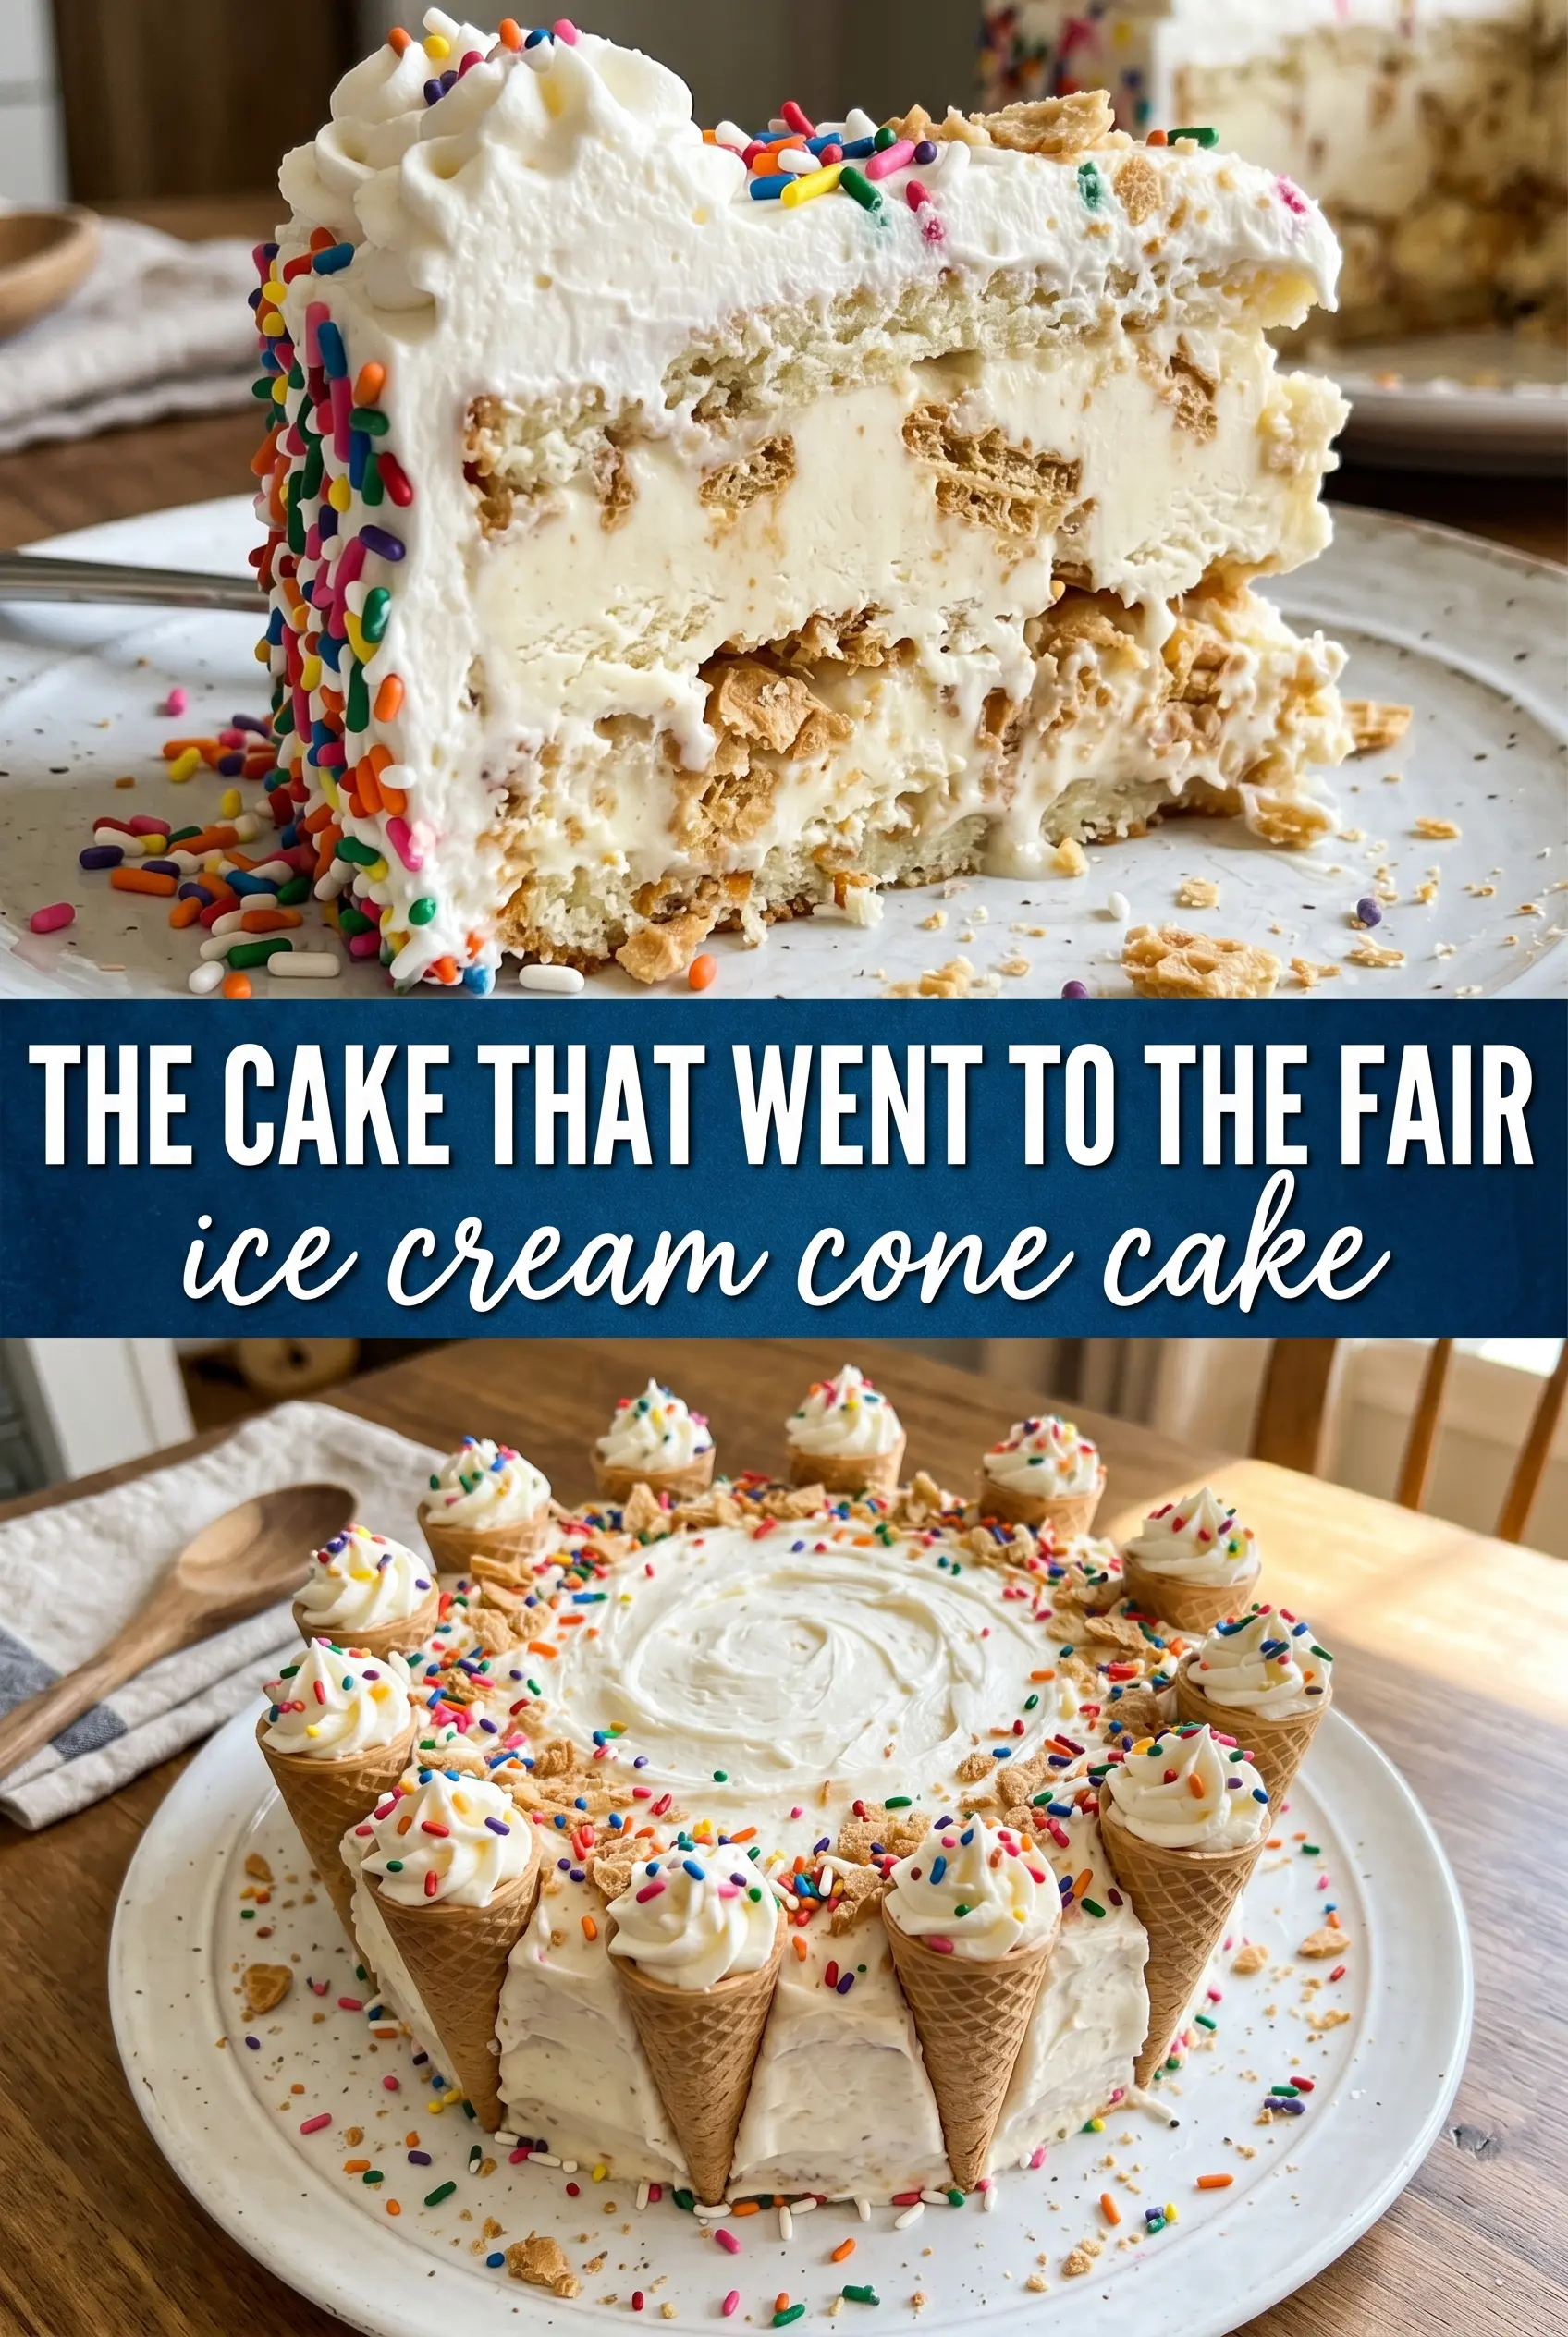
The Part Most Ice Cream Cakes Get Wrong: The Crust Needs to Freeze First
The crust in this cake isn’t just a base; it’s what keeps the whole dessert from turning sloppy when you slice into it. Crushed sugar cones have a lighter, more delicate crumb than cookie crumbs, which means they need the butter to act as a binder and the freezer to do the real structural work. Press it firmly into the springform pan, then chill it until it feels set under the back of a spoon.
If you skip that first freeze, the ice cream starts softening the second it hits the pan and the crust can slide around instead of staying tucked at the bottom. The springform pan matters here because it lets you unmold the cake without digging a knife through the sides and cracking the frozen layers.
- Sugar cones — These give the crust its flavor and that distinctive cone-toasted sweetness. Waffle cones work too, but they bring a slightly richer, more buttery flavor and a looser crumb.
- Unsalted butter — This is the glue. Melt it completely so it coats every crumb; if the mixture looks dry in spots, the crust will crumble when sliced.
- Vanilla or rainbow sherbet ice cream — You want a flavor that softens and re-freezes smoothly. Premium ice cream slices neatly, but sherbet gives you a brighter, more colorful result and keeps the cake lighter.
- Whipped topping — This is the frosting layer that holds the decoration in place. Homemade whipped cream can work for serving the same day, but it won’t hold as long in the freezer without softening.
- Mini ice cream cones — These are decoration, but they also give the cake its signature look. Press them in after the whipped topping goes on so they stay upright instead of breaking through the ice cream layer.
What Each Ingredient Is Actually Doing in This Ice Cream Cake

- Crust or base layer (cookies, brownies, or cake) — This provides structure and texture contrast. A sturdy base keeps the whole cake from crumbling when served.
- Ice cream (the main event) — Choose quality ice cream or frozen yogurt. Soft-serve or premium ice cream works better than hard-packed store brands.
- Cake layer (optional but recommended) — A thin cake layer adds substance and keeps the cake from being all frozen texture. Make it thin so it doesn’t overpower the ice cream.
- Sauce or syrup layer (fudge, caramel, or fruit) — This adds flavor depth and prevents the cake from tasting one-dimensional. Freeze between layers so sauces stay distinct.
- Toppings (chocolate chips, cookies, candy, or nuts) — These add texture and visual appeal. Mix-ins stay crispy longer if frozen separately first.
- Frosting or whipped cream (optional topping) — This adds richness to the outside. Keep it simple or it overwhelms the cake.
- Freezing time (the patience that pays off) — Each layer needs time to set so they stay distinct when sliced. Rushing this step means layers muddy together.
- Storage and serving technique (thaw 5 minutes before slicing) — A brief thaw makes slicing clean and easy. Serve slices immediately for best texture.
Building the Layers Without Letting the Cake Turn Soft
Making the Cone Crust
Crush the sugar cones into small crumbs, not dust. You want enough texture to give the crust some bite, but if the pieces are too large, the base won’t pack evenly and the cake will break apart at the first slice. Stir in the melted butter until every crumb looks lightly coated and the mixture holds together when squeezed. Press it firmly into the bottom of the springform pan, then freeze it long enough to feel solid before the filling goes in.
Spreading the Ice Cream Layer
Let the ice cream soften just until it’s spreadable, not soupy. If it’s too firm, it tears the crust as you drag it across the pan; if it’s too melted, it seeps into the crumb layer and blurs the shape. Spread it all the way to the edges and smooth the top with an offset spatula or the back of a spoon. Freeze it until it’s fully set, because this is the layer that needs to carry the weight of the topping.
Finishing With Whipped Topping and Decorations
Spread the whipped topping over the frozen ice cream in a generous, even layer. Work quickly here so the top doesn’t start to soften before the decorations go on. Add the rainbow sprinkles while the topping is still soft enough to catch them, then press the mini cones upright into a ring pattern. They should sit snugly in the topping, not sink into the cake itself.
Chocolate cone crust with mint ice cream
Swap the vanilla cones for chocolate cones or wafers and use mint chip ice cream for a sharper, cooler flavor. The crust will taste deeper and less sweet, which balances a rich frozen filling nicely. Keep the same freezing times so the darker crumbs still set into a firm base.
Dairy-free version with frozen dessert
Use dairy-free ice cream and a non-dairy whipped topping that holds its shape in the freezer. The texture comes out a little firmer, but the cake still slices well if you let it sit at room temperature for a few minutes before cutting. Check the cones too, since some brands use dairy in the flavoring.
Rainbow sherbet birthday cake
Rainbow sherbet makes the whole cake lighter and more colorful, with a firmer freeze than many standard ice creams. It’s a smart choice for a kid party because it slices cleanly and still gives you those bright, fun layers under the whipped topping. The flavor is tangier, so the sweet cone crust helps round it out.
Storage and Reheating
- Refrigerator: Don’t store this in the fridge; it will soften and lose its shape within an hour or two.
- Freezer: Wrap the fully assembled cake well and freeze for up to 1 week. The cones on top can soften a little over time, but the cake itself holds nicely.
- Reheating: No reheating needed. Let the cake sit at room temperature for 10 to 15 minutes before slicing so the crust doesn’t shatter and the knife can move through the frozen layers cleanly.
Answers to the Questions Worth Asking
Ice Cream Cone Cake
Ingredients
Equipment
Method
- Crush the sugar cones and mix with melted unsalted butter until evenly coated, then press firmly into a 9-inch springform pan to form an even crust. Freeze for 15 minutes so the crust sets.
- Scoop the softened vanilla or rainbow sherbet ice cream over the frozen crust and spread in an even layer, smoothing the top. Freeze for 4 hours until firm.
- Cover the entire top and the sides with whipped topping, smoothing as you go so the surface is evenly covered. Sprinkle rainbow sprinkles generously over the top.
- Press mini ice cream cones upright into the whipped topping in a ring pattern around the edge, leaving them standing securely. Freeze for 2 more hours, then release the springform and serve.


