Gooey chocolate chip cookies hit that perfect middle ground between crisp edges and a soft, underbaked-looking center that sets just enough as they cool. The chopped chocolate melts into long pockets instead of staying in neat little chips, and the flaky salt on top makes the whole cookie taste deeper, not sweeter. They bake up with wrinkled edges, a shiny middle, and that pull-apart softness people usually chase but don’t always get.
The texture comes from a few choices that matter. Melted butter gives you a denser, chewier cookie than creamed butter, while brown sugar keeps the center moist and adds a little caramel note. The extra egg yolk brings richness without making the dough cakey, and the cornstarch softens the crumb so the cookies stay tender even after they cool. Chilling the dough is what keeps them from spreading into flat puddles.
Below, I’m breaking down the one step that keeps these cookies thick instead of greasy, plus the ingredient swap that matters most if you only have chips instead of a chopped chocolate bar.
The centers stayed soft and gooey even after cooling, and the chopped chocolate gave those stretchy melted pockets my kids kept picking out first.
Save these gooey chocolate chip cookies for when you want thick edges, molten centers, and that chopped-chocolate pull on the first warm bite.
The Chilling Step That Keeps These Cookies Thick Instead of Spreading Thin
Melted butter gives these cookies their chewy middle, but it also makes the dough softer and more prone to spreading. That’s why the hour in the fridge isn’t optional here. It firms up the butter, hydrates the flour, and gives the cookies enough structure to hold onto that thick, gooey center instead of baking into flat rounds.
The other reason this dough works is the balance of brown sugar and granulated sugar. Brown sugar brings moisture and chew; granulated sugar helps the edges set with a little more snap. If the dough seems a little loose right after mixing, that’s normal. After chilling, it should scoop cleanly and hold its shape on the tray.
What the Chocolate and Cornstarch Are Doing Here
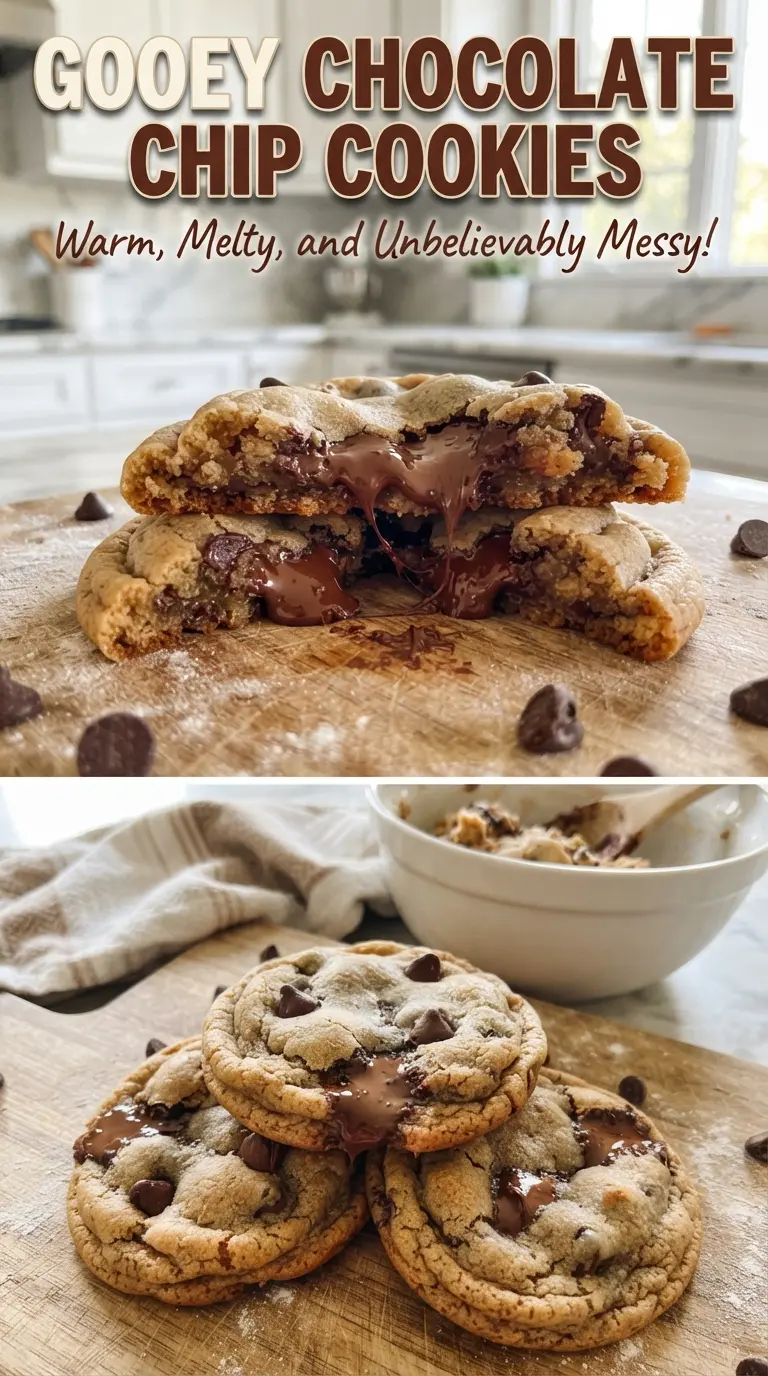
- Chopped semi-sweet chocolate bar — This is what gives you those dramatic melted pockets. Chips hold their shape longer because they’re built to resist melting; chopped bar pieces melt into uneven pools and ribbons. If you only have chips, the cookies still work, but the centers won’t have the same stretch.
- Cornstarch — A small amount keeps the crumb tender and soft without making the cookie cakey. It’s one of those quiet ingredients you notice most on day two, when the cookies are still plush instead of dry.
- Brown sugar — Use packed brown sugar here. It brings moisture, depth, and chew, and there isn’t a substitute that gives quite the same result. If you’re out, you can use all granulated sugar, but the cookies will bake up drier and less rich.
- Melted butter — Melted, not softened, is the move for this style of cookie. It gives a denser texture and a shinier dough, but it also means the dough needs chilling. If the butter is hot instead of just melted, let it cool for a few minutes before mixing or the egg can scramble slightly.
Building the Dough So the Centers Stay Soft
Mix the dry ingredients first
Whisk the flour, cornstarch, baking soda, and salt together until everything looks evenly combined. This keeps the leavener from clumping and helps the cookies bake evenly instead of tasting salty in one bite and bland in the next. If you skip this step, the dough can get streaky, and the texture turns patchy after baking.
Whisk the butter and sugars until glossy
Pour the melted butter into the sugars and whisk until the mixture looks thick and glossy, almost like wet sand turning into caramel-colored paste. Then whisk in the egg, yolk, and vanilla until smooth and shiny. If the butter is too hot, the mixture will look greasy and the egg can curdle; let it cool until warm, not piping hot.
Fold in the flour and chocolate just until combined
Stir in the dry ingredients until no dry streaks remain, then fold in the chopped chocolate. Stop as soon as the flour disappears. Overmixing here builds too much gluten and turns a soft cookie into a tougher one, which is the fastest way to lose that gooey center.
Bake until the edges set and the middle still looks soft
Scoop the dough into 3-tablespoon portions on parchment-lined sheets and bake at 350°F for 9 to 10 minutes. The edges should look lightly golden, but the centers should still look underdone and puffy. That’s the cue to pull them out. They finish setting on the tray, and waiting for the center to look fully baked will give you dry cookies.
Finish with flaky salt while they’re warm
Scatter flaky sea salt over the cookies right after they come out of the oven. The salt sticks best while the chocolate is still molten and the tops are soft. Let them cool for about 5 minutes before moving them, because they’ll be fragile at first and need that short rest to set without collapsing.
Three Ways to Adjust These Cookies Without Losing the Gooey Center
Use chocolate chips instead of a chopped bar
You can swap in semi-sweet chips if that’s what you have, but the cookies will lose some of the molten, streaky chocolate effect. Chips hold their shape longer, so the centers won’t look as dramatic. The flavor still works; the texture just shifts from pools of melted chocolate to more defined bites.
Make them dairy-free
Use a good vegan butter stick in place of the unsalted butter and choose dairy-free chocolate. The texture will still be soft and chewy, though the flavor will be a little less rich and buttery. Skip tub-style spreads, which can add too much water and make the cookies thin.
Make them a little sweeter and more bakery-style
Swap part of the chopped semi-sweet chocolate for milk chocolate if you want a sweeter cookie with a softer cocoa finish. The cookies will taste rounder and less intense, but they’ll also brown a touch faster because milk chocolate melts and caramelizes differently. Keep an eye on the edges in the last minute.
Storage and Reheating
- Refrigerator: Store baked cookies in an airtight container for up to 5 days. They’ll lose a little of the molten center but stay soft if sealed well.
- Freezer: Freeze scooped dough balls on a tray, then bag them for up to 3 months. You can also freeze baked cookies, but the dough freezes better and bakes up with a fresher texture.
- Reheating: Warm baked cookies in a 300°F oven for 3 to 5 minutes or microwave one cookie for about 8 to 10 seconds. Too much heat dries them out fast, so stop as soon as the chocolate loosens again.
Questions I Get Asked About This Recipe

Gooey Chocolate Chip Cookies
Ingredients
Equipment
Method
- Whisk all-purpose flour, cornstarch, baking soda, and salt in a mixing bowl until evenly combined. The mixture should look uniform with no visible clumps.
- Whisk melted unsalted butter and both sugars until glossy. Whisk in the large egg, egg yolk, and vanilla extract until smooth and thick.
- Stir the dry ingredients into the wet ingredients just until the dough comes together. Fold in the chopped semi-sweet chocolate so the pieces are evenly distributed.
- Cover the dough and chill for 1 hour. The dough should firm up and look slightly thicker for easier scooping.
- Preheat the oven to 350F and line sheet pans with parchment paper. The oven should be fully preheated so the centers stay soft.
- Scoop 3-tablespoon balls onto the parchment-lined sheets, spacing them apart. Keep dough balls roughly the same size for even spread.
- Bake for 9-10 minutes until edges are just golden and centers look very soft. The tops may look slightly underdone, but they will set as they cool.
- Sprinkle flaky sea salt over the warm cookies right after baking. You should see the salt adhere as the cookies are still glossy.
- Cool on the sheet pan for 5 minutes before serving warm. The centers will remain gooey while the edges set.