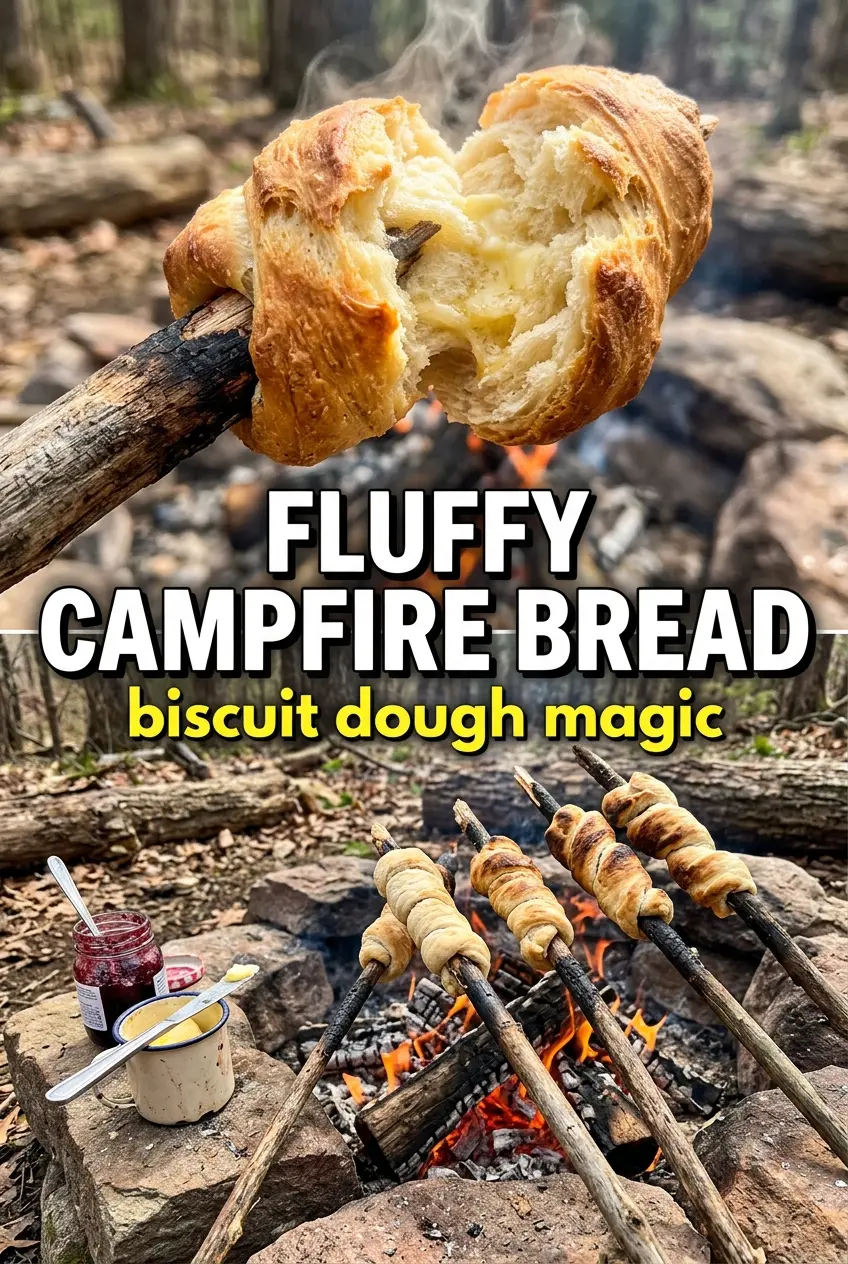
Fluffy campfire bread turns simple pantry ingredients into a warm, golden bread with a crust that picks up just enough char from the fire and an inside that stays soft and tender. Wrapped around a stick and roasted over coals, it has that old-school camping feel, but it also works because the dough is sturdy enough to hold its shape while still baking up light.
The trick is keeping the dough on the dry side before it hits the fire. Too much milk and the bread slips and sags on the stick; too little and it bakes up dense. A little sugar helps the crust brown faster over open heat, and melted butter adds richness without making the dough fussy to handle.
Below, I’ll show you how to get the rope of dough tight enough around the stick so it doesn’t unravel, plus the small fire-management detail that keeps the outside from scorching before the center cooks through.
The dough wrapped cleanly around the sticks and stayed put over the coals, and the center stayed fluffy instead of doughy. We ate the first batch straight off the fire with honey butter.
Make a note to pin this fluffy campfire bread for your next night by the fire, especially when you want a soft center and a crackly golden crust.
The Part That Keeps Campfire Bread from Falling Off the Stick
The bread has to be kneaded just enough to come together, not worked like sandwich dough. If it gets too elastic, it shrinks back when you try to roll it into ropes, and if it’s too wet, it will slump and tear once the heat softens the butter. A dough that feels smooth but still a little soft is exactly what you want.
Cooking over coals, not active flames, matters more than people expect. Flames scorch the outside before the center has time to bake. Coals give you steady heat, and constant turning keeps one side from blistering while the other side stays pale and underdone.
What Each Ingredient Is Doing in the Dough
- All-purpose flour — This gives the bread enough structure to wrap neatly around the stick without turning tough. Bread flour will make it chewier; all-purpose keeps the crumb softer and more forgiving.
- Baking powder — This is what gives the bread lift without needing yeast or a rise time. If yours is old, the bread will taste flat and bake up dense.
- Sugar — A small amount helps the crust brown over fire and gives the finished bread a little warmth. You can cut it back slightly, but don’t leave it out if you want that golden exterior.
- Butter — Melted butter brings richness and helps the dough feel supple when you knead it in the bag. Neutral oil works in a pinch, but the finished bread won’t taste as full.
- Milk — Milk softens the crumb and gives the dough a smoother feel than water would. If you need a dairy-free swap, unsweetened oat milk works best because it has enough body to keep the dough from feeling dry.
- Roasting sticks — Use clean, food-safe sticks or skewers made for campfire cooking. If they’re too thin, the dough spins and slips; if they’re sturdy, you can turn the bread with control.
How to Mix, Wrap, and Roast It Without Losing the Dough
Mixing in the Bag
Start by combining the dry ingredients in a large zip-top bag, then add the melted butter and milk. Knead the bag from the outside until the dough comes together in a shaggy ball and no dry flour remains. If the dough feels sticky enough to cling hard to the bag, add a spoonful of flour; if it looks crumbly and won’t hold together, add a teaspoon of milk at a time.
Shaping the Ropes
Divide the dough into eight equal portions and roll each one into a rope long enough to spiral around the stick. Keep the rope even in thickness so it cooks at the same pace from end to end. Press the start and finish of the rope gently into the rest of the dough so it doesn’t unwind as soon as the heat softens it.
Roasting Over the Coals
Hold the wrapped dough over hot coals and turn it constantly. The outside should become evenly golden with a few darker spots, but not blackened, and the bread should feel lighter and sound a little hollow when tapped. If the surface is browning too quickly, lift it higher from the heat; if it’s pale after several minutes, move it closer to the coals, not the flames.
Finishing and Serving
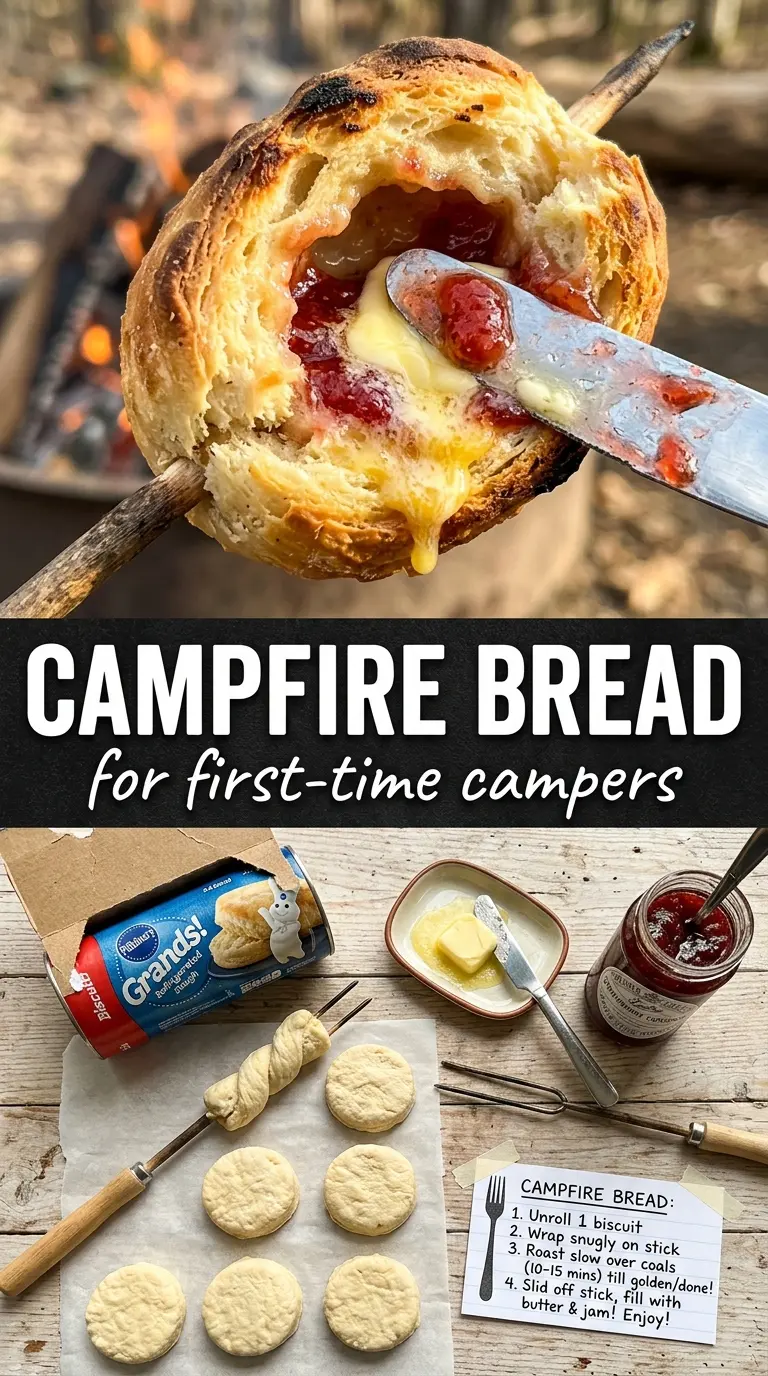
Slide the bread off the stick while it’s still warm so it releases cleanly. Serve it right away with butter, jam, or honey, because that first five-minute window gives you the best contrast between the crust and the soft center. If you wait too long, the crust softens as steam settles back into the bread.
How to Adapt This for a Different Camp Setup
Dairy-Free Campfire Bread
Swap the butter for melted coconut oil or a neutral oil and use unsweetened oat milk. The bread will still brown well, though it won’t have quite the same rich, buttery finish.
Honey Campfire Bread
Replace the sugar with honey and reduce the milk by a tablespoon if needed to keep the dough from getting too soft. Honey adds a deeper sweetness and helps the crust color faster, but the dough will be slightly stickier to handle.
Gluten-Free Version
Use a 1:1 gluten-free baking blend that includes xanthan gum. The texture will be a little more delicate and less stretchy, so wrap it more gently and keep the ropes a touch thicker to help them stay on the stick.
Make It Smaller for Faster Cooking
Cut the dough into ten or twelve pieces instead of eight and make shorter ropes. Smaller pieces cook faster and are easier to manage over a lively fire, but they brown more quickly, so keep turning them and start checking early.
Storage and Reheating
- Refrigerator: Store leftovers in an airtight container for up to 2 days. The crust will soften, but the bread will still be usable.
- Freezer: Freeze the baked bread for up to 1 month, wrapped well and sealed. Thaw before reheating so the center doesn’t stay cold while the outside overcooks.
- Reheating: Warm in a 325°F oven for 6 to 8 minutes. Don’t microwave it if you want to keep the crust from turning rubbery.
Questions I Get Asked About This Recipe
Fluffy Campfire Bread
Ingredients
Method
- In a large zip-top bag, mix all-purpose flour, baking powder, salt, and sugar until evenly combined. Use a quick shake so no streaks of sugar or baking powder remain.
- Add the melted butter and milk to the bag, seal it, and knead until the dough forms. Knead until the dough looks cohesive and no dry flour pockets are visible.
- Divide the dough into 8 portions. Lightly roll each portion between your hands to keep the dough from sticking.
- Roll each portion into a long rope and wrap it around the end of a roasting stick. Leave a little overlap so the dough stays attached as it cooks.
- Hold the stick over campfire coals and rotate constantly for 10-12 minutes, until golden brown and cooked through. Watch for deep golden color and a set center with no doughy spots.
- Slide the bread off the stick and serve warm. Pair it with butter, jam, or honey right away for the best crust and soft interior.


