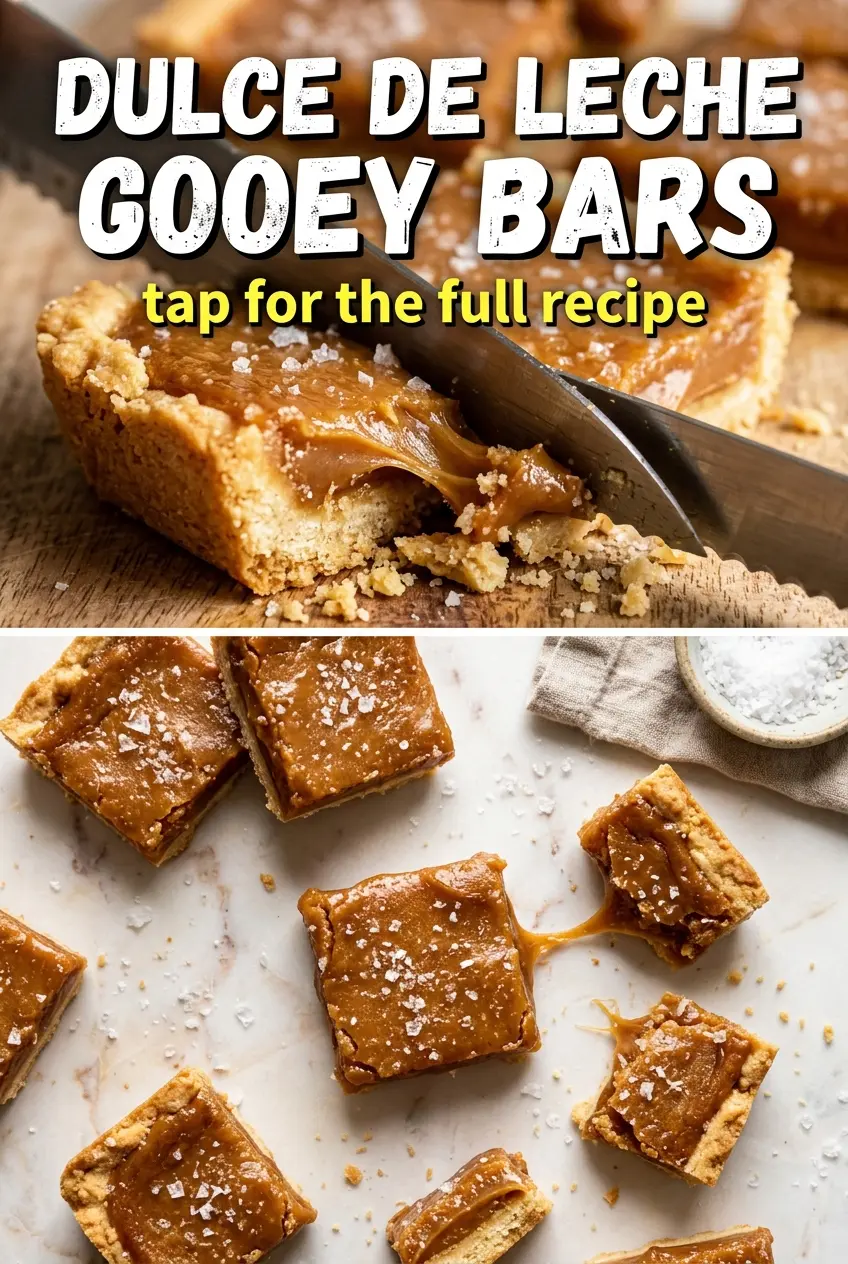
Golden shortbread, glossy dulce de leche, and a thin cap of dark chocolate make these bars the kind that disappear faster than anyone expects. The base bakes into a sturdy, buttery layer that can hold the caramel without turning soggy, and the chill time gives the filling just enough body to slice into neat squares while still keeping that soft, gooey center.
What makes these work is the contrast. The crust is pressed firmly and baked first so it sets up before the dulce de leche goes on, and that warm crust helps the caramel spread without tearing. A little butter melted into the chocolate keeps the top from feeling hard or brittle once it cools, so each bite lands between fudgy, creamy, and crisp.
Below, I’ve included the small details that matter most: how to keep the crust from crumbling, why the bars need that rest in the fridge, and the one garnish that makes the whole pan taste finished instead of just sweet.
The shortbread stayed crisp under the caramel, and the chocolate layer set up with just enough give. I cut them after chilling for 30 minutes and they came out in clean squares with that perfect gooey center.
Love the contrast of buttery shortbread, dulce de leche, and dark chocolate? Save these gooey bars for the next time you need a rich dessert with a clean slice.
The Shortbread Layer Has to Hold Its Shape Before the Caramel Goes On
The biggest mistake with bars like these is rushing the crust. If the base goes in pale and soft, the dulce de leche seeps into it and you lose that clean, buttery bottom that makes each square slice well. Press the dough firmly into the pan, especially into the corners, then bake until the top is just turning golden and the edges look set.
That first bake does two jobs at once: it cooks off the raw flour taste and creates a barrier between the caramel and the pan. A loose, sandy crust will fall apart when you cut it, so take the time to compress it evenly with your fingers or the bottom of a measuring cup. The goal is a tight layer with a faint sheen of butter on top, not a thick, puffy cookie base.
What Each Layer Is Doing in These Gooey Bars
- All-purpose flour — This gives the crust enough structure to hold the dulce de leche. A 1:1 gluten-free flour blend can work here if it includes xanthan gum, but the texture will be a little more delicate.
- Butter — Softened butter makes the crust tender and rich, and the extra butter in the chocolate layer keeps the top glossy instead of firm and waxy. Use real butter here; it matters.
- Dulce de leche — This is the whole point of the bars, so use a thick, spoonable jar or can rather than a thin caramel sauce. If it’s very stiff from the can, warm it just enough to spread without tearing the crust.
- Dark chocolate chips — The slight bitterness keeps the bars from tasting flat. Semi-sweet chocolate works too, but dark chocolate gives the cleanest contrast against the caramel.
- Fleur de sel — The salt on top isn’t decoration. It sharpens the caramel and makes the chocolate taste deeper, especially once the bars sit at room temperature.
Layering the Bars Without Losing the Gooey Center
Building the Crust
Mix the flour, softened butter, sugar, and salt until the mixture looks crumbly and damp, like coarse wet sand. Press it firmly into the pan so there are no loose pockets, then bake just until the edges turn light gold. If the crust looks dry and pale, give it another minute or two; if it browns deeply, it’ll taste too toasted under the caramel.
Spreading the Dulce de Leche
Spread the dulce de leche over the warm crust in an even layer, working gently so you don’t tear into the base. Warm crust helps here because the caramel loosens and levels out more easily. If your dulce de leche is stiff, microwave it in short bursts until it spreads smoothly, but don’t let it get hot enough to bubble.
Finishing with Chocolate
Melt the chocolate chips with the butter until the mixture is smooth and shiny, then drizzle or spread it over the caramel layer. The butter softens the set of the chocolate, so the top won’t crack when you bite into a chilled square. Bake just until the chocolate loses its wet gloss and looks set at the edges.
Chilling for Clean Squares
Let the bars cool completely, then refrigerate them for at least 30 minutes before cutting. That chill time firms the caramel enough that the knife slides through without dragging the filling out of the pan. If you cut them too soon, the centers ooze everywhere and the layers blur together instead of staying distinct.
Three Ways to Make These Bars Fit What You Need
Gluten-Free Version
Swap the all-purpose flour for a 1:1 gluten-free baking blend that includes xanthan gum. The crust will still hold together, but it may be a touch more delicate when warm, so chill the bars fully before slicing.
Extra Dark, Less Sweet
Use bittersweet chocolate instead of dark chocolate chips if you want a sharper finish. It cuts through the sweetness of the dulce de leche and makes the bars taste more layered, especially with the fleur de sel on top.
Dairy-Free Adaptation
Use a plant-based butter that bakes well and a dairy-free caramel-style filling made for baking, since traditional dulce de leche depends on dairy. The texture will still be rich, but the flavor is a little less deep and toasted than the original.
Storage and Reheating
- Refrigerator: Store in an airtight container for up to 5 days. The chocolate stays neat and the caramel firms up a bit, which makes them even easier to cut.
- Freezer: These freeze well. Wrap the cut bars individually, then store them in a freezer bag for up to 2 months.
- Reheating: There’s no real reheating needed here. Let frozen bars thaw in the fridge, then sit at room temperature for 10 to 15 minutes so the caramel softens without becoming sticky.
Answers to the Questions Worth Asking
Dulce de Leche Gooey Bars
Ingredients
Equipment
Method
- Preheat the oven to 350°F and place an 8x8 baking dish nearby. (Visual cue: warm oven light on the rack.)
- Mix the all-purpose flour, softened butter, granulated sugar, and salt until the mixture looks crumbly. (Visual cue: small, dry clumps form.)
- Press the crumbly mixture firmly into the bottom of the 8x8 baking dish to make an even layer. (Visual cue: flat, compact surface.)
- Bake at 350°F for 12-15 minutes until the crust turns golden. (Visual cue: edges look set and lightly browned.)
- Spread the dulce de leche over the warm crust in an even layer. (Visual cue: caramel covers the surface with a glossy sheen.)
- Melt the dark chocolate chips with the 2 tablespoons butter until smooth, then drizzle or spread over the dulce de leche. (Visual cue: chocolate becomes glossy and pourable.)
- Bake at 350°F for another 8-10 minutes until the chocolate is set. (Visual cue: chocolate top looks firm with no wet shine.)
- Cool the bars completely at room temperature before refrigerating. (Visual cue: caramel and chocolate look fully settled.)
- Refrigerate for at least 30 minutes to firm the layers. (Visual cue: surface looks matte and slice stays together.)
- Cut into 16 squares and sprinkle fleur de sel on top. (Visual cue: tiny salt flakes sit on each piece.)
- Serve at room temperature for gooey caramel flow or chilled for tighter slices. (Visual cue: caramel pulls more at room temperature.)