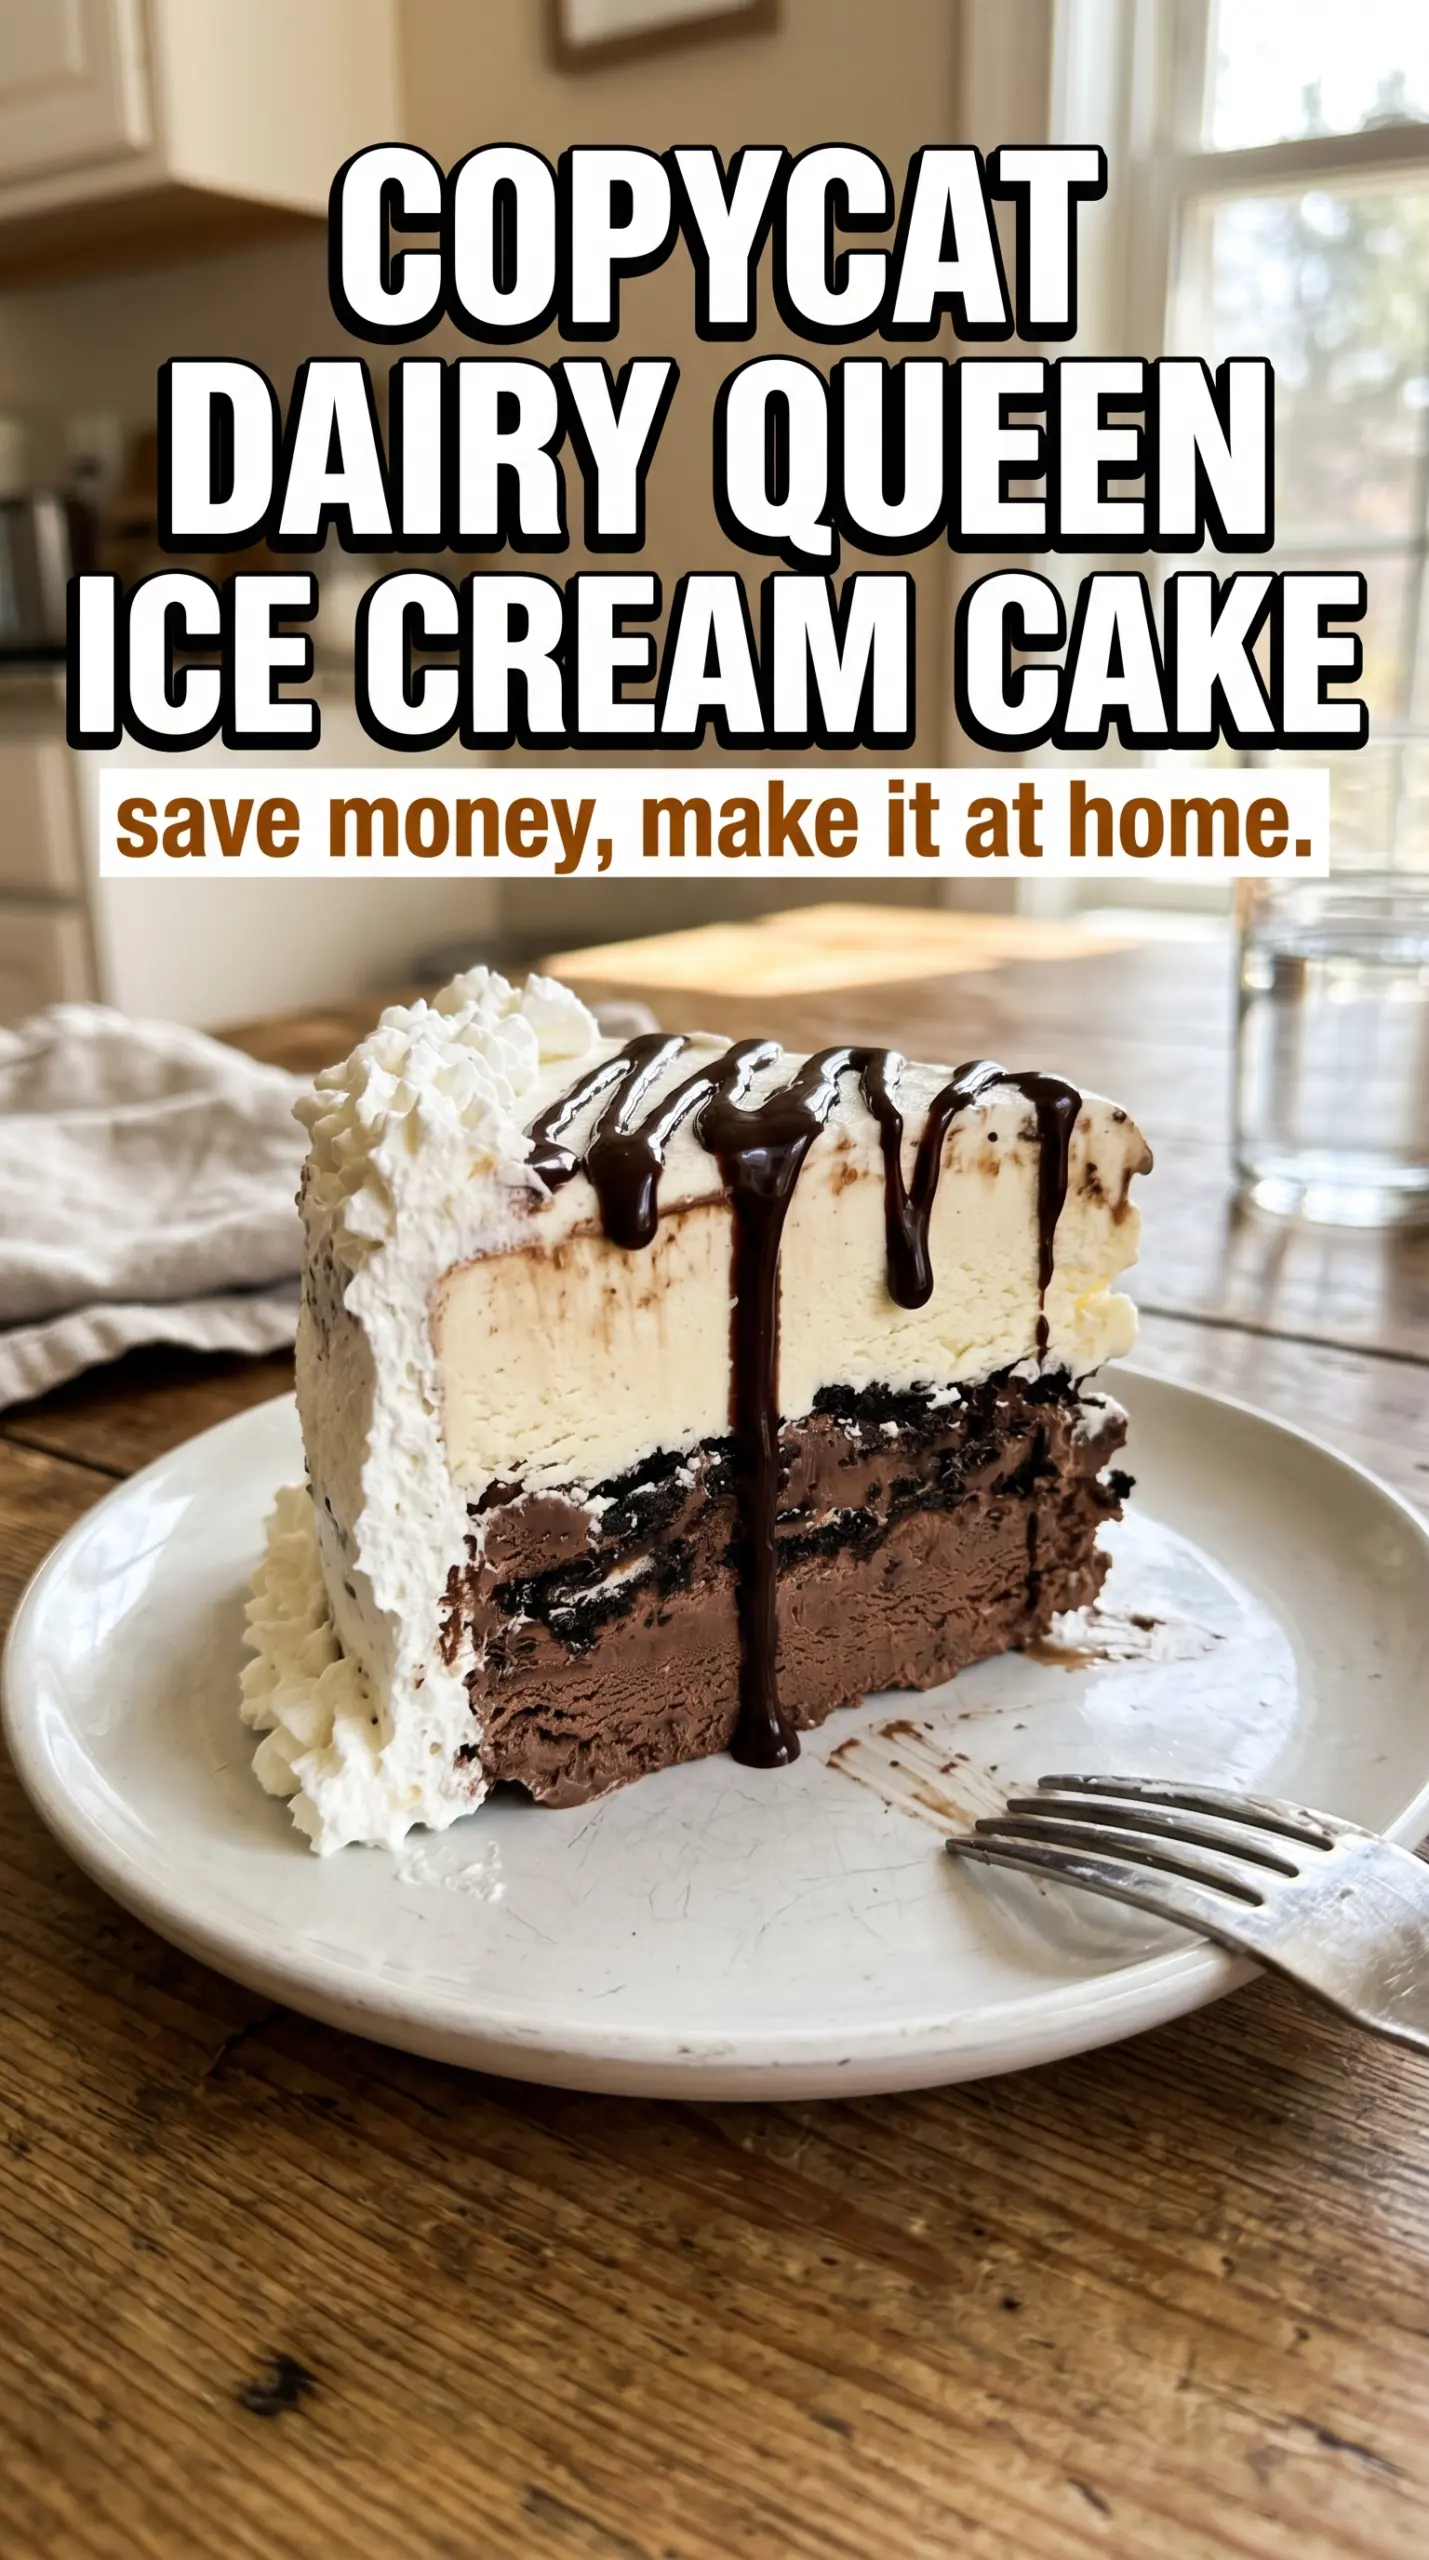
That first slice of a Dairy Queen-style ice cream cake is all about the layers: a clean cut through chocolate ice cream, a crackly Oreo-fudge middle, and a soft vanilla cap under whipped topping. The homemade version hits the same nostalgic notes, but with a fresher, thicker crunch layer that holds its shape when you serve it instead of melting into a muddy stripe.
The trick is freezing in stages. If you rush the layers, the cookies sink, the fudge loosens the ice cream underneath, and the cake loses those sharp lines that make it look like the real thing. Softened ice cream spreads without tearing the layer below, but it still needs enough body to firm up again before the next addition goes on.
Below, I’ll walk you through the part that matters most: building the crunch layer so it stays crisp enough to slice cleanly, plus a few swaps and storage notes that make this cake work for birthdays without any last-minute panic.
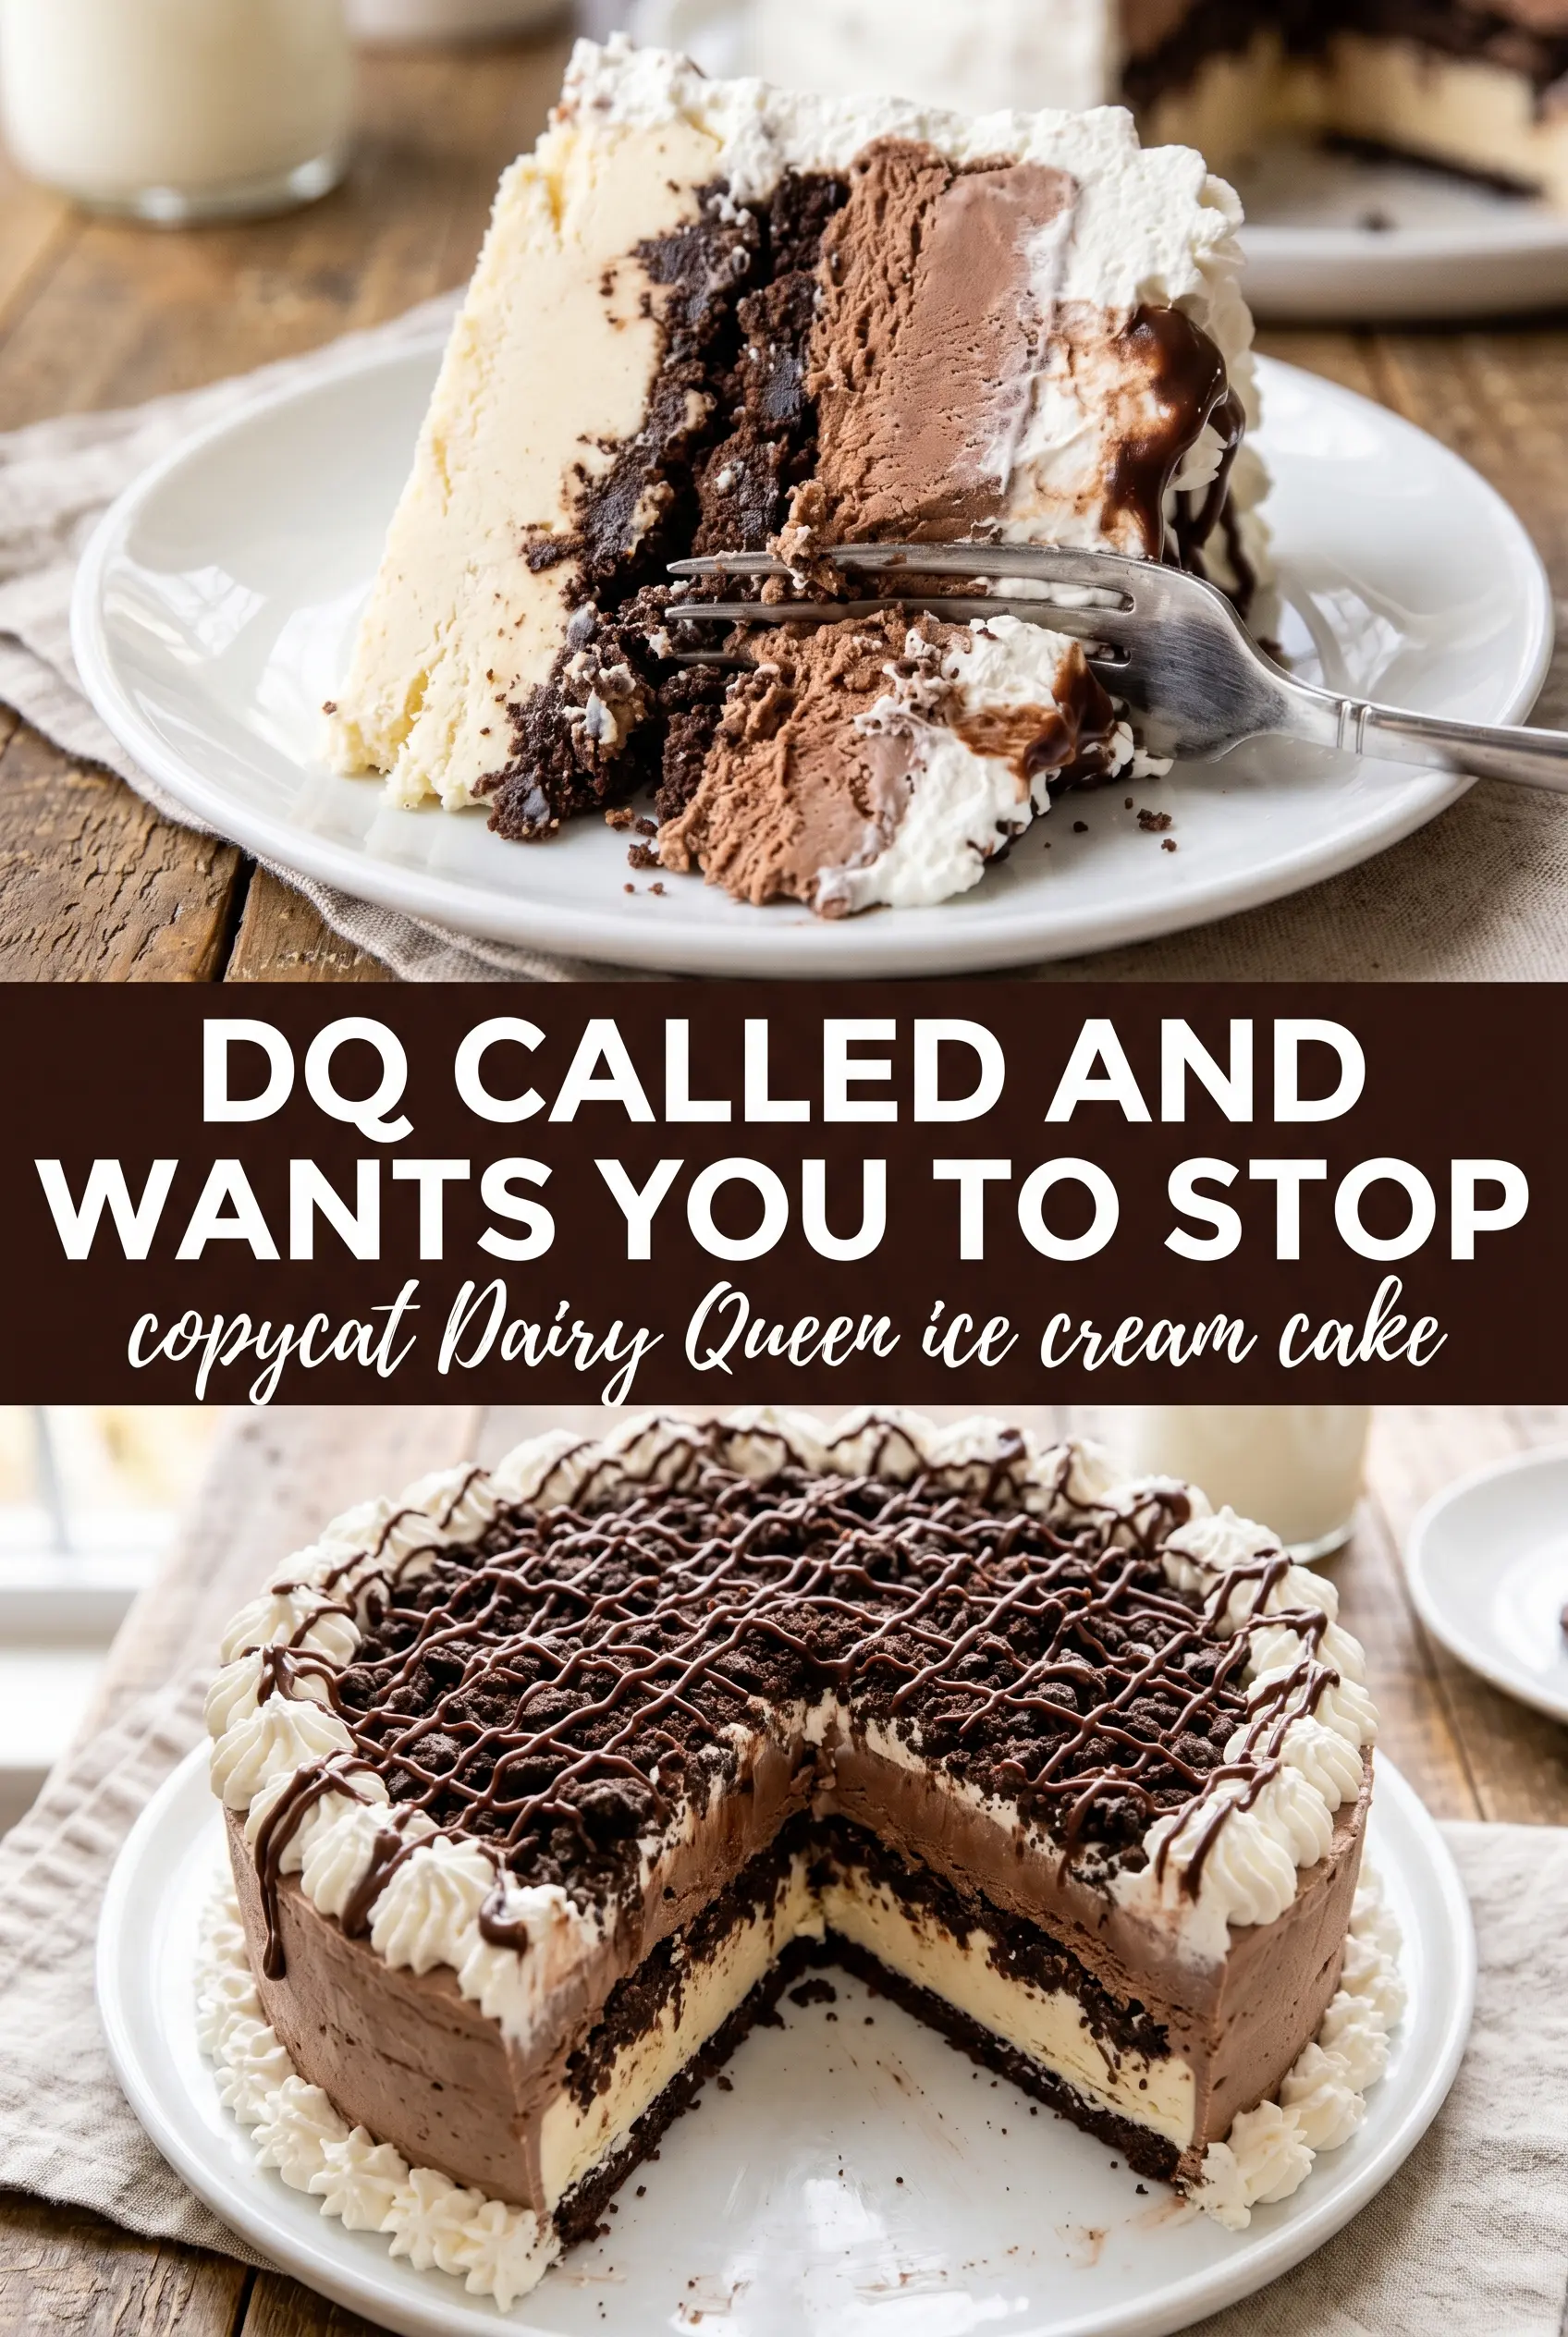
The fudge-and-Oreo layer set up just like the store-bought cake, and the slices came out with those clean, sharp lines instead of falling apart. My kids asked if I bought it from Dairy Queen.
Save this homemade DQ ice cream cake for birthdays, because that chocolate-vanilla layering and Oreo fudge crunch are worth repeating.
The Freeze-Set Timing That Keeps the Layers Clean
The biggest mistake with an ice cream cake is treating it like a single mixture instead of three separate jobs. Each layer needs enough time to firm up before the next one goes on, or the whole cake turns slushy at the edges and blurs together when you slice it. The chocolate base should be firm enough that the crunch layer sits on top instead of disappearing into it.
The other thing that matters is the temperature of the ice cream itself. Softened means spreadable, not melted. If it’s soupy, it will seep into the cookie layer and weaken the structure. You want the spoon to glide through with some resistance, like thick frosting.
- Chocolate ice cream — This is the base that gives the cake its classic DQ feel. Any good supermarket chocolate ice cream works, but choose one with enough body to re-freeze firmly. Let it soften at room temperature just until spreadable.
- Vanilla ice cream — The vanilla layer balances the chocolate and keeps the cake from tasting heavy. French vanilla is richer, but standard vanilla makes the most recognizable copycat flavor.
- Oreos — Regular Oreos are the safest choice because the filling helps the crumbs cling to the fudge. Double Stuf makes the layer a little softer. Crush them finely, but leave a few small bits for texture.
- Hot fudge sauce — This is what turns plain cookie crumbs into that signature crunch stripe. Use a thick hot fudge, not a thin chocolate syrup. If it’s too loose, the layer won’t set with that fudgy snap.
- Whipped topping — Cool Whip-style topping is the easiest way to get the familiar bakery-case finish. Fresh whipped cream tastes great, but it softens faster and doesn’t hold decorative swirls as well on a frozen cake.
What Each Ingredient Is Actually Doing in This Ice Cream Cake
- Crust or base layer (cookies, brownies, or cake) — This provides structure and texture contrast. A sturdy base keeps the whole cake from crumbling when served.
- Ice cream (the main event) — Choose quality ice cream or frozen yogurt. Soft-serve or premium ice cream works better than hard-packed store brands.
- Cake layer (optional but recommended) — A thin cake layer adds substance and keeps the cake from being all frozen texture. Make it thin so it doesn’t overpower the ice cream.
- Sauce or syrup layer (fudge, caramel, or fruit) — This adds flavor depth and prevents the cake from tasting one-dimensional. Freeze between layers so sauces stay distinct.
- Toppings (chocolate chips, cookies, candy, or nuts) — These add texture and visual appeal. Mix-ins stay crispy longer if frozen separately first.
- Frosting or whipped cream (optional topping) — This adds richness to the outside. Keep it simple or it overwhelms the cake.
- Freezing time (the patience that pays off) — Each layer needs time to set so they stay distinct when sliced. Rushing this step means layers muddy together.
- Storage and serving technique (thaw 5 minutes before slicing) — A brief thaw makes slicing clean and easy. Serve slices immediately for best texture.
Building the Crunch Layer So It Stays Crisp
Firm the Base Before the Fudge Goes On
Spread the softened chocolate ice cream into your pan and freeze it until the surface feels solid when you touch it. That first hour matters because the crunch layer needs a cold, stable foundation. If the base is still soft, the fudge mixture will sink and the cake will lose its definition. A smooth, packed surface is what gives you those tidy slices later.
Mix the Oreos and Fudge Into a Thick Paste
Stir the crushed Oreos into the hot fudge until every crumb is coated and the mixture looks like damp gravel. Don’t pour the fudge over the cookies after the fact; mix them first so the layer holds together instead of separating. If the fudge is too hot, let it cool for a few minutes before combining it or it can soften the chocolate layer underneath.
Freeze Again Before Adding Vanilla
Once the crunch layer is spread evenly, freeze the cake until the top feels set and dry to the touch. This short freeze stops the vanilla ice cream from dragging the Oreo layer around. Spread the vanilla in an even layer, working quickly from the center outward, and smooth it before it starts to melt against the pan.
Finish, Cover, and Freeze Long Enough to Slice
Whipped topping goes on last, after the vanilla layer has had time to firm up. Add the chocolate drizzle and sprinkles before the final freeze so everything locks in place. The cake needs those last two hours, minimum, to cut cleanly. If you rush it, the top smears and the slice bends at the middle instead of standing up on the plate.
How to Adapt This Homemade DQ Cake for Different Needs
Dairy-Free Version
Use dairy-free chocolate and vanilla frozen desserts, then swap in a non-dairy whipped topping. The structure still works, but some coconut-based versions soften faster, so give the cake a little extra freeze time before slicing.
Gluten-Free Crunch Layer
Use certified gluten-free chocolate sandwich cookies in place of Oreos. You’ll get the same dark, crunchy middle layer without changing the freezing method, and the texture stays close to the original.
More Chocolate, Less Sweet
Swap the vanilla topping drizzle for a thin layer of ganache if you want a deeper chocolate finish. That makes the cake richer and less candy-sweet, which is helpful if you’re serving it after a big meal.
Storage and Reheating
- Refrigerator: Not recommended. Ice cream cake softens fast in the fridge and the layers lose their shape.
- Freezer: Keeps well for up to 1 week, tightly covered. Press parchment or plastic wrap against the cut surface to keep freezer burn off the ice cream.
- Reheating: No reheating needed. For clean slices, let the cake sit at room temperature for 8 to 12 minutes before cutting; if you wait too long, the chocolate shell and whipped topping start to smear.
Answers to the Questions Worth Asking
Copycat Dairy Queen Ice Cream Cake
Ingredients
Equipment
Method
- Spread the softened chocolate ice cream into the bottom of a 9x13 pan or a 10-inch springform, smoothing into an even layer. Place it in the freezer for 1 hour until firm, looking for no soft spots when pressed lightly.
- Mix the crushed Oreo cookies with the hot fudge sauce until the crumbs are evenly coated and resemble a thick crunch filling. Spread the Oreo crunch layer evenly over the frozen chocolate ice cream.
- Freeze the layered cake for 30 minutes. Chill until the Oreo crunch layer feels set to the touch, not tacky.
- Spread the softened vanilla ice cream over the Oreo crunch layer and smooth completely to seal the edges. Freeze for at least 4 hours until the top is solid and sliceable.
- Top with whipped topping and smooth or lightly mound it for a classic finish. Drizzle the chocolate shell (or ganache) over the top and add colorful sprinkles.
- Freeze at least 2 more hours before serving. Keep it fully firm so slices hold together and the fudge-soaked Oreo layer stays clearly defined.


