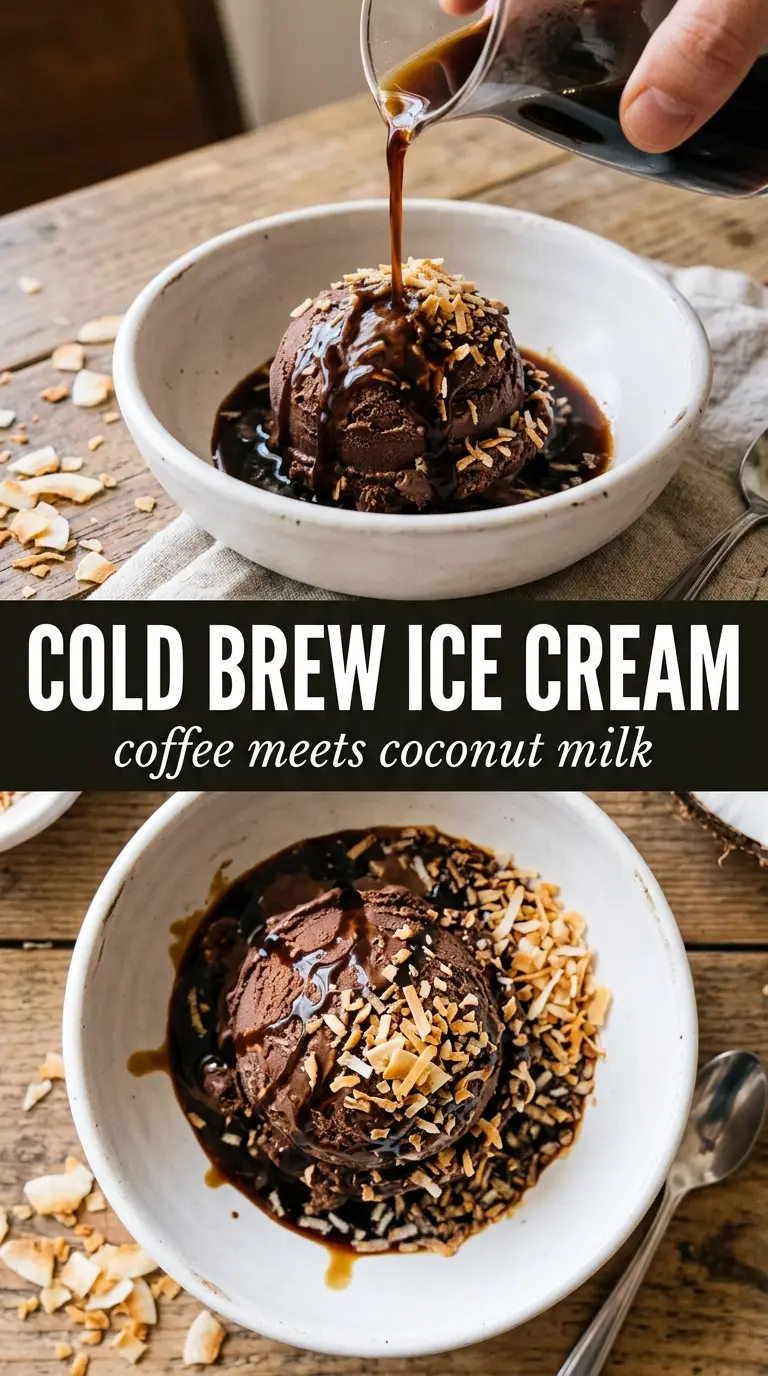
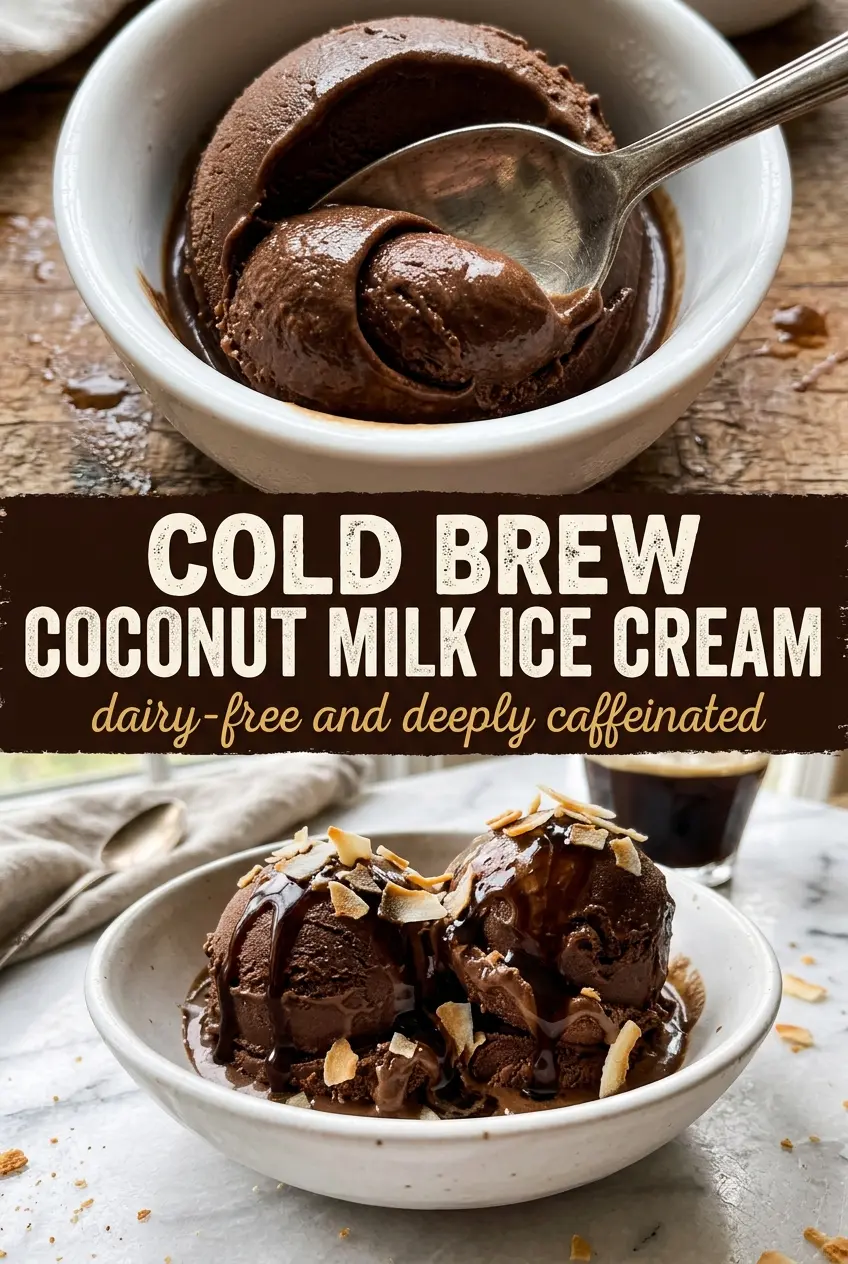
Deep coffee flavor and a velvety coconut finish make this ice cream the kind of dessert people keep sneaking from the freezer. It’s bold without being bitter, creamy without dairy, and it scoops with a soft, silky texture that plays beautifully with an extra drizzle of cold brew on top. The coconut milk doesn’t hide the coffee here; it rounds it out and gives the whole thing a lush, almost fudge-like body.
The trick is treating the base like a custard without eggs. A little starch gives the mixture enough structure to freeze smoothly, and the coconut milk needs enough heat to dissolve the sugar and activate that thickening power without boiling hard. Once the base is chilled all the way through, the churn is quick and the texture stays cleaner, less icy, and much easier to scoop after freezing.
Below, I’ve included the part that matters most: how to keep the base from tasting thin, which swaps work without wrecking the texture, and what to do if your freezer turns it firmer than you expected.
The coffee flavor came through clean and strong, and the coconut milk gave it this smooth, almost gelato-like scoop. I was worried it would freeze hard, but after about 20 minutes on the counter it was perfect.
Save this cold brew coffee and coconut milk ice cream for the nights when you want deep coffee flavor, a silky dairy-free base, and an extra drizzle on top.
The Part That Keeps This Ice Cream from Turning Icy
Coconut milk ice cream lives or dies by the balance between fat, sugar, and a little starch. Too little sugar and it freezes hard. Too much heat and the starch loses the chance to do its quiet work, which is giving the base enough body to churn into something smooth instead of grainy. The goal is not a bubbling custard. It’s a heated, fully dissolved base that coats a spoon lightly before it ever goes into the machine.
Cold brew concentrate matters here because it gives a clean coffee hit without the harsh edge you can get from brewed coffee that’s still hot or weakly extracted. Use a strong concentrate, not regular iced coffee. If the coffee is thin, the final ice cream tastes flat, and no amount of vanilla can cover that up.
- Full-fat coconut milk — This is the backbone of the texture. Light coconut milk won’t give you the same creamy body, and the ice cream will freeze harder and break down faster in the bowl.
- Cold brew concentrate — Concentrate brings intensity without extra water. If yours is especially strong, keep the amount the same and avoid adding more unless you want a more bitter finish.
- Arrowroot or cornstarch — Either one helps the base freeze smoother. Arrowroot gives a slightly silkier finish; cornstarch is easier to find and works well as long as you whisk it in before heating.
- Maple syrup swap — Maple syrup works if you want a deeper, almost caramel note. It softens the coffee edge a little, while granulated sugar gives a cleaner, more direct coffee flavor.
What Each Ingredient Is Actually Doing in This Frozen Treat
- Base ingredient (cream, yogurt, or fruit) — This determines the texture and richness. Cream makes it scoopable; yogurt makes it tangy; fruit makes it refreshing.
- Sweetener (sugar or honey) — This prevents the mixture from freezing rock-solid and creates a smooth texture. Too much and it won’t freeze; too little and it’s icy.
- Egg yolks (if using custard method) — These create richness and a silky texture. Tempering is important so they don’t scramble.
- Thickener (cornstarch, gelatin, or egg) — This prevents ice crystals from forming and keeps the texture smooth instead of grainy.
- Flavoring (vanilla, chocolate, fruit, or spices) — Use quality flavorings because they’re essential to the taste. Dilute-tasting ice cream comes from cheap extract.
- Stabilizers (gum, gelatin, or dairy) — These keep the ice cream from becoming icy during storage. They prevent large ice crystals from forming.
- Mix-ins (nuts, chunks, or swirls) — These add texture and interest. Freeze-stable chocolate works better than regular chocolate, which gets hard.
- Proper chilling and churning (the technique) — This incorporates air and prevents ice crystals. An ice cream maker makes a huge difference in texture.
Heating, Chilling, and Churning Without Breaking the Base
Whisking the Base Smooth
Start with the coconut milk, cold brew concentrate, sugar, starch, vanilla, and salt in a saucepan before the heat goes on. Whisk until everything looks uniform and the starch has disappeared into the liquid. If you see little clumps now, they’ll turn into soft lumps later, and that’s the kind of texture problem you can’t fix after churning.
Cooking to the Right Thickness
Warm the mixture over medium heat and keep whisking. After about 5 minutes, the sugar should be dissolved and the base should look slightly thicker, with a faintly glossy finish that coats the back of a spoon. Don’t let it boil hard; high heat can make the starch tighten unevenly and leave you with a base that feels pasty instead of creamy.
Cooling It All the Way Down
Pour the hot base into an ice bath and stir it now and then until it stops steaming. Then refrigerate it for at least 4 hours, or overnight if you’ve got the time. Churning a warm base is the fastest way to get soft ice cream that never fully firms up, so this step matters more than it looks like it should.
Freezing After Churn
Churn according to your machine’s instructions until the mixture looks like soft serve and holds gentle ridges. Scrape it into a container and freeze until scoopable. If it gets too firm, let it sit at room temperature for 10 to 15 minutes before serving; that’s normal with coconut milk bases, especially if your freezer runs cold.
Ways to Shift the Flavor or Keep It Dairy-Free and Easy
Make it sweeter and more dessert-like
Use maple syrup instead of granulated sugar for a softer, rounder sweetness. It adds a faint caramel note that works nicely with coffee, but the ice cream will taste a little less sharp and a little more mellow.
Keep it fully vegan
This recipe is already naturally vegan as written, as long as your sugar and vanilla are vegan-friendly. The coconut milk gives you the dairy-free creaminess that makes this work, so there’s no need for substitutions.
Turn it into a mocha version
Add 2 to 3 tablespoons of cocoa powder with the dry ingredients. You’ll get a deeper, more chocolate-forward ice cream that tastes like a frozen mocha, but the coffee will read a little softer under the cocoa.
What to do if you don’t have an ice cream maker
Pour the chilled base into a shallow freezer-safe dish and stir it every 30 to 40 minutes as it freezes. The texture won’t be quite as airy, but the starch and coconut milk still help it stay scoopable instead of icy.
Storage and Reheating
- Refrigerator: Not applicable for finished ice cream, but the churned base can be chilled up to 24 hours before freezing if needed.
- Freezer: Keeps well for about 2 weeks in a covered container. After that, the texture starts to pick up more ice crystals.
- Reheating: Let it sit at room temperature for 10 to 15 minutes before scooping. Don’t microwave it; that melts the edges fast and leaves the center too hard.
Questions I Get Asked About This Recipe
Cold Brew Coffee and Coconut Milk Ice Cream
Ingredients
Equipment
Method
- Whisk full-fat coconut milk, cold brew coffee concentrate, granulated sugar or maple syrup, arrowroot or cornstarch, vanilla extract, and salt together in a saucepan until smooth and uniform.
- Heat the mixture over medium heat, whisking constantly, until it thickens slightly and the sugar dissolves, about 5 minutes.
- Cool completely over an ice bath, then refrigerate at least 4 hours until well chilled.
- Churn the mixture in an ice cream maker according to the manufacturer’s instructions until it reaches soft-serve consistency.
- Freeze until scoopable, then serve with an extra drizzle of cold brew coffee concentrate.


