Campfire bread turns out with a crisp, golden shell and a soft, steamy center that pulls apart in warm layers the second it leaves the fire. It’s the kind of side that gets eaten before dinner even reaches the table, especially when the outside is blistered just enough to taste smoky but the inside stays tender.
What makes this version dependable is the simple dough: baking powder gives it lift without yeast, powdered milk adds a little richness, and a touch of sugar helps the crust brown faster over the coals. The dough is meant to be slightly sticky, which sounds messy but matters here because a dry dough wants to crack as it wraps and can bake up dense instead of fluffy.
If you’ve ever had campfire bread scorch on the outside before the center was cooked, the technique below will help. The biggest difference is the heat source and the rotation. Coals, not flames, give you time to cook the dough through without blackening it first.
The dough wrapped around the sticks without tearing, and the bread came off golden with a soft middle instead of doughy in the center. My kids kept asking for “just one more spiral.”
Save this campfire bread for the next time you want a golden, spiral-wrapped bread that bakes right over the coals.
The Part That Keeps Campfire Bread from Burning Before It’s Done
The mistake most people make is holding the dough over open flames. Flames are too aggressive; they char the outside before the center has a chance to set. Hot coals give steadier heat, which is exactly what this simple dough needs. Constant rotation matters too. If one side sits still for more than a few seconds, you’ll get a dark patch before the rest of the spiral is cooked.
The dough should feel soft and a little tacky, not dry and stiff. A drier dough looks easier to handle, but it cracks when you stretch it into ropes and bakes up with a tight crumb. If yours feels sticky enough to cling to your fingers, that’s the right place to be. Dust the board lightly if needed, but don’t work in extra flour until the dough turns firm.
What Each Ingredient Is Actually Doing in This Dough
- All-purpose flour — This gives the bread structure without making it tough. Bread flour would make the dough a little chewier and less forgiving to wrap around a stick, while all-purpose stays soft and easy to shape.
- Baking powder — This is the lift in the recipe. Since there’s no yeast or long rise, it’s what keeps the finished bread from turning dense and heavy over the fire.
- Powdered milk — It adds a little richness and helps the bread brown better. If you don’t have it, the bread still works, but the crust will be a touch less flavorful and less evenly colored.
- Sugar — Just enough to help with browning and take the edge off the plain dough. It also gives the finished bread that slightly toasty, campfire-snack sweetness.
- Water — Start with the listed amount and stop once the dough comes together. If you add too much and have to load in extra flour, the dough gets stiff and won’t spiral smoothly.
Wrapping and Roasting the Dough the Right Way
Mixing the Dough Fast
Combine the dry ingredients first so the baking powder and powdered milk are evenly dispersed, then add the water and mix just until a dough forms. It should look shaggy at first and then come together into a soft ball with a slight stickiness. Don’t knead it hard; overworking it makes the bread tighter and less tender after roasting.
Shaping the Spirals
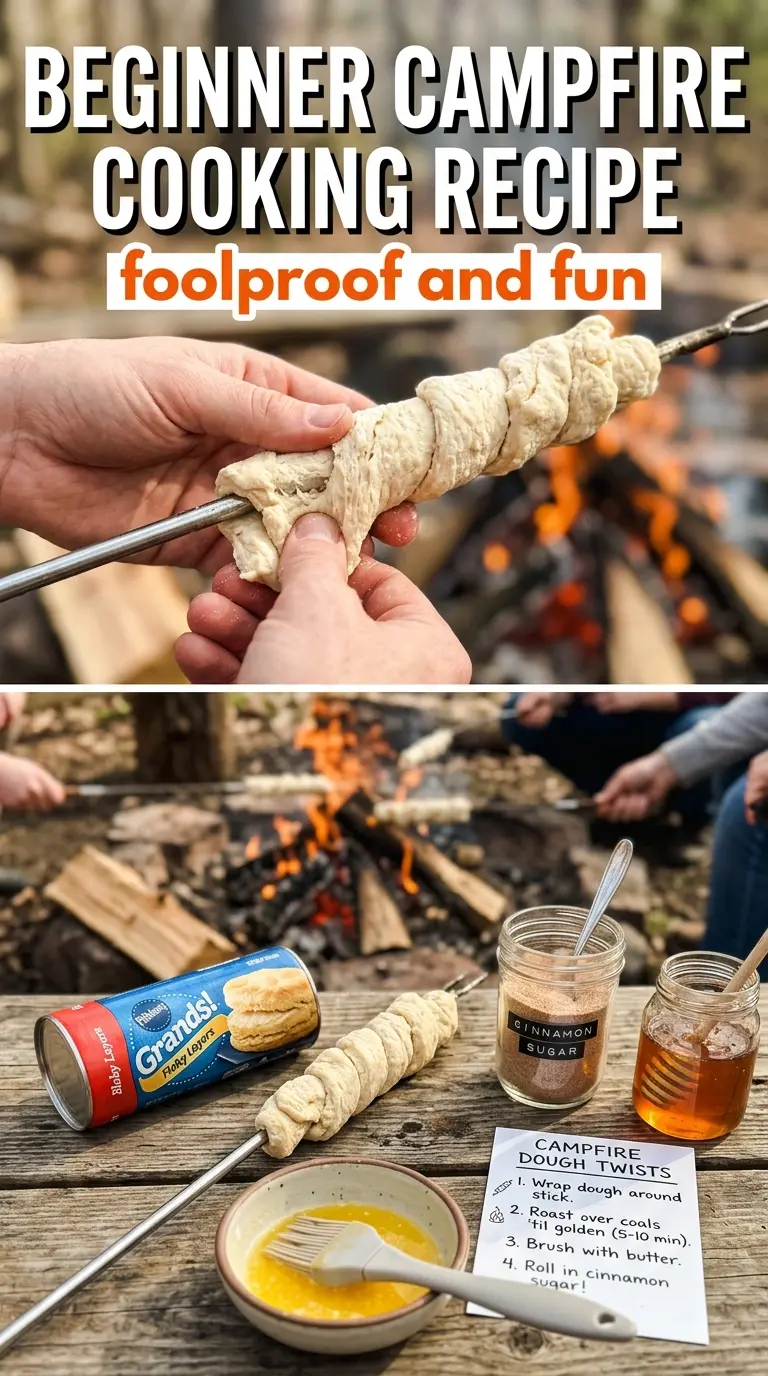
Divide the dough into 10 portions and roll each one into a rope about 1 inch thick. Wrap it around the end of a roasting stick in a loose spiral so heat can reach the dough from the sides as well as the bottom. If the rope is wrapped too tightly, the center can stay doughy while the outside browns.
Roasting Over the Coals
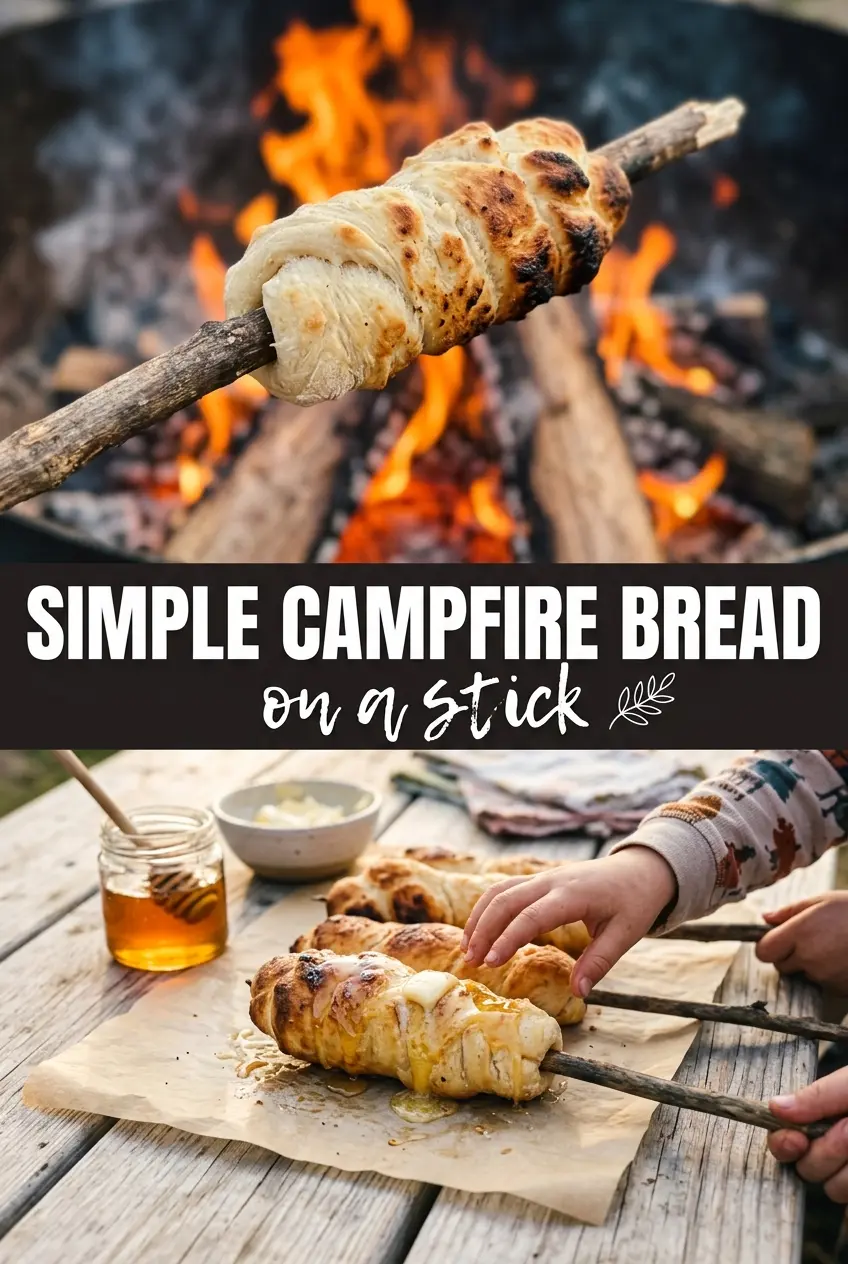
Hold the wrapped dough over hot coals, not licking flames, and keep rotating the stick the whole time. You’re looking for an even golden color and a dry surface that sounds faintly crisp when tapped. If the dough browns too fast, move it higher from the heat; if it stays pale after several minutes, the coals aren’t hot enough.
Sliding It Off and Serving It Warm
When the bread is golden all around and feels set, slide it carefully off the stick. The inside should be fluffy, not gummy, and the spiral should release without tearing if it has cooked long enough. Serve it right away with butter or jam while the crust is still crisp and the center is warm.
How to Adapt Campfire Bread for Different Camps and Cravings
Dairy-Free Campfire Bread
The powdered milk can be left out if you need a dairy-free version. The bread will still roast up with a good structure, but it loses a little richness and browning, so expect a plainer crust and serve it with a stronger topping like jam or cinnamon sugar.
Sweeter Breakfast-Style Bread
Add an extra tablespoon of sugar and dust the finished bread with cinnamon sugar after roasting. This pushes it toward a sweet breakfast bread instead of a plain side, but it can brown faster, so keep the stick moving even more often.
Gluten-Free Version
Use a 1:1 gluten-free flour blend that already contains xanthan gum. The dough will be a little more fragile when you spiral it, so handle it gently and don’t make the ropes too thin or they’ll split over the fire.
Storage and Reheating
- Refrigerator: Store leftovers in a sealed container for up to 2 days. The bread loses its crisp exterior quickly and turns more like a soft roll.
- Freezer: It freezes best after baking and cooling completely. Wrap tightly and freeze for up to 1 month, then thaw before reheating.
- Reheating: Warm in a 325°F oven for a few minutes until the center is hot again. Avoid the microwave if you want to keep any crust at all; it softens the bread and makes it chewy.
Answers to the Questions Worth Asking
Campfire Bread
Ingredients
Method
- Combine all-purpose flour, baking powder, salt, sugar, and powdered milk in a large bowl or zip-top bag, mixing until evenly distributed.
- Add water and mix until dough forms, noting the dough will be slightly sticky.
- Divide the dough into 10 portions so each stick gets an even amount.
- Roll each portion into a long rope about 1 inch thick.
- Wrap each dough rope around the end of a roasting stick in a spiral pattern, securing the start so it doesn’t unwind.
- Hold the stick over campfire coals (not flames) and rotate constantly for 12-15 minutes, cooking until golden brown and cooked through.
- Slide the bread off the stick and serve warm with butter or jam.


