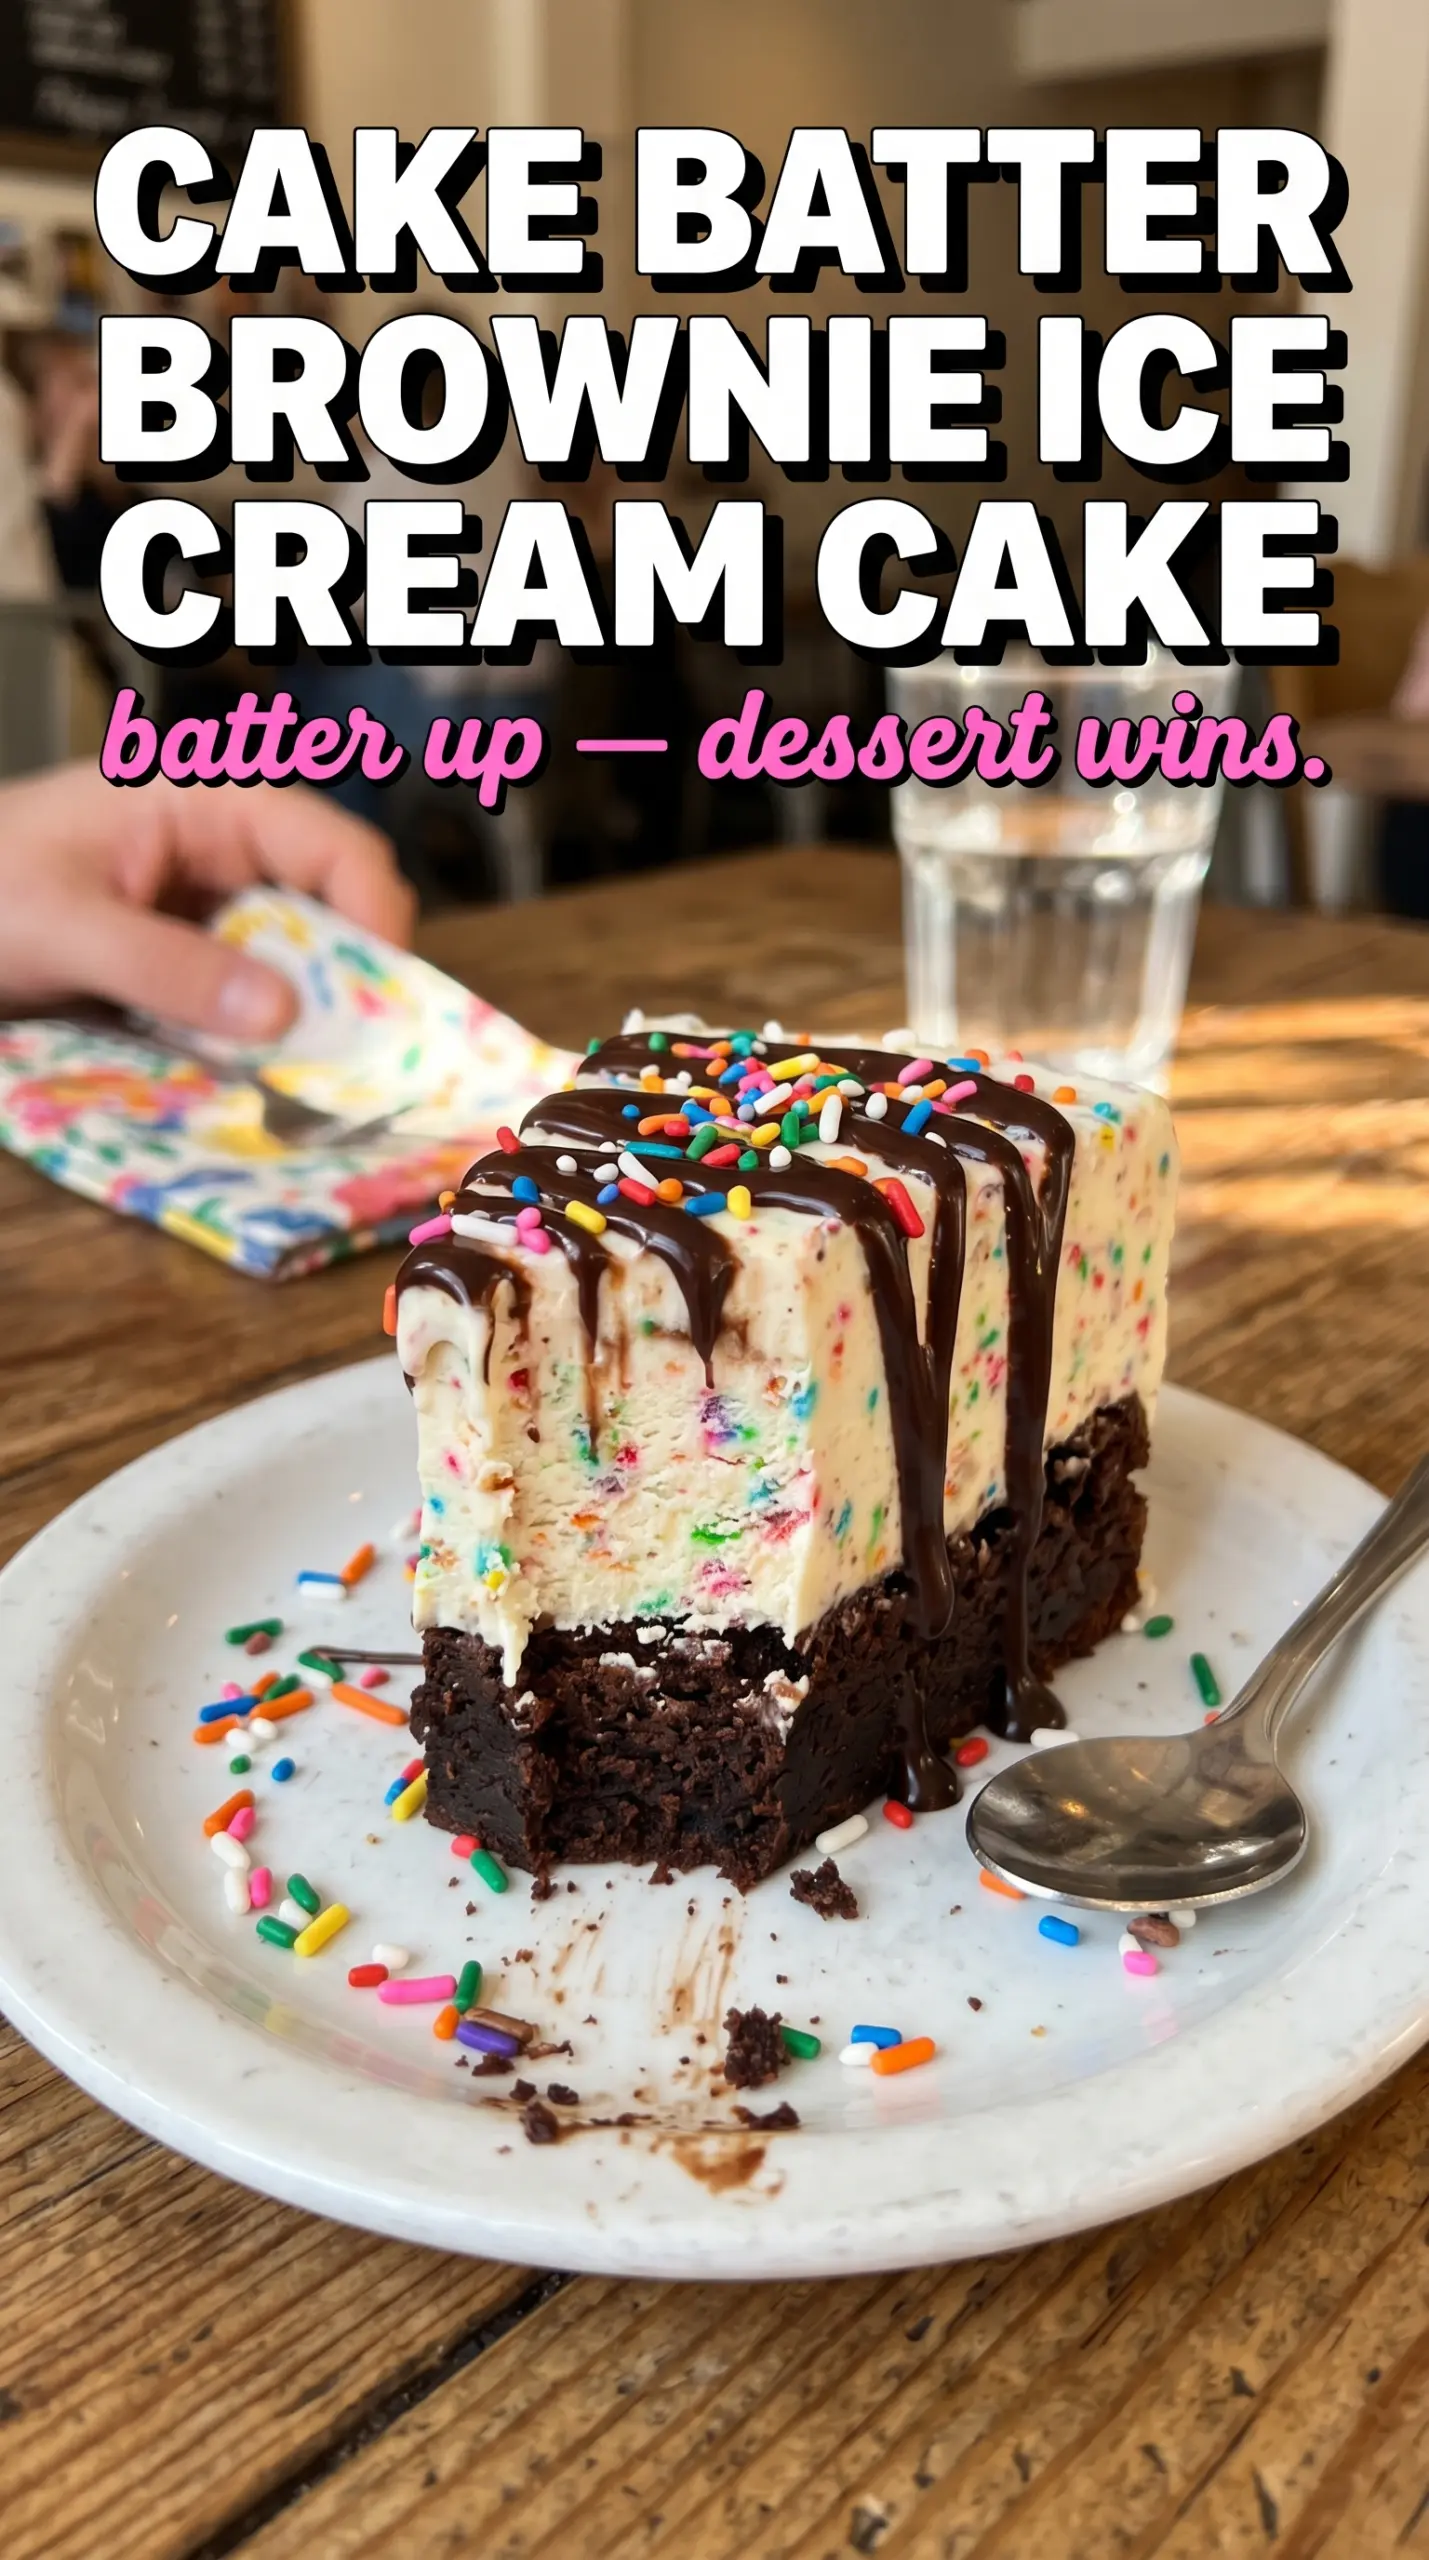
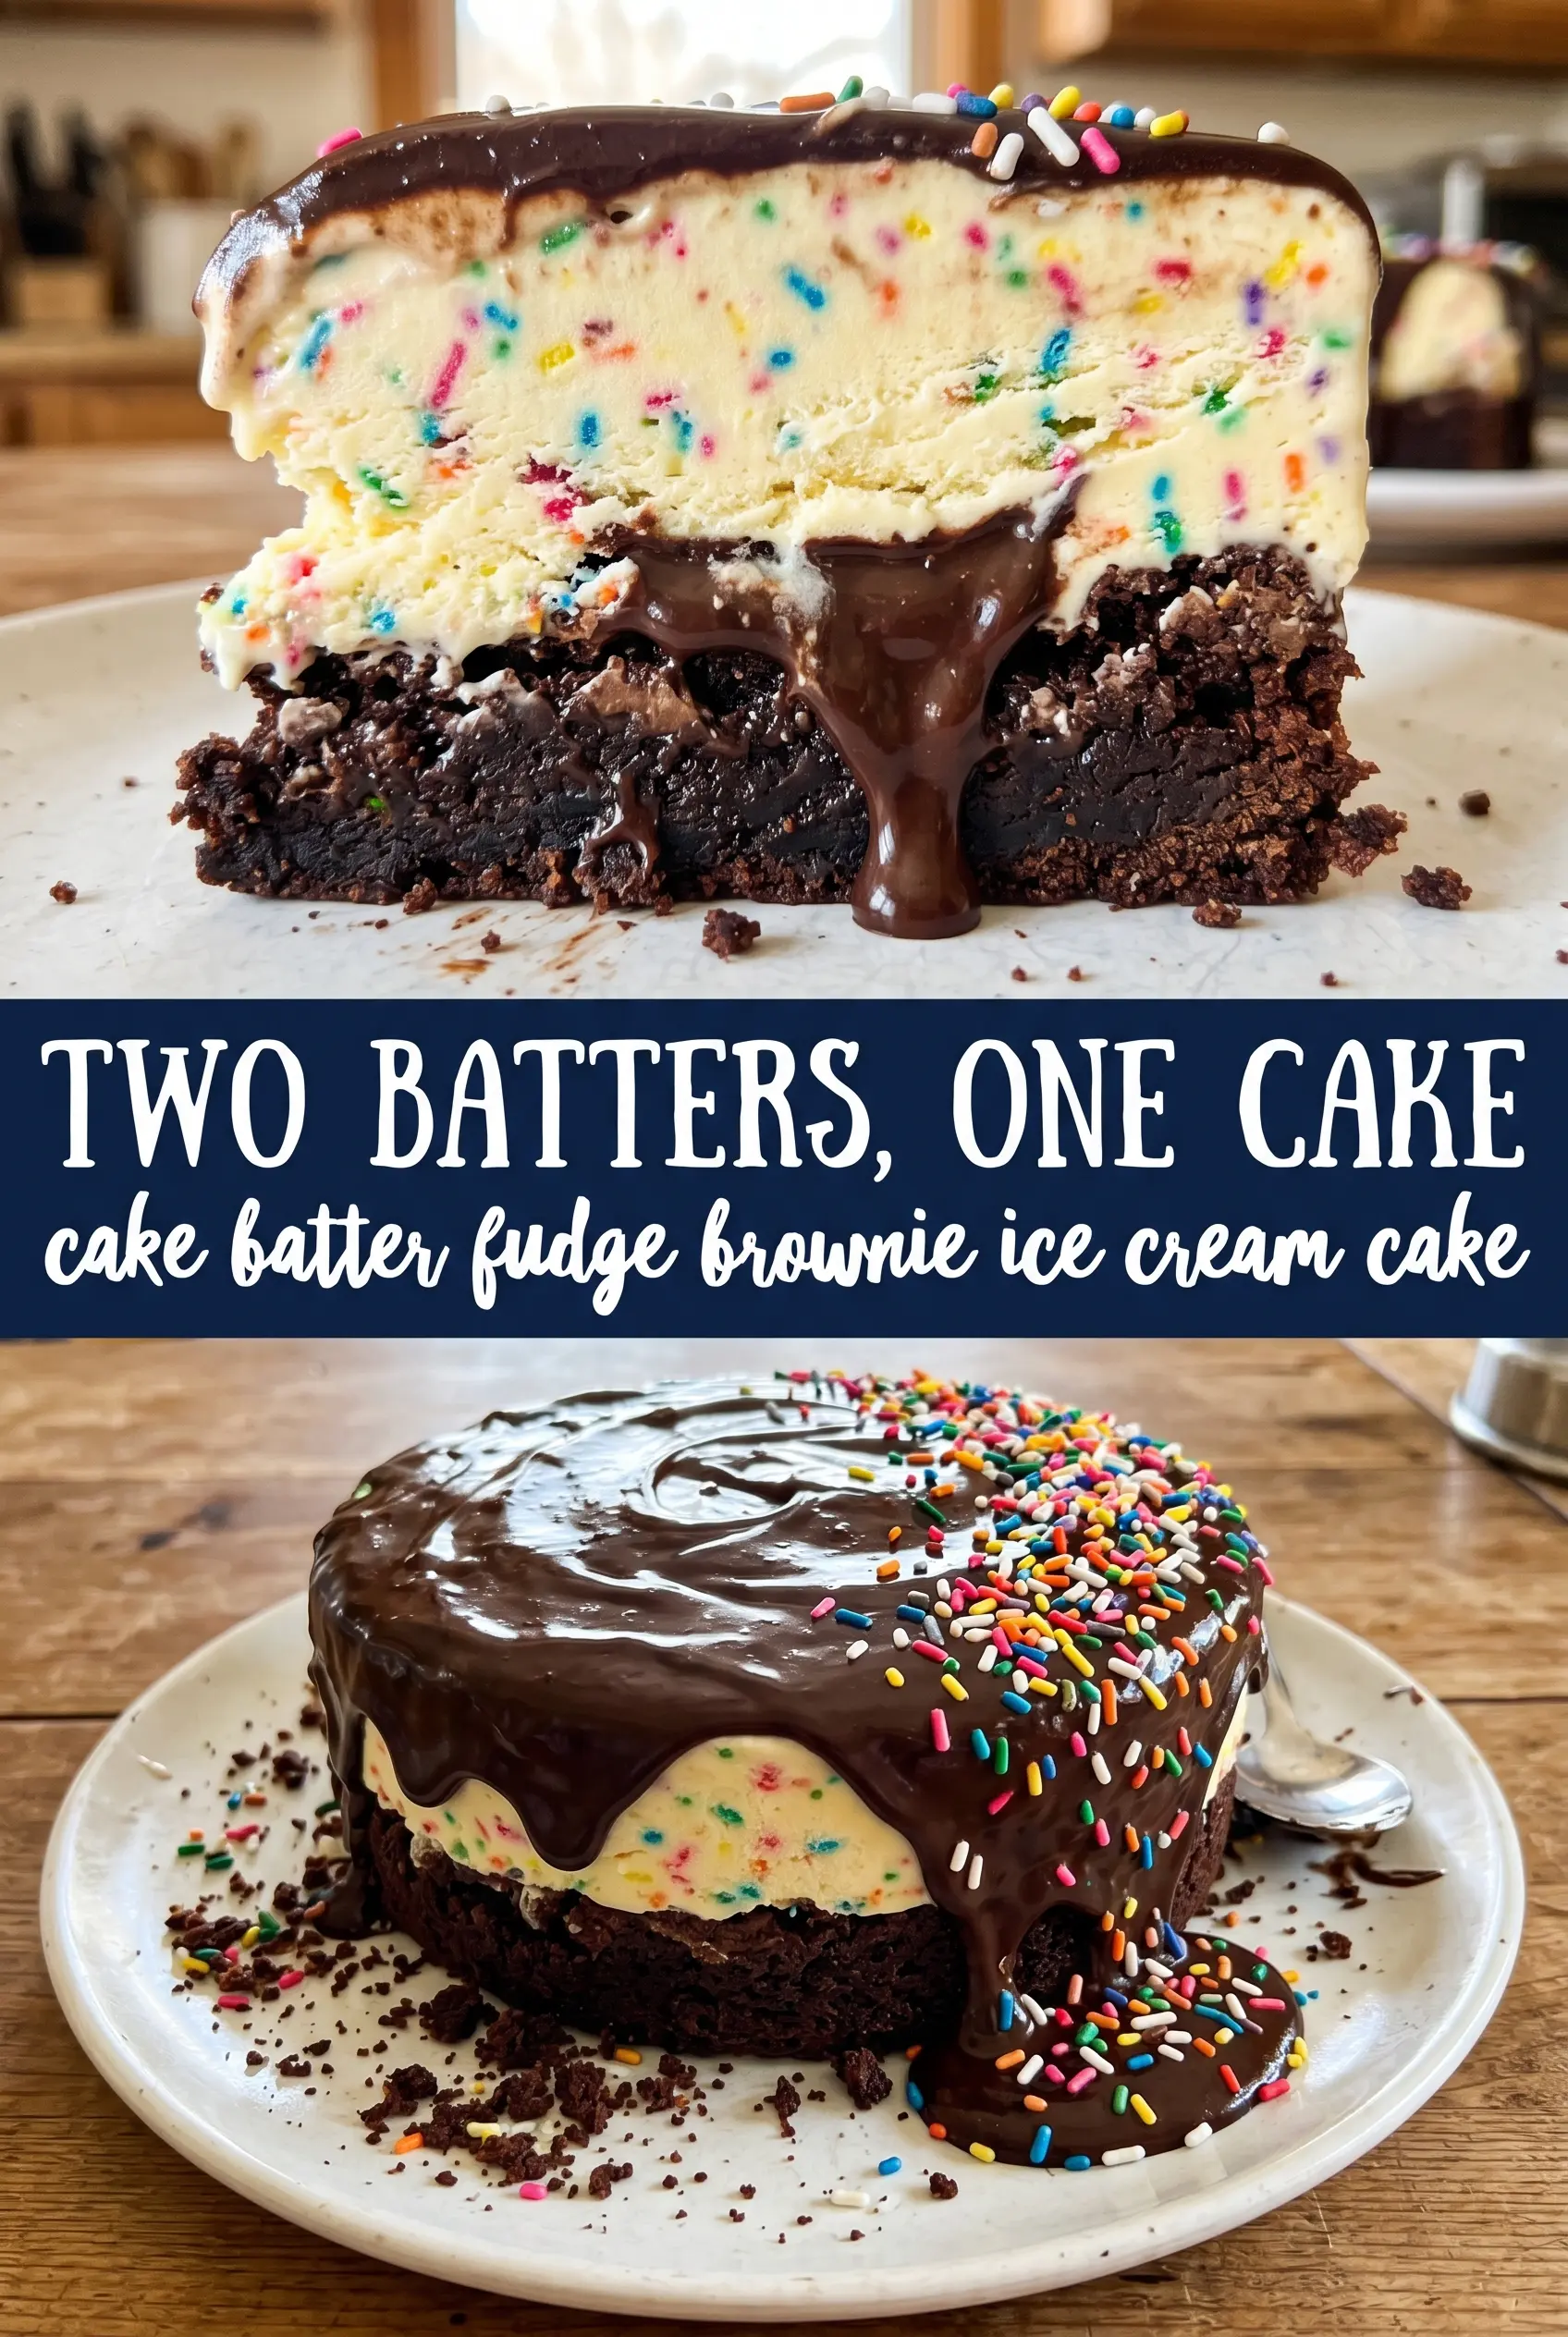
Fudgy brownie, cake batter ice cream, hot fudge, and a shower of rainbow sprinkles come together in a frozen slab that slices like a celebration and eats like pure birthday nostalgia. The brownie stays dense and chewy under the cold ice cream, while the fudge ribbon cuts through the sweetness so every bite has a little contrast instead of tasting flat.
The trick is treating each layer like it needs its own moment. The brownie has to be fully cool before the ice cream goes on, or you’ll get a melted mess at the base. Softened ice cream spreads without tearing the brownie, and folding in the sprinkles after it softens keeps them from bleeding color into the whole pan.
Below, I’ll walk through the details that matter most: how to keep the layers clean, how to get neat slices from a frozen cake, and the small changes that make this work for birthdays, summer parties, or any night that calls for something bigger than ordinary dessert.
The brownie stayed fudgy even after freezing, and the fudge ribbon kept the ice cream layer from tasting too sweet. I let it sit for about 10 minutes before slicing, and the pieces came out clean.
Love the brownies-and-funfetti contrast? Save this cake batter fudge brownie ice cream cake for the birthday dessert that needs a fudge swirl and a lot of sprinkles.
The Layer That Breaks If You Rush It
The mistake most people make with ice cream cakes is treating the brownie like an afterthought. A warm brownie base melts the ice cream from the bottom up, and once that happens you lose the sharp layers that make this dessert worth serving. Bake the brownie in a 9×13 pan, then let it cool all the way down before anything else touches it.
Softened ice cream matters here, but melted ice cream does not. You want it pliable enough to spread without dragging up chunks of brownie, yet still cold enough to hold its shape once it hits the pan. That balance is what gives you a thick, even middle layer instead of a streaky, slushy one.
- Brownie mix — A boxed mix is perfect here because you want a dense, fudgy base that bakes evenly and slices cleanly after freezing. If your mix includes a separate oil-and-egg ratio, follow the package directions exactly and avoid overbaking, since a dry brownie turns hard once frozen.
- Cake batter or birthday cake ice cream — This is the flavor that makes the whole dessert read as birthday cake, not just brownie sundaes in sheet form. If you can’t find it, vanilla ice cream with a little cake batter extract and extra sprinkles works, but the texture will be a touch less creamy and a little sweeter.
- Hot fudge sauce — The fudge gives you the rich, glossy stripe that cuts through the ice cream. Use a sauce that pours smoothly; if yours is thick from the jar, warm it just enough to drizzle, not so much that it turns runny and sinks straight through.
- Whipped topping — This makes the top lighter and easier to slice than a heavy buttercream-style frosting. Fresh whipped cream can work, but it doesn’t hold as long in the freezer, so use it only if you’re serving the cake the same day.
- Rainbow sprinkles — Add them after the ice cream softens, not before. If they sit in the freezer for too long on their own, they can dull a little, but they still give the cake its festive look and a bit of crunch on top.
What Each Ingredient Is Actually Doing in This Ice Cream Cake
- Crust or base layer (cookies, brownies, or cake) — This provides structure and texture contrast. A sturdy base keeps the whole cake from crumbling when served.
- Ice cream (the main event) — Choose quality ice cream or frozen yogurt. Soft-serve or premium ice cream works better than hard-packed store brands.
- Cake layer (optional but recommended) — A thin cake layer adds substance and keeps the cake from being all frozen texture. Make it thin so it doesn’t overpower the ice cream.
- Sauce or syrup layer (fudge, caramel, or fruit) — This adds flavor depth and prevents the cake from tasting one-dimensional. Freeze between layers so sauces stay distinct.
- Toppings (chocolate chips, cookies, candy, or nuts) — These add texture and visual appeal. Mix-ins stay crispy longer if frozen separately first.
- Frosting or whipped cream (optional topping) — This adds richness to the outside. Keep it simple or it overwhelms the cake.
- Freezing time (the patience that pays off) — Each layer needs time to set so they stay distinct when sliced. Rushing this step means layers muddy together.
- Storage and serving technique (thaw 5 minutes before slicing) — A brief thaw makes slicing clean and easy. Serve slices immediately for best texture.
How to Build the Frozen Layers Without Losing the Swirl
Cooling the Brownie Completely
Spread the baked brownie in your 9×13 pan and let it cool all the way to room temperature before you start layering. If there’s any warmth left, the ice cream will slide and melt at the edges, which makes the first freeze uneven. A completely cool brownie gives you a firm base that supports the whole cake.
Folding in the Sprinkles
Stir the rainbow sprinkles into the softened ice cream just until they’re evenly scattered. Don’t beat them in hard or they’ll streak the ice cream and turn the whole layer muddy. You want visible confetti all the way through, not a pink-and-blue smear.
Spreading and Drizzling
Scrape the ice cream over the brownie in thick spoonfuls, then smooth it into one even layer with an offset spatula or the back of a spoon. Drizzle the fudge over the top and use a knife to make a few lazy swirls; overworking it blends the layers too much and you lose that fudge ribbon effect. Freeze until firm before adding the whipped topping so the surface stays neat.
The Final Freeze
Spread the whipped topping over the frozen fudge layer and cover the top with more sprinkles. Put the cake back in the freezer for at least 2 hours, and longer is even better if you want cleaner slices. If you cut it too early, the top layer slumps and the brownie pulls away from the pan edges.
Make It Even More Birthday-Party Loud
Add extra sprinkles between the brownie and ice cream layers if you want more color in every slice. It turns the cake into a little more of a confetti showpiece, but it also adds crunch, so keep the layer thin if you want the brownie to stay front and center.
Dairy-Free Version
Use a dairy-free brownie mix or a homemade brownie made with oil instead of butter, then swap in a non-dairy birthday cake ice cream and coconut or oat whipped topping. The texture stays close to the original, though the ice cream layer may freeze a little harder, so give it an extra few minutes at room temperature before slicing.
Chocolate-Forward Swap
Use chocolate ice cream instead of cake batter ice cream if you want a more brownie-centric dessert. You’ll lose some of the birthday-cake flavor, but the hot fudge layer tastes deeper and the whole cake leans into a more classic ice cream parlor feel.
Storage and Reheating
- Refrigerator: Not recommended. This is a freezer dessert, and the ice cream layer will collapse if it sits in the fridge for long.
- Freezer: Store tightly covered for up to 2 weeks. Press a sheet of parchment or plastic wrap directly against the surface before covering to help prevent freezer burn.
- Reheating: No reheating needed. For best slices, let the cake sit at room temperature for 8 to 10 minutes before cutting; if you wait too long, the whipped topping softens before the brownie base does.
Answers to the Questions Worth Asking
Cake Batter Fudge Brownie Ice Cream Cake
Ingredients
Equipment
Method
- Bake the brownie mix in a 9x13 pan according to package directions, then cool completely so the frozen layers don’t melt. Temperature and time: follow the box baking instructions until set in the center.
- Fold the rainbow sprinkles into the softened cake batter or birthday cake ice cream until evenly distributed. Visual cue: the ice cream should look speckled with sprinkles throughout.
- Spread the sprinkle ice cream over the cooled brownies in a thick, even layer. Visual cue: you should see a uniform surface with no brownie showing through.
- Drizzle the hot fudge sauce over the top and swirl with a knife to create ribbons. Visual cue: dark fudge streaks should swirl across the surface in multiple passes.
- Freeze for 6 hours until completely firm. Visual cue: the cake should slice with clean edges and no wobble.
- Cover the firm cake with whipped topping and shower generously with rainbow sprinkles. Visual cue: the top should be fully covered and heavily sprinkled.
- Freeze for 2 more hours before slicing until the whipped layer sets. Visual cue: a knife should glide through with a clean cut line.


