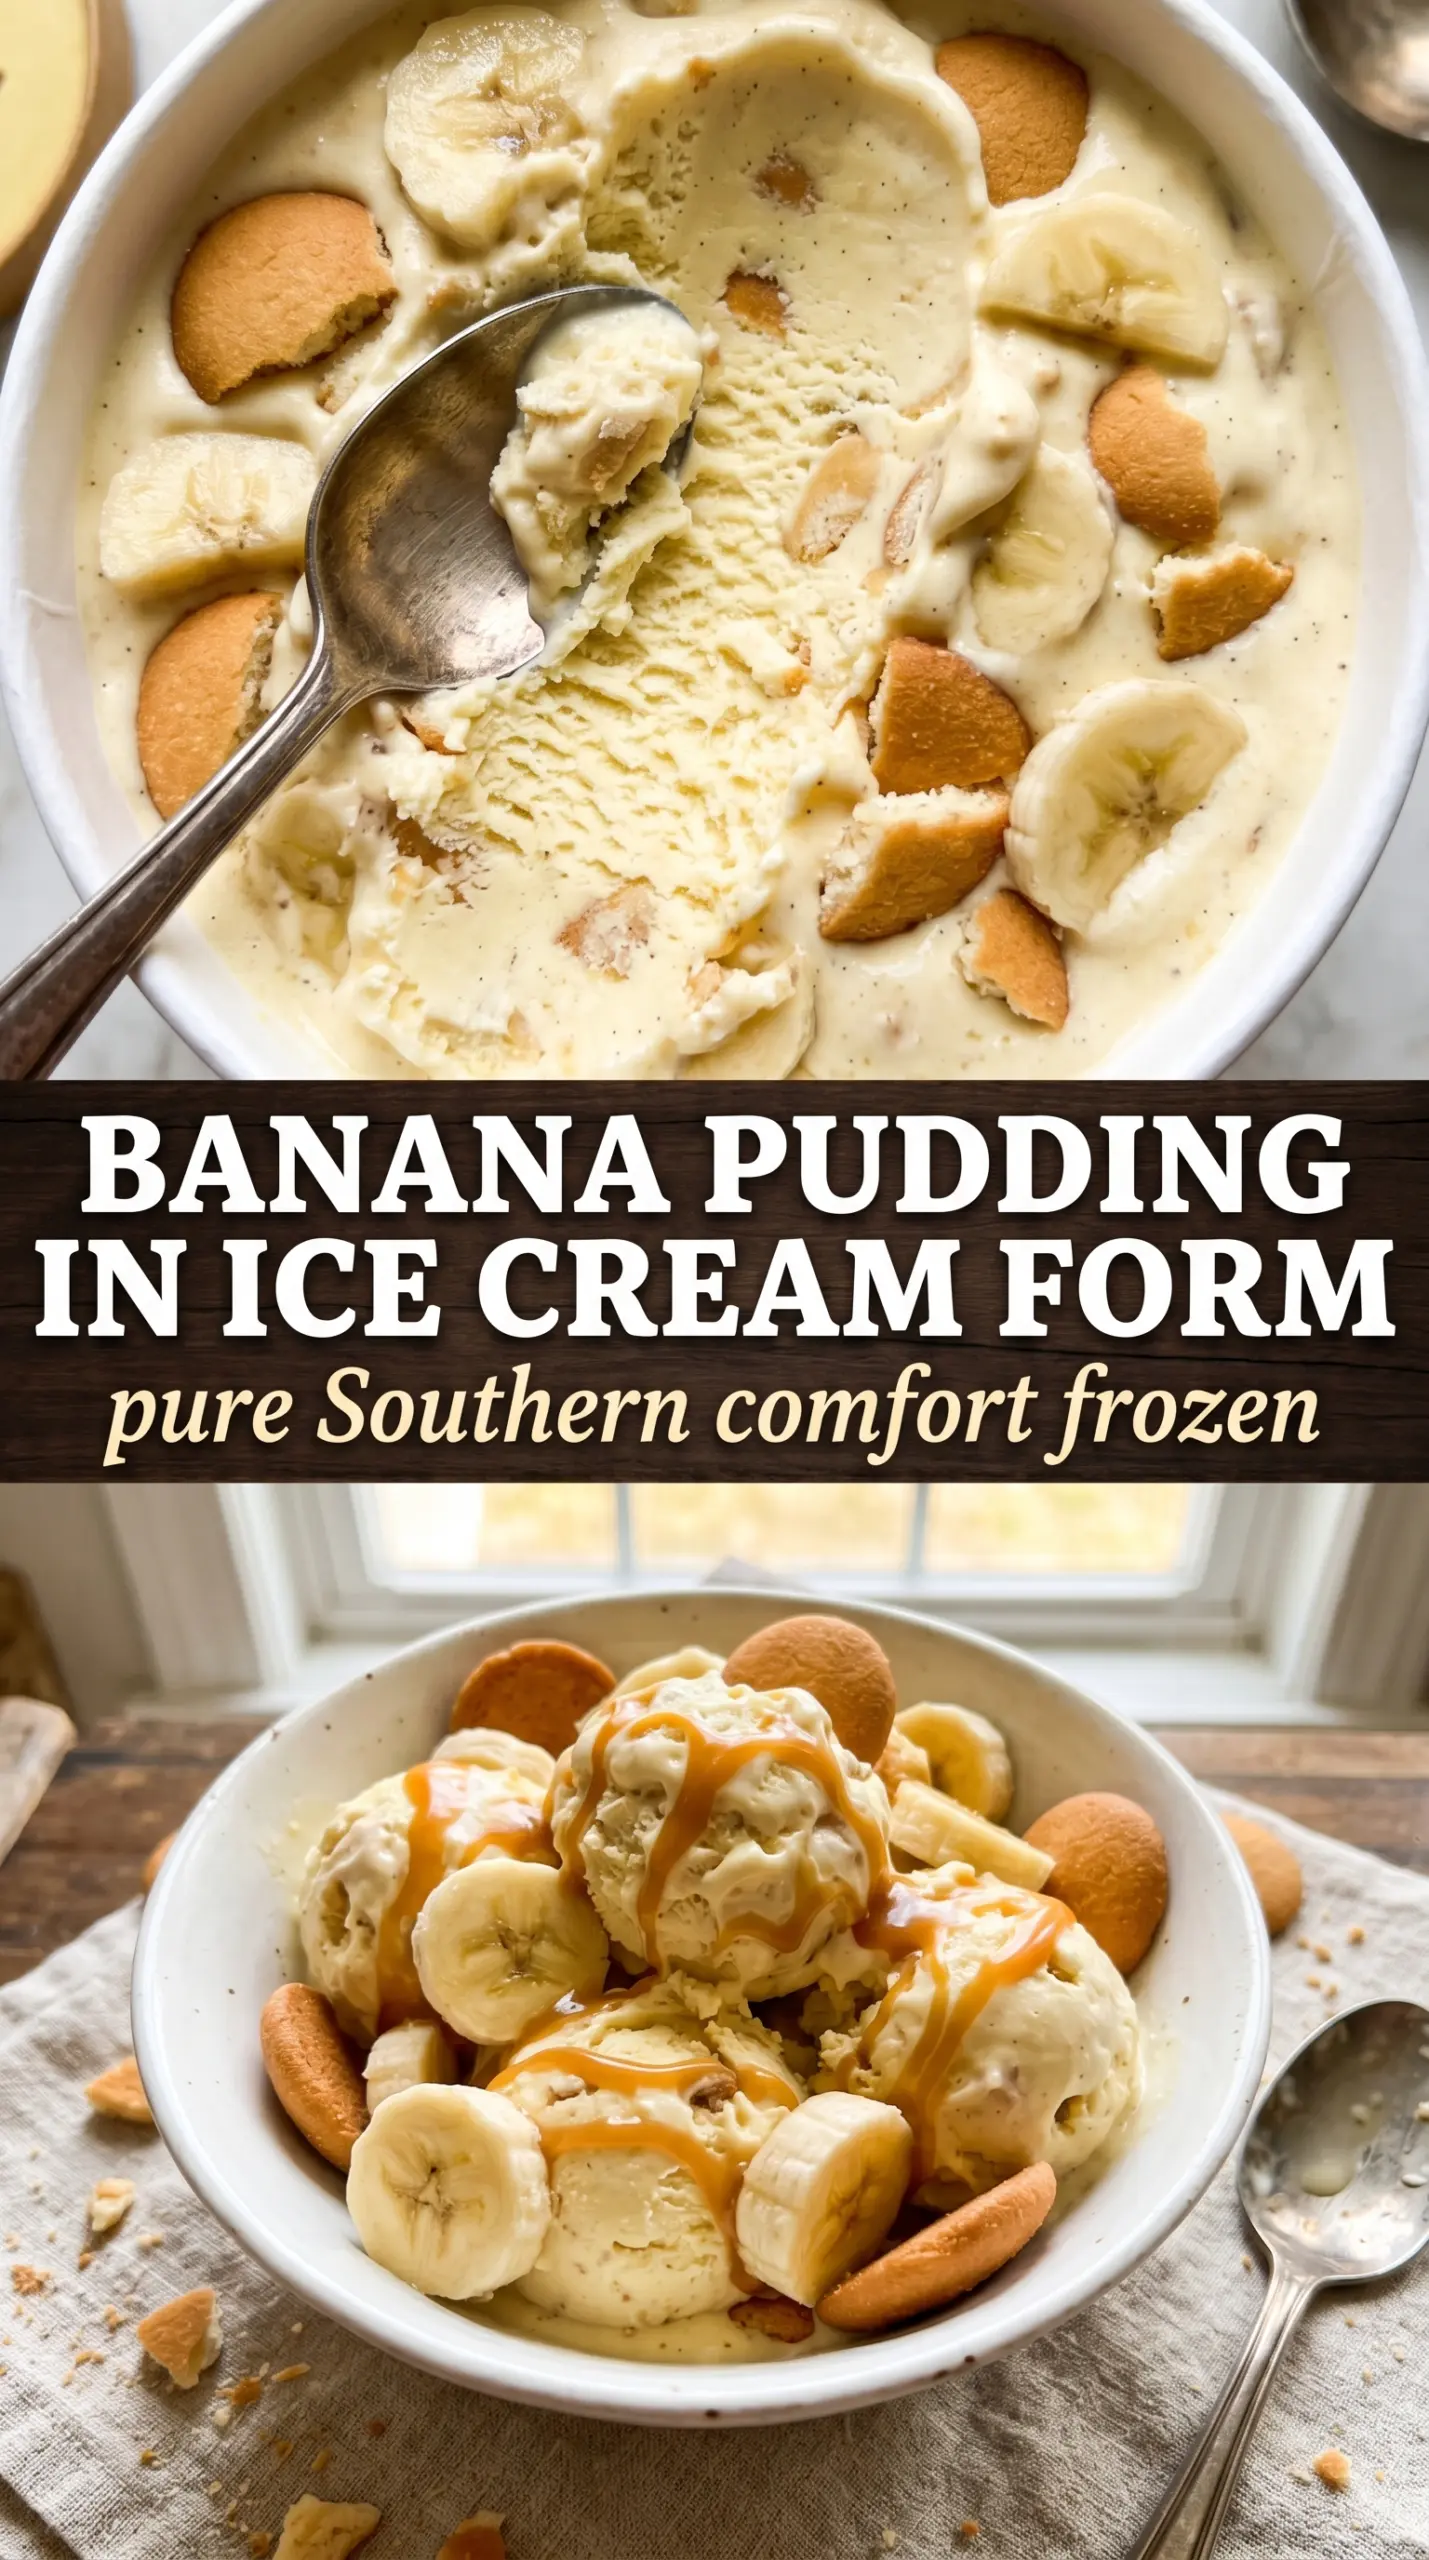
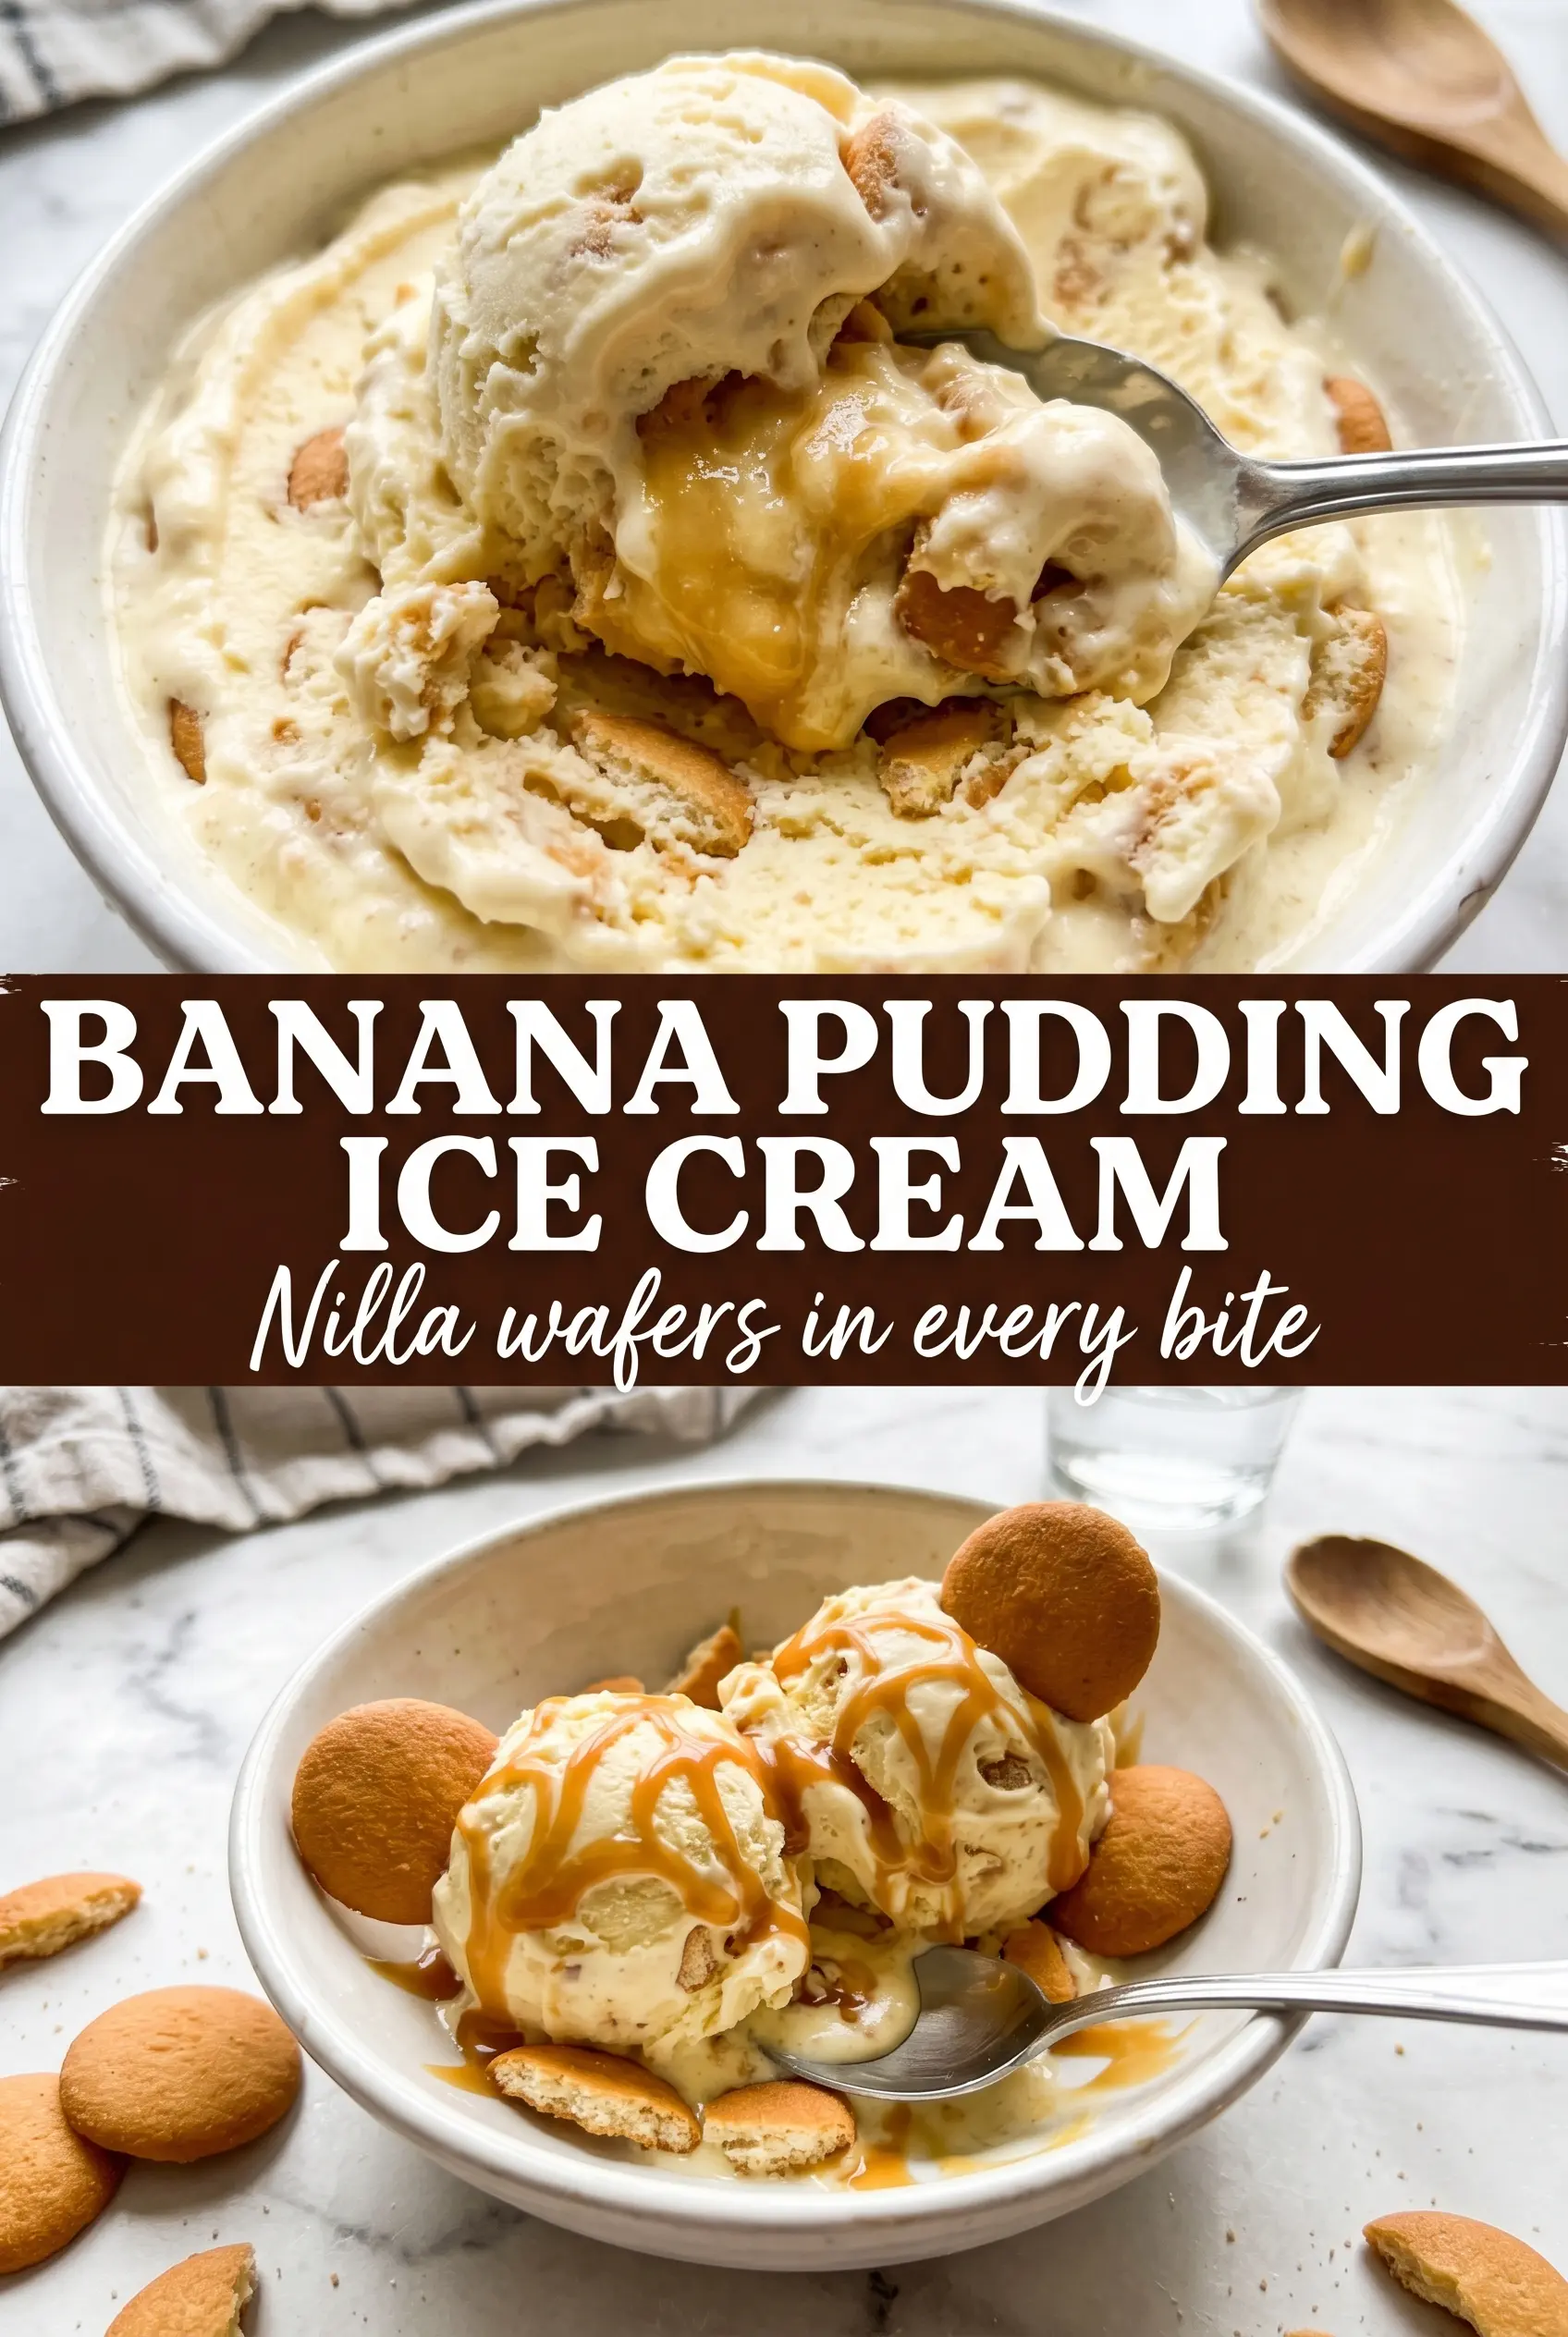
Creamy banana pudding ice cream hits that sweet spot between nostalgic and polished: soft banana flavor, a rich custard base, and enough crushed Nilla wafers to give every scoop a little cookie crunch. The frozen banana slices stay tucked inside like chilled pockets of fruit, so it tastes layered instead of one-note.
What makes this version work is the custard. Egg yolks give it the thick, scoopable body you want after freezing, and the bananas go in after the custard is cooked so their flavor stays bright instead of turning dull and muddy on the stove. I also use frozen banana slices for the mix-in, which keeps them from disappearing into the base.
Below, I’ll walk you through the part that matters most: cooking the custard without scrambling the eggs, plus the timing for adding the wafers so they keep some texture instead of dissolving.
The custard chilled up thick and silky, and the Nilla wafers stayed crunchy enough to taste in every scoop. My kids kept asking if there were more banana chunks in the freezer.
Creamy banana pudding ice cream with Nilla wafer crunch is the kind of freezer dessert worth making room for.
Why the Custard Has to Be Chilled Before Churning
The base needs to be fully cold before it goes into the ice cream maker, and that isn’t just about patience. A warm custard takes longer to freeze, which can leave you with soft, icy ice cream instead of a dense scoopable texture. Chilling also gives the banana flavor time to settle into the cream instead of tasting sharp and separate.
The other mistake is rushing the custard through the stove. If the heat is too high, the eggs tighten too quickly and you get grainy bits instead of a smooth base. Cook it over medium-low and keep stirring; the custard should coat the back of a spoon and reach 175F, not boil.
What Each Ingredient Is Actually Doing in This Frozen Treat
- Base ingredient (cream, yogurt, or fruit) — This determines the texture and richness. Cream makes it scoopable; yogurt makes it tangy; fruit makes it refreshing.
- Sweetener (sugar or honey) — This prevents the mixture from freezing rock-solid and creates a smooth texture. Too much and it won’t freeze; too little and it’s icy.
- Egg yolks (if using custard method) — These create richness and a silky texture. Tempering is important so they don’t scramble.
- Thickener (cornstarch, gelatin, or egg) — This prevents ice crystals from forming and keeps the texture smooth instead of grainy.
- Flavoring (vanilla, chocolate, fruit, or spices) — Use quality flavorings because they’re essential to the taste. Dilute-tasting ice cream comes from cheap extract.
- Stabilizers (gum, gelatin, or dairy) — These keep the ice cream from becoming icy during storage. They prevent large ice crystals from forming.
- Mix-ins (nuts, chunks, or swirls) — These add texture and interest. Freeze-stable chocolate works better than regular chocolate, which gets hard.
- Proper chilling and churning (the technique) — This incorporates air and prevents ice crystals. An ice cream maker makes a huge difference in texture.
What Each Ingredient Is Actually Doing in This Ice Cream
- Very ripe bananas — These carry the main flavor, and the riper they are, the sweeter and more aromatic the ice cream tastes. You want bananas with lots of brown spots, not just yellow fruit, because under-ripe bananas can taste flat after freezing.
- Heavy cream and whole milk — This pairing gives the base enough fat for a smooth churn without turning greasy. If you swap in lower-fat milk, the ice cream freezes harder and tastes thinner.
- Egg yolks — The yolks are what make this custard-style ice cream rich and scoopable. They also help the base emulsify, which keeps it from freezing into a coarse, icy block.
- Nilla wafers — These bring the banana pudding part of the flavor story, not just crunch. Crush them roughly so you get some crumbs for flavor and some bigger bits for texture.
- Frozen banana slices — Frozen slices hold their shape better than fresh ones and keep the mix-in from turning mushy. Cut them before freezing so they fold in quickly at the end.
How to Build the Custard Without Scrambling the Eggs
Purée the bananas first
Blend the bananas until completely smooth before you start on the custard. Any chunks left behind can turn stringy in the finished ice cream and make the texture feel uneven. Set the purée aside so it can be stirred in after the custard comes off the heat.
Temper the yolks slowly
Whisk the sugar and yolks together until they look thick and pale, then add the steaming cream and milk in a slow stream while whisking constantly. That gradual addition warms the yolks without shocking them, which is what keeps scrambled egg bits out of the pot. If you dump the dairy in all at once, the eggs can seize before the custard ever thickens.
Cook to nappe, not a boil
Return the mixture to the pan and stir over medium-low heat until it reaches 175F and lightly coats the spoon. The custard should look glossy and slightly thickened, with small bubbles around the edge but no simmering on the surface. If it starts to boil, pull it off the heat immediately; boiling pushes the eggs from silky to grainy fast.
Strain, chill, and churn
Strain the custard into a clean bowl to catch any tiny bits of cooked egg, then stir in the vanilla, salt, and banana purée. Cover it and chill until it is fully cold, at least 4 hours. Churn only when the base is cold all the way through, or the texture stays loose and icy instead of turning creamy.
Add the wafers at the very end
Fold in the crushed Nilla wafers and frozen banana slices during the last 2 minutes of churning. That timing keeps the wafers from dissolving and gives the banana pieces enough time to distribute without breaking down. Once the ice cream hits soft-serve consistency, move it to the freezer so it firms up into proper scoops.
How to Adapt This Frozen Banana Pudding for Different Kitchens
Dairy-Free Version
Use full-fat canned coconut milk in place of the cream and whole milk, and keep the egg yolks for the custard structure. The result will taste a little coconut-forward and freeze a bit firmer, but it still gives you a rich, scoopable base with the banana and wafer flavor front and center.
Gluten-Free Swap
Swap the Nilla wafers for a gluten-free vanilla cookie that crushes cleanly. You’ll still get the cookie-cream flavor, but some gluten-free cookies soften faster, so add them at the last minute and freeze the churned ice cream promptly.
Extra Banana, Less Cookie
If you want a more fruit-forward ice cream, increase the frozen banana slices to 3/4 cup and reduce the wafers slightly. The texture will be softer and more banana-cream than pudding-like, which works well if you want the fruit to lead.
Storage and Reheating
- Refrigerator: Not applicable once churned; this is a freezer dessert and needs cold storage from the start.
- Freezer: Store in a tightly sealed container for up to 2 weeks. Press parchment directly on the surface if you want to limit ice crystals.
- Reheating: Let it sit at room temperature for 5 to 10 minutes before scooping. If it’s rock hard, it usually means it was overchurned or frozen in a container with too much air space.
Answers to the Questions Worth Asking
Banana Pudding Ice Cream
Ingredients
Equipment
Method
- Blend very ripe bananas until completely smooth, then set aside for later fold-in.
- Heat heavy cream and whole milk in a Dutch oven until steaming, not boiling, then keep over medium-low heat.
- In a separate bowl, beat egg yolks with granulated sugar until smooth, then slowly whisk in the hot cream mixture.
- Cook the custard over medium-low heat, stirring constantly, until it reaches 175°F.
- Strain the custard, then stir in vanilla extract and salt along with the banana puree until fully combined.
- Cool the custard completely before refrigerating.
- Refrigerate the custard for 4 hours, then churn in an ice cream maker according to the manufacturer’s instructions.
- Fold in crushed Nilla wafers and frozen banana slices during the last 2 minutes of churning.
- Transfer to a freezer-safe container and freeze until scoopable.


