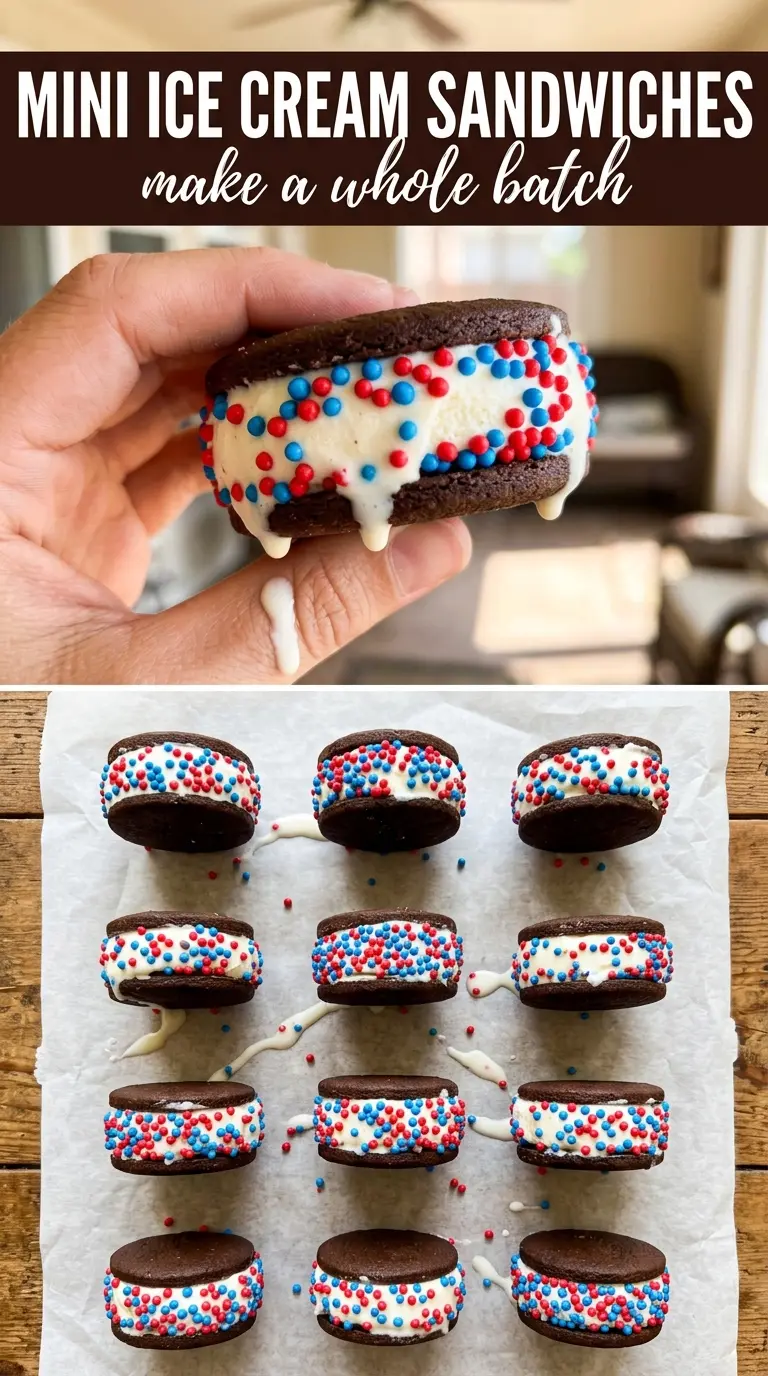
Mini ice cream sandwiches hit the sweet spot between playful and practical: just enough cookie, just enough vanilla ice cream, and a sprinkle rim that makes every bite feel festive. The red velvet cookie base stays soft after freezing, so you don’t get the hard, icy crunch that ruins a good homemade ice cream sandwich. What you end up with is a dessert that looks polished on the plate but eats like the kind of treat people reach for twice.
The small size matters here. Bigger sandwiches tend to squish the filling out the sides before they ever freeze properly, but tablespoon-sized cookies keep everything neat and balanced. Freezing the cookies before assembly helps them hold up when the ice cream goes on, and working with slightly softened ice cream gives you enough flexibility to build the sandwiches without cracking the cookies or chasing melted drips across the counter.
Below, you’ll find the little timing details that keep the cookies tender, the best way to roll the edges in sprinkles without making a mess, and a few swaps if you want to use chocolate cookies instead of red velvet.
The cookies stayed soft after freezing and the sprinkle edges looked just like the photos. I made them the night before and they were perfect for our July 4th party.
Save these patriotic mini ice cream sandwiches for a red, white, and blue dessert that freezes beautifully and stays neat in the hand.
The Cookie Trick That Keeps These Mini Sandwiches Soft After Freezing
The biggest mistake with homemade ice cream sandwiches is baking the cookies until they seem done in the oven. They keep cooking on the hot pan and, once frozen, that extra dryness turns into a brittle bite. Pull them when the tops are set and the edges are just firm. They should still look a little soft in the middle.
Size matters too. Tablepoon-sized cookies bake into a better sandwich ratio than full-size cookies because they freeze faster and hold the ice cream in a tighter border. A short freeze on the cookies after cooling also helps them firm up enough to assemble without crumbling when you press the top cookie down.
- Red velvet cake mix — This gives you a soft, tender cookie with enough structure to stay pleasant after freezing. Chocolate cake mix works the same way if you want a deeper cocoa note and less color contrast.
- Eggs and oil — They turn the dry mix into a dough that bakes up chewy instead of cakey. The oil is important here; swapping in melted butter changes the texture and usually makes the cookies spread more.
- Vanilla ice cream — Slightly softened ice cream spreads between the cookies without tearing them apart. Let it sit just until it gives when pressed; if it gets soupy, the sandwiches won’t freeze into clean layers.
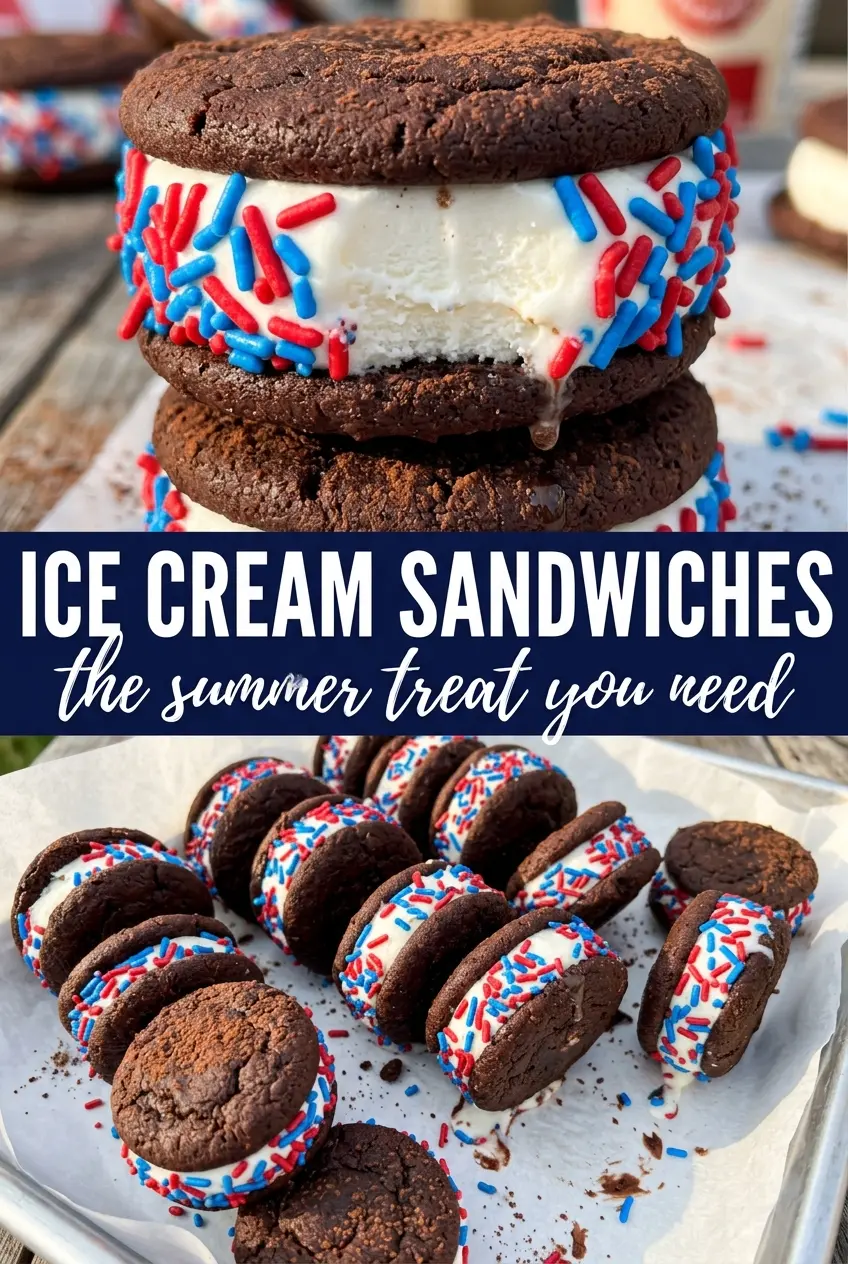
- Red and blue sprinkles — Use jimmies or a similar longer sprinkle if you want the edges to stick cleanly. Tiny nonpareils tend to roll off and make the coating patchy.
What Each Ingredient Is Actually Doing in This Frozen Treat
- Base ingredient (cream, yogurt, or fruit) — This determines the texture and richness. Cream makes it scoopable; yogurt makes it tangy; fruit makes it refreshing.
- Sweetener (sugar or honey) — This prevents the mixture from freezing rock-solid and creates a smooth texture. Too much and it won’t freeze; too little and it’s icy.
- Egg yolks (if using custard method) — These create richness and a silky texture. Tempering is important so they don’t scramble.
- Thickener (cornstarch, gelatin, or egg) — This prevents ice crystals from forming and keeps the texture smooth instead of grainy.
- Flavoring (vanilla, chocolate, fruit, or spices) — Use quality flavorings because they’re essential to the taste. Dilute-tasting ice cream comes from cheap extract.
- Stabilizers (gum, gelatin, or dairy) — These keep the ice cream from becoming icy during storage. They prevent large ice crystals from forming.
- Mix-ins (nuts, chunks, or swirls) — These add texture and interest. Freeze-stable chocolate works better than regular chocolate, which gets hard.
- Proper chilling and churning (the technique) — This incorporates air and prevents ice crystals. An ice cream maker makes a huge difference in texture.
How to Bake, Fill, and Freeze Without Crushing the Cookies
Mixing the Dough
Stir the cake mix, eggs, and oil until a thick dough forms and no dry pockets remain. It will look denser than cake batter, which is what you want. If the dough feels sticky, that’s normal; chilling isn’t required before scooping, but clean hands or a small cookie scoop help keep the portions even.
Baking the Mini Cookies
Scoop tablespoon-sized mounds onto parchment-lined baking sheets, then flatten each one to about 1/4-inch thick. Bake just until the cookies are set and the centers no longer look wet. If they brown much at the edges, they’ll taste dry once frozen, so err on the side of underbaked rather than overbaked.
Cooling and Firming Up
Let the cookies cool completely on a wire rack before they go into the freezer. Warm cookies melt the ice cream too quickly and create a slippery seam that never sets cleanly. A 30-minute freeze on the cooled cookies gives them the backbone they need for assembly without turning them hard.
Assembling the Sandwiches
Work with one or two sandwiches at a time so the ice cream stays manageable. Place the scoop on the flat side of one cookie, set the second cookie on top, and press just enough for the filling to reach the edges. If you press too hard, the ice cream squeezes out and the cookies can split.
Rolling and Final Freezing
Roll the exposed ice cream edge in red and blue sprinkles right after assembly, while the filling is still tacky. Wrap each sandwich in plastic wrap and freeze until solid, at least 2 hours. That last freeze is what turns them from a soft assembly project into a neat grab-and-go dessert.
Three Practical Ways to Change These Up Without Losing the Structure
Chocolate Cookie Version
Use a chocolate cake mix instead of red velvet for a deeper cocoa flavor and a darker cookie. The method stays the same, but the finished sandwiches read a little less festive and a little more classic ice cream parlor.
Dairy-Free Filling
Swap in a dairy-free vanilla ice cream with a firmer churned texture. Some soften faster than regular ice cream, so work in smaller batches and refreeze the sandwiches promptly after rolling them in sprinkles.
Make Them Ahead for a Party
These are a strong make-ahead dessert. Assemble and freeze them the day before, then keep them wrapped so the cookies stay soft and the ice cream doesn’t pick up freezer flavor. For a crowd, stack them in a single layer in a shallow container so the sprinkle edges don’t get crushed.
Smaller Bite-Size Sandwiches
Use half-tablespoon portions if you want more pieces for a dessert tray. The filling step gets faster, but the cookies bake in less time, so start checking them early. These are easier for kids and less messy in warm weather.
Storage and Reheating
- Refrigerator: Not recommended. These soften too quickly in the fridge and the ice cream layer turns messy.
- Freezer: Freeze wrapped sandwiches for up to 2 weeks for the best texture. After that, the cookies can start to dry out and the sprinkles lose some of their color punch.
- Reheating: No reheating needed. Let a sandwich sit at room temperature for 3 to 5 minutes before serving so the cookie softens just enough to bite without the ice cream slipping out.
Answers to the Questions Worth Asking
Patriotic Mini Ice Cream Sandwiches
Ingredients
Equipment
Method
- Preheat the oven to 350°F and line baking sheets with parchment paper.
- Mix the cake mix, eggs, and vegetable oil until a thick dough forms.
- Scoop tablespoon-sized balls onto the baking sheets, flatten to about 1/4-inch thick circles, and bake for 8–10 minutes until set; do not overbake.
- Let the cookies cool completely on a wire rack, then freeze for 30 minutes.
- Working quickly, place a scoop of slightly softened vanilla ice cream on the flat side of one cookie and press another cookie on top to sandwich.
- Roll the exposed ice cream edge in red and blue sprinkles so you get a festive border.
- Wrap each mini sandwich in plastic wrap and freeze for at least 2 hours until solid before serving.