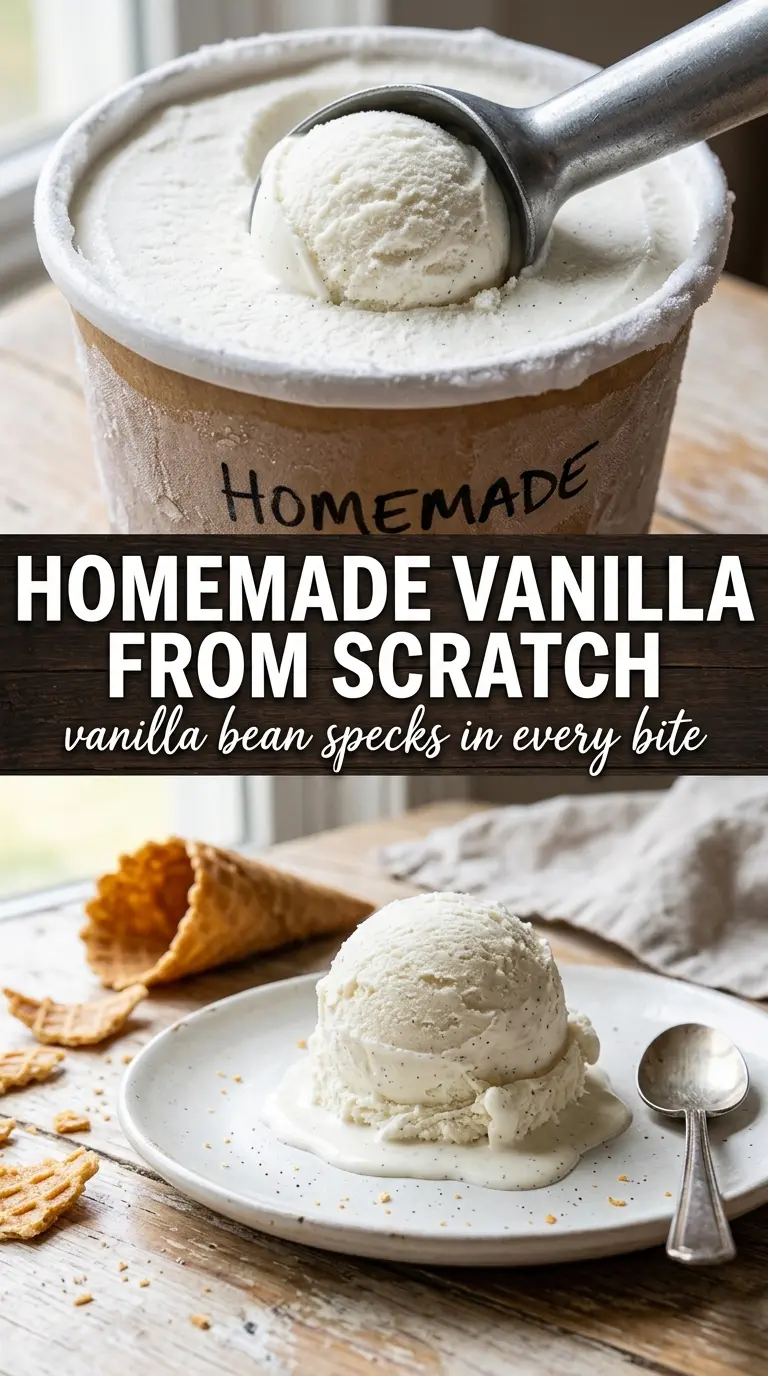
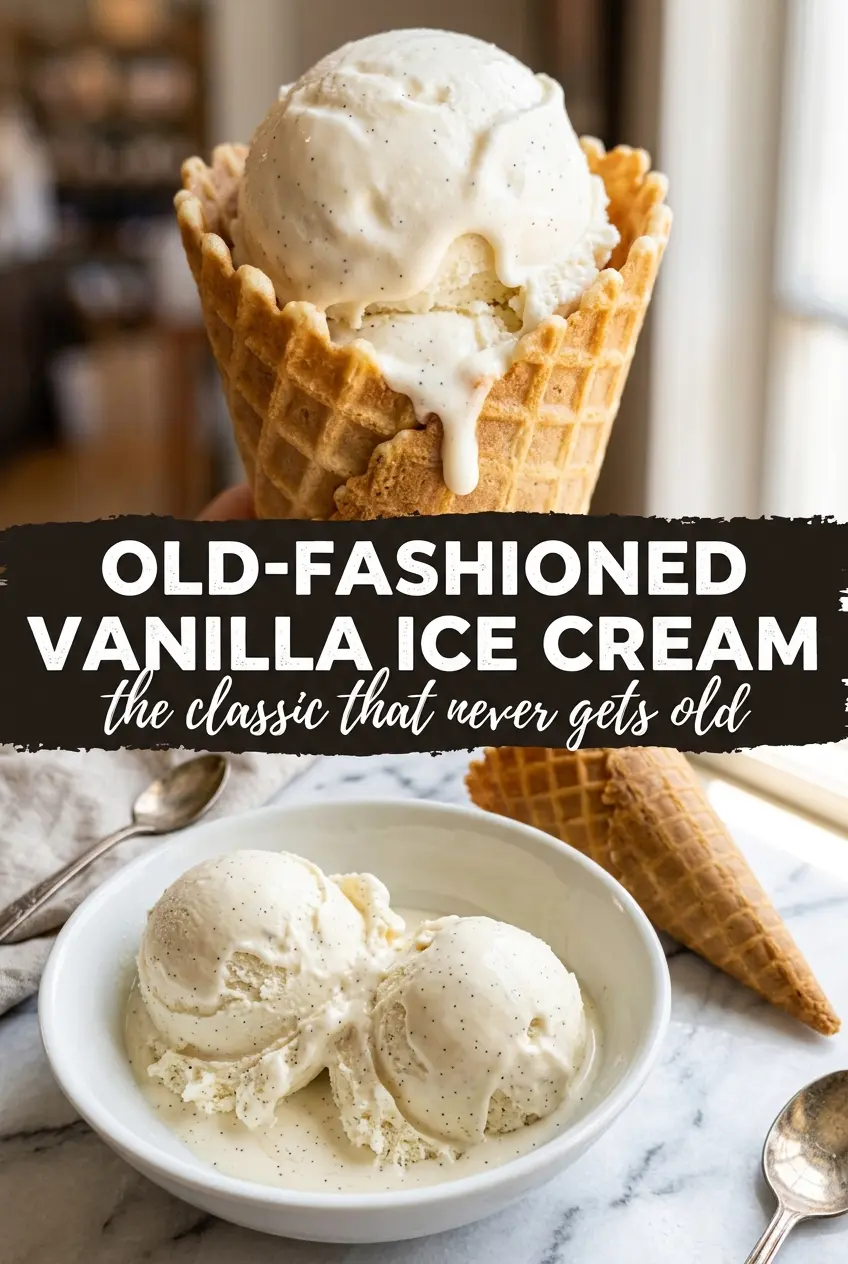
Pale, creamy vanilla ice cream made the old-fashioned way has a depth that store-bought cartons just can’t touch. The custard base gives it a dense, velvety scoop that melts slowly on the spoon, with vanilla running all the way through instead of sitting on top like an afterthought. When it’s done right, the flavor is clean, rich, and unmistakably vanilla, with those tiny bean specks telling you this is the real thing.
What makes this version work is the balance of egg yolks, cream, and whole milk. The yolks add body and that classic custard texture, while the milk keeps it from turning heavy or greasy. The vanilla bean gets steeped in the dairy before anything else happens, which pulls out a deeper flavor than stirring extract in at the end alone. The custard only needs to cook until it coats the back of a spoon; if you push it too far, it turns grainy instead of silky.
Below, I’ve included the part that matters most if you’ve ever had homemade ice cream turn icy or flat: how to keep the custard smooth, how to churn it for the best texture, and what to do if you want to use vanilla extract instead of a bean.
The custard came out silky and the vanilla bean flavor was spot on. I chilled it overnight and the churned texture was dense and scoopable, not icy at all.
Save this old-fashioned vanilla ice cream for the nights when you want a custard-rich scoop with real vanilla bean specks and a slow-melting, creamy finish.
The Custard Stage That Keeps Ice Cream Creamy Instead of Icy
The difference between smooth homemade ice cream and a tray of hard, icy disappointment starts with the custard. Egg yolks don’t just add richness; they help the base emulsify and freeze with a finer texture. The mistake most people make is rushing the heat. If the custard cooks too fast, the eggs tighten and you end up with little bits of cooked yolk instead of a glossy base.
Steeping the vanilla bean in the warm dairy before tempering the yolks matters more than it sounds. That pause pulls flavor into the cream and milk, so the vanilla tastes rounded instead of sharp. Chilling the custard thoroughly before churning matters just as much, because an ice cream maker can’t compensate for a warm base. Warm custard means slower freezing and bigger ice crystals.
- Egg yolks — These are doing the heavy lifting for texture. They give the custard its body and keep the finished ice cream from eating thin or flaky.
- Heavy cream — This brings the lush, full-fat richness you want in a classic vanilla. There isn’t a real substitute if you want the same dense, scoopable result.
- Whole milk — The milk keeps the base from feeling overly heavy. You can swap in 2% in a pinch, but the texture will be a little less plush and a touch icier.
- Vanilla bean — This gives the deepest vanilla flavor and the signature specks. If you use extract instead, stir it in after cooking and straining so it doesn’t lose aroma in the heat.
What Each Ingredient Is Actually Doing in This Frozen Treat
- Base ingredient (cream, yogurt, or fruit) — This determines the texture and richness. Cream makes it scoopable; yogurt makes it tangy; fruit makes it refreshing.
- Sweetener (sugar or honey) — This prevents the mixture from freezing rock-solid and creates a smooth texture. Too much and it won’t freeze; too little and it’s icy.
- Egg yolks (if using custard method) — These create richness and a silky texture. Tempering is important so they don’t scramble.
- Thickener (cornstarch, gelatin, or egg) — This prevents ice crystals from forming and keeps the texture smooth instead of grainy.
- Flavoring (vanilla, chocolate, fruit, or spices) — Use quality flavorings because they’re essential to the taste. Dilute-tasting ice cream comes from cheap extract.
- Stabilizers (gum, gelatin, or dairy) — These keep the ice cream from becoming icy during storage. They prevent large ice crystals from forming.
- Mix-ins (nuts, chunks, or swirls) — These add texture and interest. Freeze-stable chocolate works better than regular chocolate, which gets hard.
- Proper chilling and churning (the technique) — This incorporates air and prevents ice crystals. An ice cream maker makes a huge difference in texture.
Building the Vanilla Custard Without Scrambling the Eggs
Steeping the Vanilla
Split the vanilla bean, scrape the seeds, and add both the seeds and the pod to the cream and milk in the saucepan. Heat the mixture over medium until it’s steaming and just starting to quiver at the edges, then take it off the heat and let it steep for 15 minutes. That resting time pulls more vanilla into the dairy, which gives the custard a fuller flavor. If you boil it hard, you can scorch the milk and mute the vanilla instead of deepening it.
Tempering the Yolks
Whisk the yolks and sugar until the mixture looks pale and thicker than it started. Then add the warm dairy in a slow stream while whisking constantly. That gradual addition raises the temperature of the yolks without shocking them, which is what keeps the eggs smooth instead of scrambled. If you dump the dairy in all at once, the yolks can seize in little curds before they ever reach the saucepan.
Cooking to the Spoon-Coating Point
Return everything to the saucepan and cook over medium-low, stirring constantly and scraping the bottom and corners of the pan. Stop when the custard thickens enough to coat the back of a spoon and reaches about 175°F. It should look glossy and leave a clear track when you drag a finger through the spoon. If it starts steaming heavily or bubbling, the heat is too high and the eggs are getting pushed past their sweet spot.
Cooling Before Churning
Strain the custard through a fine-mesh sieve into a clean bowl, then stir in the salt and set the bowl over an ice bath. This step catches any tiny bits of cooked egg and stops the cooking fast, which keeps the base silky. Chill it in the refrigerator for at least 4 hours, or overnight if you can. A fully cold base churns faster and freezes with a cleaner texture, while a lukewarm one tends to come out loose and icy.
How to Adjust This Vanilla Ice Cream for Different Kitchens and Freezers
Vanilla Extract Instead of a Bean
Use 2 teaspoons pure vanilla extract if you don’t have a bean. Stir it in after the custard is cooked, strained, and slightly cooled so the aroma stays bright. You’ll lose the visible specks and some of the layered depth, but the ice cream will still taste clean and classic.
Lighter Texture With More Milk
You can replace up to half of the heavy cream with more whole milk if you want a lighter finish. The ice cream will still churn fine, but it won’t have the same dense, almost custard-like body, and it will freeze a little harder. I wouldn’t go leaner than that unless you’re willing to trade creaminess for a lighter bite.
Dairy-Free Version
This recipe doesn’t convert cleanly to dairy-free without changing the texture quite a bit, because the custard depends on both milk fat and egg yolks. A full-fat canned coconut milk base can work, but it will taste like coconut and freeze softer. If you go that route, keep the same custard method and chill it thoroughly before churning.
Storage and Reheating
- Refrigerator: The custard base can be refrigerated for up to 2 days before churning. Keep it covered so it doesn’t pick up fridge odors.
- Freezer: The churned ice cream keeps for about 2 weeks with the best texture. After that, it can start to ice over at the edges.
- Reheating: There’s no reheating here, but for the best scoop, let the container sit at room temperature for 5 to 10 minutes before serving. If you try to force it with a hot spoon or microwave, the edges melt before the center loosens.
Questions I Get Asked About This Recipe
Old-Fashioned Homemade Vanilla Ice Cream
Ingredients
Equipment
Method
- Split the vanilla bean and scrape the seeds, then add both the pod and seeds to the heavy cream and whole milk in a saucepan.
- Heat over medium heat until steaming and just beginning to simmer, then remove from heat and steep for 15 minutes; remove the vanilla pod after steeping.
- Whisk the egg yolks and granulated sugar until pale and thick, about 1–2 minutes.
- Slowly pour the warm cream into the yolks while whisking constantly to temper the eggs.
- Return the mixture to the saucepan and cook over medium-low heat, stirring constantly, until thick enough to coat the back of a spoon at 175°F.
- Strain the custard through a fine mesh sieve, stir in the salt, and cool it over an ice bath until no longer hot.
- Refrigerate the custard at least 4 hours or overnight until very cold.
- Churn in an ice cream maker according to the manufacturer’s directions, then transfer to a freezer-safe container and freeze until firm.