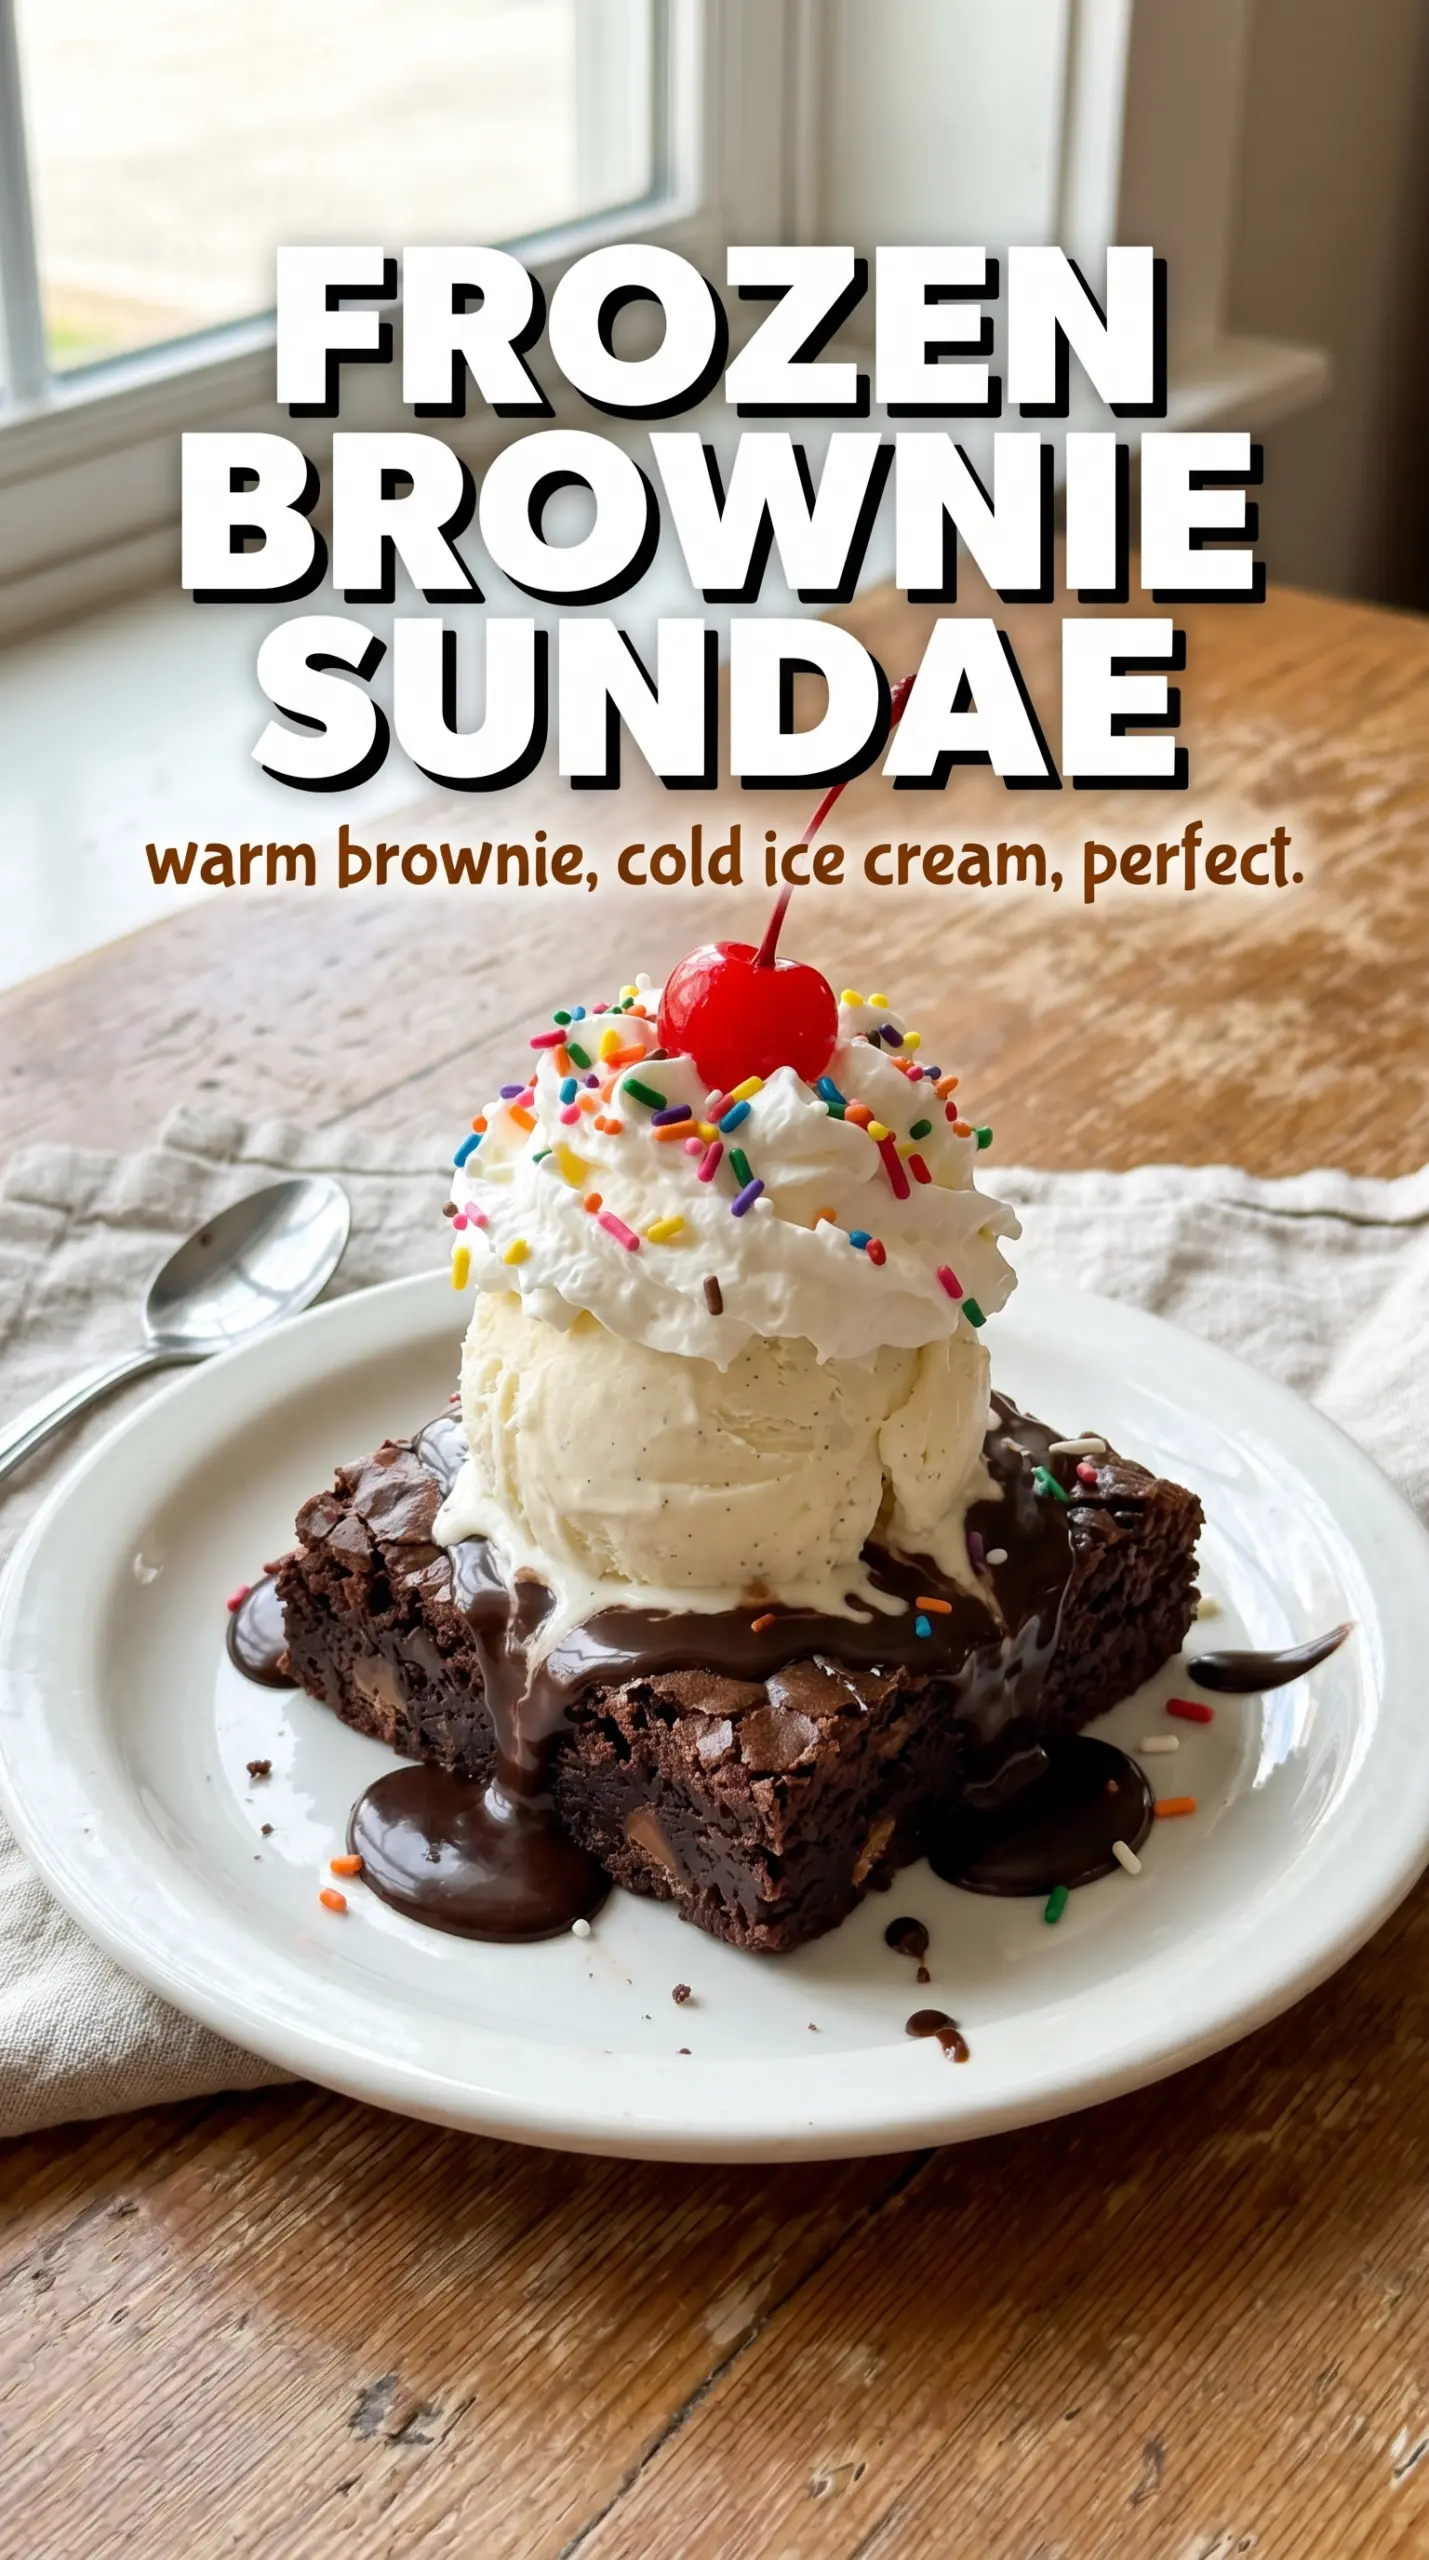
Frozen brownie sundae bars hit that sweet spot between nostalgic and smart: fudgy brownie on the bottom, a thick layer of vanilla ice cream in the middle, and ribbons of hot fudge that freeze into a clean, sliceable dessert. The first bite gives you cold creaminess, dense chocolate, and just enough sauce to keep each square tasting like a real sundae instead of a block of ice cream on a crust.
The trick is starting with brownies that are completely cool and fully set. Warm brownies melt the ice cream from underneath and turn the whole pan slushy before it ever firms up. Softened ice cream matters here too, because it spreads without tearing the brownie layer. Once the pan goes back into the freezer, the layers lock together and cut into neat squares instead of crumbling apart.
Below, I’ve included the little details that make this work for a crowd, plus the best way to serve it so the toppings stay distinct and the slices hold their shape.
The brownie stayed fudgy after freezing, and the fudge swirled through the ice cream instead of turning icy. I cut it after 10 minutes on the counter and it came out in perfect squares.
Like this frozen brownie sundae? Save it for the next time you need a make-ahead dessert with fudgy layers and hot fudge swirls that slice cleanly.
The Part That Keeps the Ice Cream Layer Smooth Instead of Icy
Most frozen ice cream desserts fail for one of two reasons: the base is warm, or the ice cream is too hard to spread. This one avoids both problems if you let the brownies cool all the way and soften the ice cream just enough that it moves across the pan without melting into a puddle. You want the ice cream pliable, not soupy.
The hot fudge also matters more than people think. Warm it until it pours in thick ribbons, then swirl it gently so it settles into the top of the ice cream without digging all the way down into the brownie layer. That keeps each bite layered instead of muddy.
- Brownies — A sturdy, fudgy brownie base gives you clean squares and enough structure to support the ice cream. Boxed mix works fine here, and homemade brownies work too if they bake up dense rather than cakey.
- Vanilla ice cream — Use a full-fat ice cream with a creamy texture. Lower-fat versions freeze harder and can turn crumbly when you slice the dessert. Let it soften on the counter until a spoon presses in easily.
- Hot fudge sauce — Thick hot fudge freezes into those rich ribbons that make the sundae taste complete. If the sauce is too thick to drizzle, warm it briefly until it loosens; if it’s thin and runny, it won’t stay where you swirl it.
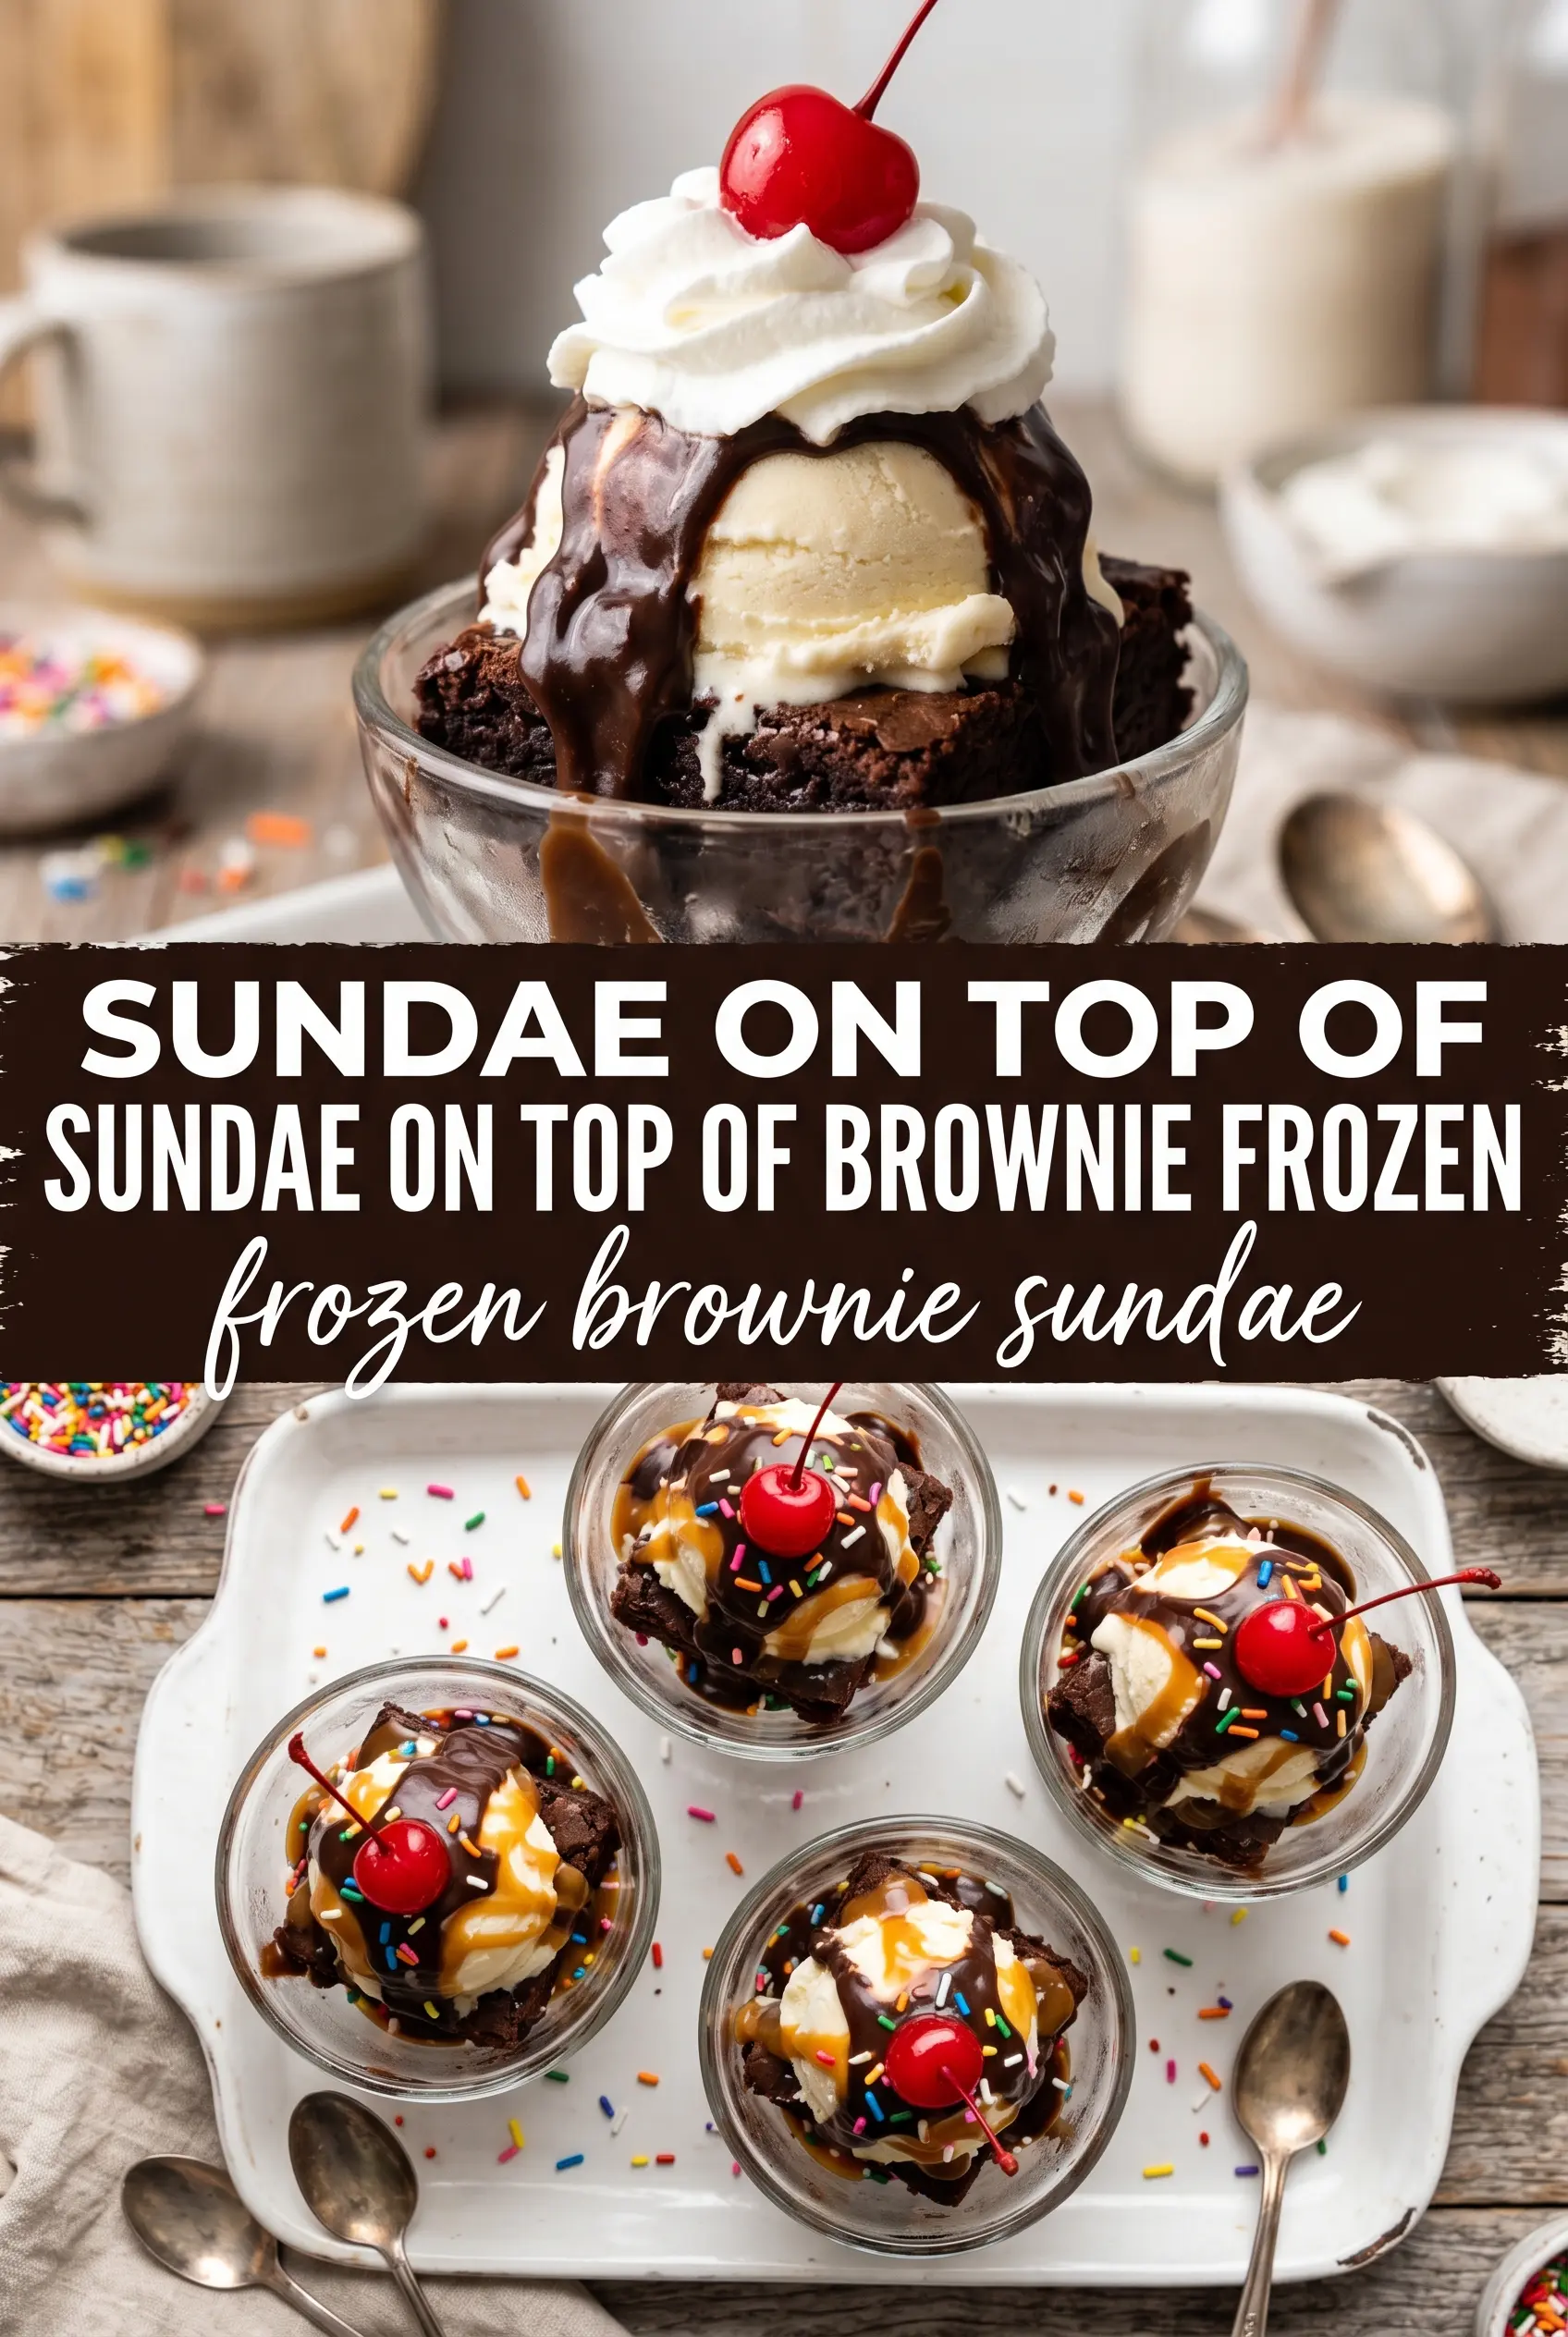
- Whipped cream and toppings — These stay off until serving so they keep their shape and give the dessert that classic sundae finish. Maraschino cherries and sprinkles are more than decoration here; they add the hit of sweetness and crunch that makes each portion feel finished.
What Each Ingredient Is Actually Doing in This Peach Recipe
- Fresh peaches (the star ingredient) — Ripe peaches are essential. Their quality directly impacts the final dish.
- Sugar (the sweetness and texture) — This enhances peach flavor without overpowering it. Adjust based on peach ripeness.
- Lemon juice (the acid and brightness) — This prevents the dish from tasting cloying. It brings out peach flavor.
- Butter or oil (the richness) — This carries flavors and creates satisfying texture. Don’t skip this ingredient.
- Spices (cinnamon, ginger, or nutmeg) — These warm up the peach flavor without overpowering it. Use sparingly.
- Texture element (nuts, crumble, or crispy topping) — This prevents the dish from being monolithic. Add right before serving.
- Optional thickener (cornstarch or flour) — This creates the right texture consistency. Don’t skip if a thick filling is needed.
- Finishing touch (fresh herbs or garnish) — These add aroma and visual appeal. Keep them fresh for maximum impact.
Building the Layers So the Dessert Slices Cleanly
Start with a fully cooled brownie pan
Bake the brownies in a 9×13 pan and let them cool completely before anything else touches the top. If the center is even slightly warm, the ice cream will start melting from below and the finished dessert will turn soft at the base. A fully cooled brownie layer should feel firm to the touch and release cleanly from the pan.
Spread the ice cream before it gets too soft
Let the vanilla ice cream sit out just until it’s spreadable, then scoop it onto the brownies and press it into an even layer. Work quickly and use the back of a spoon or offset spatula so you don’t gouge up the brownie underneath. If the ice cream starts to puddle at the edges, it’s gone too far and the texture will be less smooth after freezing.
Ribbon the fudge across the top
Drizzle the warmed hot fudge over the ice cream in thick lines, then swirl lightly with a spoon. Don’t overmix it. You want visible pockets of fudge, not a uniform brown layer, because the contrast is part of what makes each bite taste like a sundae. Transfer the pan to the freezer right away so the swirls set before they sink.
Freeze until the center is firm all the way through
Give the pan at least 4 hours in the freezer, and longer if your freezer runs warm or the dessert is deep in the pan. It should feel completely solid in the center before you try to cut it. If you rush this part, the squares will slump and the layers will smear when you slice them.
How to Adapt the Sundae for Different Crowds and Diets
Gluten-Free Brownie Base
Use a gluten-free brownie mix or a homemade GF brownie recipe that bakes up dense and chewy. The topping layers don’t need any changes. Just be careful not to overbake the brownie base, since gluten-free batters can dry out faster around the edges.
Dairy-Free Version
Use a dairy-free brownie mix or homemade brownies made with oil, then swap in a creamy nondairy vanilla ice cream and a dairy-free fudge sauce. The flavor stays close, but the texture can freeze a little harder, so let the pan sit at room temperature for 10 minutes before slicing.
Making It Ahead for a Party
This dessert is built for advance prep. Assemble it the day before, freeze it overnight, and add whipped cream, cherries, and sprinkles only right before serving. That keeps the top looking fresh and keeps the whipped cream from melting into the fudge layer.
Storage and Reheating
- Refrigerator: Not recommended; it softens too quickly and the layers lose their clean shape.
- Freezer: Store covered for up to 1 week for the best texture. After that, the ice cream can start to pick up freezer frost.
- Reheating: No reheating needed. For the easiest cutting, let the pan sit at room temperature for 5 to 10 minutes before slicing, then use a sharp knife dipped in hot water.
Answers to the Questions Worth Asking
Frozen Brownie Sundae
Ingredients
Equipment
Method
- Bake brownies in a 9x13 pan according to the package directions or your recipe, until a tester comes out with moist crumbs. Cool completely so the ice cream will spread without melting.
- Spread softened vanilla ice cream in a thick, even layer over the cooled brownies. Smooth the surface so it freezes into neat scoops.
- Drizzle warmed hot fudge sauce in thick ribbons over the ice cream and swirl gently. Keep the ribbons visible so each bite shows dark fudge streaks.
- Freeze for 4 hours, until completely firm to the touch and scoopable straight from the freezer. The top should feel solid rather than soft.
- Scoop portions with an ice cream scoop for neat rectangles or squares. Use quick scoops so the layers stay distinct.
- Top each portion with whipped cream and an extra drizzle of hot fudge sauce. Add rainbow sprinkles and a maraschino cherry to finish.