Toasted bread, melted cheese, and smoky campfire heat turn a simple sandwich into something people remember. The buttered crust gets crisp and deeply golden while the center stays soft enough to hold the ham, turkey, and cheese together without collapsing. It’s the kind of meal that feels low-effort in the best way, but still tastes like you paid attention.
The trick is building it with the butter on the outside and the cheese tucked against the fillings, not the bread. That gives you a cleaner melt and keeps the sandwich from drying out before the cheese loosens. Medium heat matters here too. A hot grate can scorch the bread before the middle has time to warm through, and that’s how you end up with burnt edges and stubborn cheese.
Below, I’ll walk through the part that matters most: how to get that campfire grill mark without losing the soft, melty center. I’ve also included a few smart variations and the easiest way to handle these if you’re making them for a group around the fire.
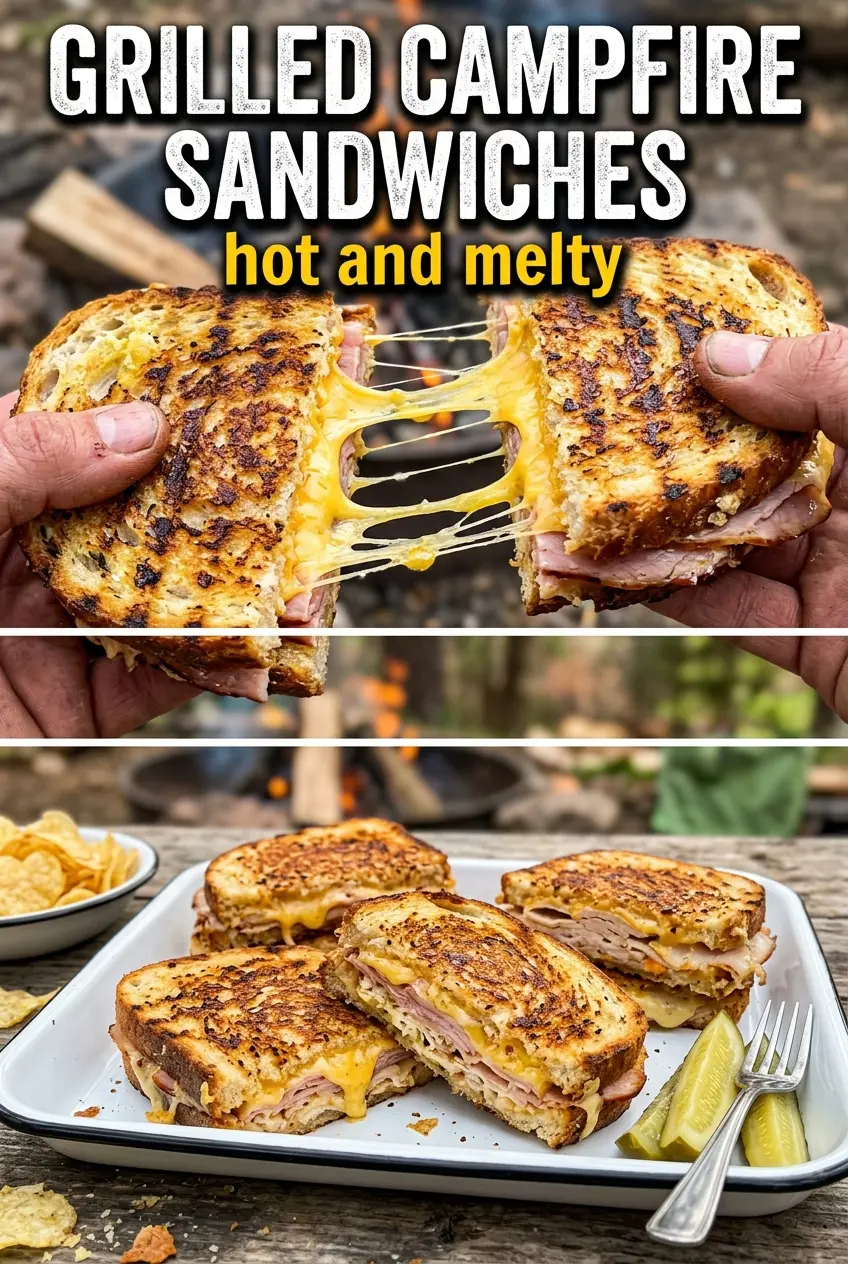
The bread got crisp without burning and the cheese melted all the way through by the time the second side was done. We made these over the fire after hiking and everyone ate them faster than I could cut them.
Love the smoky crust and melty center of this campfire sandwich? Save it to Pinterest for your next outdoor lunch around the fire.
The Part Most People Get Wrong on a Campfire Sandwich
The biggest mistake is treating the fire like a stovetop. Campfire heat moves in waves, and the grate often has hot spots that will char bread before the cheese has a chance to melt. Medium heat and a steady hand matter more than constant flipping. If the bread is browning too fast, move the sandwich to the cooler edge of the grate instead of fighting the flame.
Butter on the outside isn’t just for flavor. It creates a protective layer that helps the bread toast evenly and keeps the sandwich from sticking to the grate. The cheese should sit directly against the fillings so it melts into the ham and turkey and helps hold the sandwich together once you slice it.
What Each Ingredient Is Actually Doing in This Sandwich
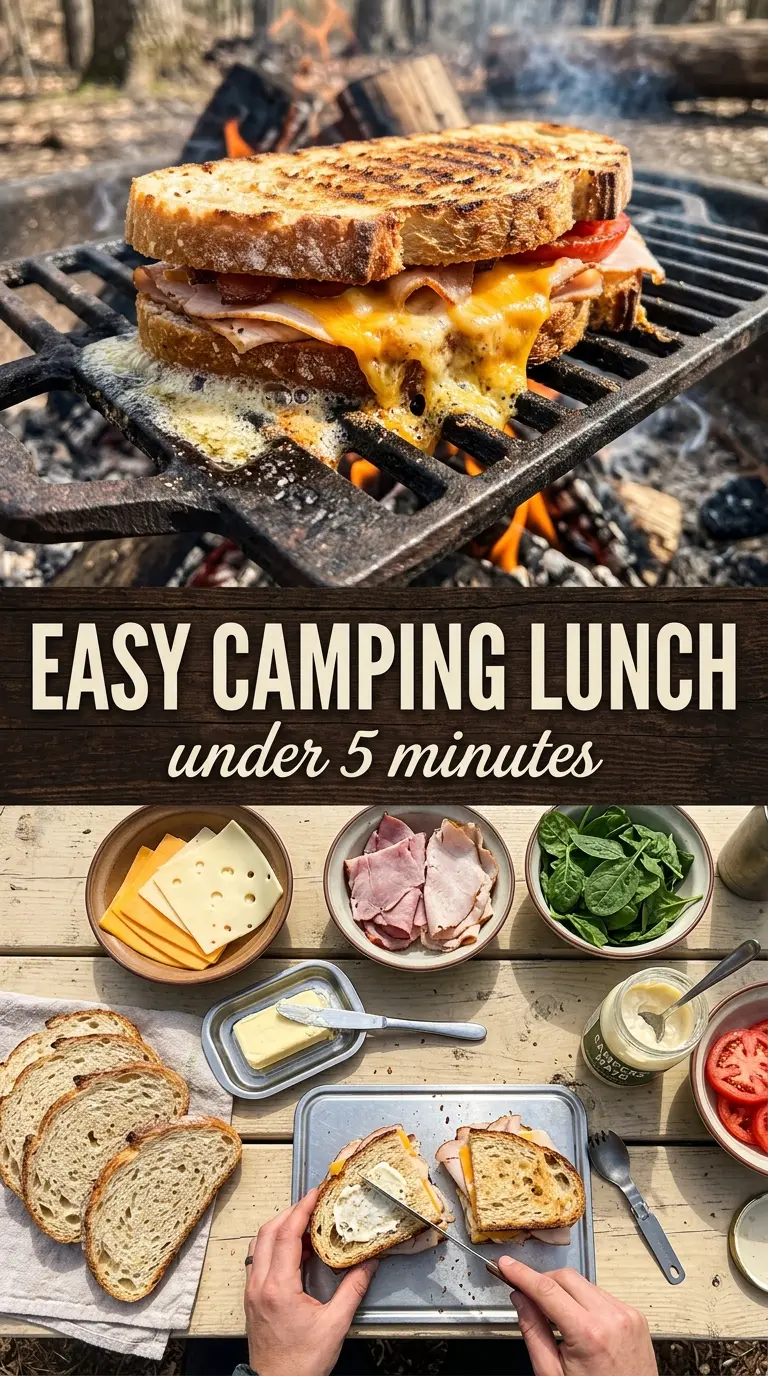
- Bread — Use sturdy sandwich bread that can hold up to butter and heat. Thin, soft bread can tear on the grate or go floppy before it crisps. A thicker sliced white or country-style bread gives you the best balance of crunch and structure.
- Deli ham and turkey — The mix gives the sandwich enough savory depth without making it heavy. Sliced deli meat warms quickly, which is important because the fire won’t stay on one exact temperature long enough for a thick filling to cook evenly.
- Cheddar or Swiss cheese — This is the glue. Cheddar gives a sharper bite, while Swiss melts smoothly and adds a little nuttiness. Pre-sliced cheese works fine here, but avoid very oily shredded blends that can leak out before they fully melt.
- Butter — Softened butter spreads more evenly than cold butter and helps the bread toast instead of dry out. If you’re cooking for a crowd, butter the bread before you head out so assembly at the fire is faster and less messy.
- Mustard and mayo — These are optional, but they add moisture and a little tang. Use a thin layer so the bread doesn’t slip or steam; too much spread can make the sandwich soggy before it hits the grate.
Building the Melt Before the Bread Burns
Butter the Outside First
Spread softened butter on one side of each bread slice so the butter is on the outside when you build the sandwich. That’s the side that hits the grate and turns golden. If the butter is patchy or clumped, the bread will toast unevenly and you’ll get pale spots instead of an even crust.
Stack for a Clean Melt
Assemble each sandwich with bread, cheese, ham, turkey, cheese, and bread, with the buttered sides facing out. The cheese on both sides of the meat helps it melt into a single layer instead of sliding out. If you pile the meat too close to the edges, it can leak out and catch on the grate.
Grill Over Steady Heat
Set the sandwich on a campfire grate over medium heat and leave it alone long enough for the first side to brown. Four to five minutes per side is the usual window, but fire intensity changes, so watch the color and listen for a gentle sizzle rather than chasing the clock. If the bread darkens too fast, raise it, move it, or give the fire a minute to calm down.
Cut While It’s Still Hot
Take the sandwich off the grate when the bread is deep golden and the cheese is visibly melted at the seams. Let it sit for a minute, then cut it in half so the filling settles instead of spilling out immediately. If you wait too long, the cheese firms up and you lose that soft pull when you slice it.
How to Adapt This Campfire Sandwich for Different Eaters
Gluten-Free Bread Swap
Use a sturdy gluten-free sandwich bread with enough structure to survive buttering and grate heat. Softer GF breads can crumble, so toast them a little more gently and use a spatula when flipping. The flavor stays the same, but the texture will be a little more delicate.
Dairy-Free Version
Swap in a dairy-free butter and a meltable plant-based cheese slice. Choose a brand that’s designed to soften under heat, not one that stays rubbery. You’ll still get the crisp exterior, but the melt will be a little less stretchy than the original.
Meatless Campfire Sandwich
Leave out the ham and turkey and add sliced tomato, sautéed mushrooms, or thin roasted peppers. The sandwich will be softer and a little juicier, so keep the fillings moderate and use a cheese that melts well. This version tastes best when the bread is extra crisp to balance the softer center.
Camp Kitchen Make-Ahead Prep
Butter the bread and stack the sandwiches at home, then wrap them tightly in parchment or foil until you’re ready to cook. Keep them chilled if they’ll sit for more than an hour. This saves time at the fire, but don’t assemble them too far ahead or the bread can soften around the fillings.
Storage and Reheating
- Refrigerator: Store leftovers for up to 2 days wrapped tightly. The bread softens as it sits, so it won’t have the same crackly crust the next day.
- Freezer: Freezing isn’t ideal. The bread and cheese both change texture after thawing, and the sandwich loses the fresh-grilled finish that makes it worth making.
- Reheating: Warm it in a skillet over low heat or on a grate away from direct flame until the bread crisps again and the cheese loosens. High heat will burn the outside before the center heats through.
Questions I Get Asked About This Recipe
Campfire Sandwich
Ingredients
Equipment
Method
- Butter one side of each bread slice, creating a golden, crisp surface. If using, spread mustard and/or mayo on the unbuttered side for added flavor.
- Build sandwiches with the butter-side out: bread, cheese, ham, turkey, cheese, bread. Press lightly so the fillings stay together during grilling.
- Place sandwiches on a campfire grate over medium heat. Grill with the lid open if you’re using one, so you can watch the bread color.
- Grill for 4-5 minutes on the first side until the bread is golden and the cheese starts to melt. Look for defined grill marks where the grate contacts the bread.
- Flip the sandwiches and grill for 4-5 minutes until both sides are golden and the cheese fully melts. The interior should look gooey when cut.
- Remove sandwiches from the heat, cut in half, and serve hot. Serve immediately so the cheese stays melted and stretchy.


