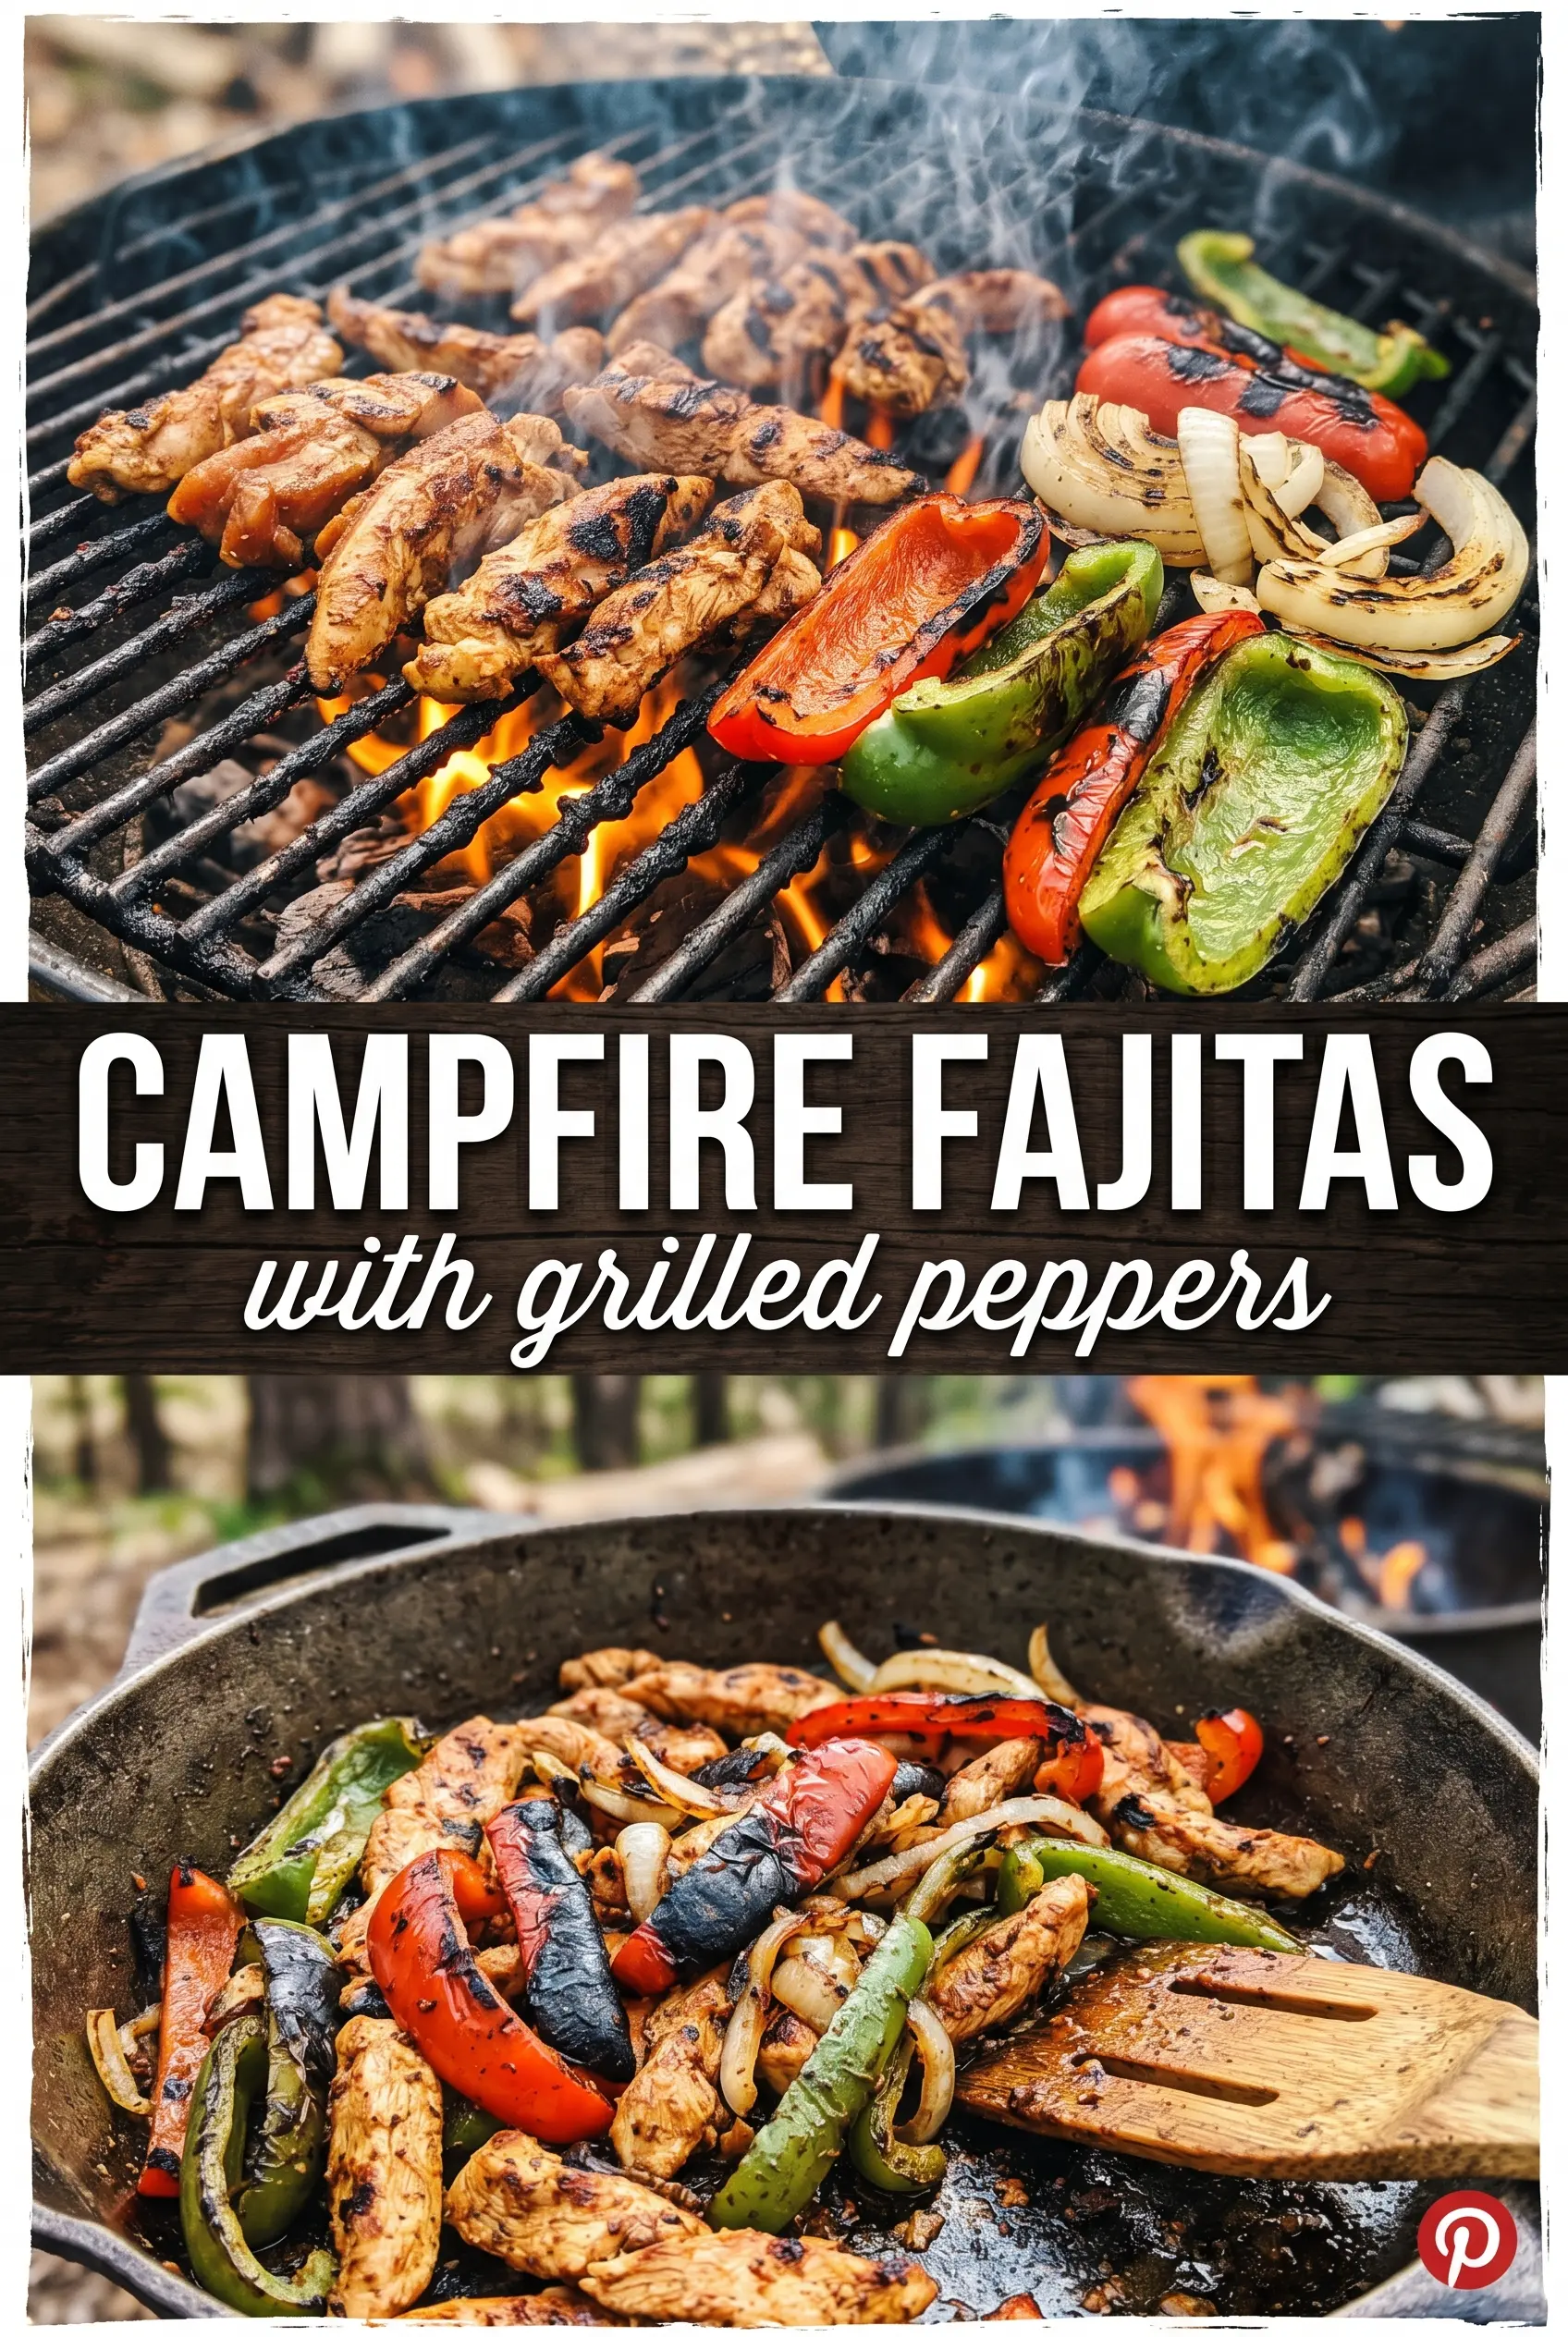
Sizzling campfire fajitas are the kind of dinner that make everyone drift toward the fire before you even call them. The meat picks up a smoky edge in the skillet, the peppers soften just enough to keep their snap, and the onions turn sweet around the charred corners. Piled into warm tortillas with a squeeze of lime, the whole thing tastes bigger than the simple ingredient list suggests.
What makes this version work is the order. The meat goes into a hot cast iron skillet first so it browns instead of steaming, then it comes out while the peppers and onions cook in the seasoned oil left behind. That keeps the vegetables bright and lets them pick up the browned bits from the pan. If you crowd the skillet, everything turns gray and soft, so it’s better to cook in a couple of batches than rush the process.
Below, I’ll walk you through the small campfire details that matter most: how hot the skillet should be, how to get that light char without burning the vegetables, and how to keep the tortillas warm while the filling finishes.
The peppers got those little charred edges and the chicken stayed juicy instead of drying out. We used the leftover filling for breakfast tacos the next morning and it was even better.
Save these campfire fajitas for the night you want a cast-iron dinner with smoky meat, sweet peppers, and easy cleanup.
The Trick to Fajitas That Sear Instead of Steam Over a Fire
The biggest mistake with fajitas over campfire heat is starting with a skillet that isn’t hot enough. Cast iron needs time over the coals or grate before the meat goes in, otherwise the juices spill out and pool in the pan. Once that happens, you’re braising, not searing. The other trap is loading the pan too full. Thin slices cook fast, but they still need room for direct contact with the metal.
That first hot sear does two jobs at once: it builds flavor on the meat and leaves behind seasoned drippings for the peppers and onions. When you pull the meat out, don’t scrape the pan clean. Those browned bits are the base of the whole dish.
What Each Ingredient Is Actually Doing in These Fajitas

- Chicken breast or steak — Both work, but they behave differently. Chicken breast stays lean and takes the seasoning cleanly, while steak gives you a deeper beefy bite and usually a little more browning. Slice it thin so it cooks before the vegetables turn limp.
- Bell peppers — Use a mix of colors for sweetness and visual contrast. The key is cutting them into even strips so they soften at the same pace. A thicker cut stays snappy longer, which is good if you like a little crunch.
- Onions — They sweeten as they cook and balance the smoky seasoning. Yellow onions are the most flexible choice, but white onions work well too if that’s what you’ve got.
- Fajita seasoning — This is carrying the cumin, garlic, chile, and salt, so a good blend matters more than most people think. If yours is salt-heavy, use a little less and add more at the end only if the filling needs it.
- Cast iron and oil — The skillet is part of the ingredient list here. It holds heat through the fire and gives you the charred edges you can’t get from a thin pan. A neutral oil with a higher smoke point keeps the seasoning from burning before the meat hits the heat.
The 20 Minutes That Matter Most at the Fire
Heating the Skillet Properly
Set the cast iron skillet over steady campfire heat and let it get fully hot before anything goes in. A drop of oil should shimmer right away and move easily across the surface. If the fire is weak, wait a little longer instead of adding the meat too soon. A lukewarm pan is the fastest way to end up with gray, wet fajitas.
Cooking the Meat First
Add the seasoned meat to the hot oil in a single layer. You want to hear an immediate sizzle, not a soft hiss. Let it brown before stirring so it can pick up color on the bottom; constant stirring steals that crust. Once it’s cooked through, pull it out so it doesn’t overcook while the vegetables finish.
Softening the Peppers and Onions
Add the peppers and onions to the same skillet and cook until the onions turn translucent at the edges and the peppers soften with a few charred spots. Stir often enough to keep the vegetables moving, but not so much that they steam in their own moisture. If the pan looks dry, add a small splash of oil instead of turning up the fire and scorching the onions.
Bringing Everything Back Together
Return the meat to the skillet and toss it with the vegetables for a minute or two, just long enough for the flavors to come back together. This last step warms everything through without drying out the meat. Warm the tortillas over the fire separately so they stay soft and pliable, then serve the filling right away with your toppings and lime.
How to Stretch Campfire Fajitas for Different Crowds and Diets
Make It Dairy-Free Without Losing the Good Stuff
Skip the sour cream and cheese, then lean on guacamole, salsa, and a bigger squeeze of lime. The fajitas themselves stay the same, and you’ll still get plenty of richness from the meat and oil. If you want extra creaminess, a dairy-free cashew sauce works better than trying to mimic sour cream with something thin.
Use Steak for a Deeper Campfire Bite
Flank, skirt, or sirloin all work well if you slice them thin across the grain. Steak browns faster than chicken and tastes a little richer, but it also dries out if you leave it in the pan too long. Pull it as soon as it’s browned, then let the vegetables finish the rest of the cooking.
Turn It Into a Vegetarian Skillet
Swap the meat for sliced portobello mushrooms, zucchini, and extra bell peppers. Mushrooms need a hot pan and enough space to release their moisture, or they’ll go soggy instead of browned. The result is lighter, but the same fajita seasoning and charred vegetables still carry the whole dish.
Storage and Reheating
- Refrigerator: Store the filling in an airtight container for up to 4 days. The peppers soften a bit more as they sit, but the flavor holds up well.
- Freezer: The cooked filling freezes well for up to 2 months. Cool it completely first, then freeze in a flat bag or container so it thaws evenly.
- Reheating: Warm the filling in a skillet over medium heat with a small splash of oil or water. The common mistake is microwaving it until the meat turns dry and the peppers collapse.
Answers to the Questions Worth Asking
Campfire Fajitas
Ingredients
Equipment
Method
- Heat the oil in a large cast iron skillet over the campfire until shimmering.
- Spread the sliced meat in the hot skillet and sprinkle with fajita seasoning.
- Cook the meat for 8-10 minutes, stirring occasionally, until browned and cooked through, then remove and set aside.
- Add the peppers and onions to the skillet and cook for 8-10 minutes until tender and slightly charred.
- Return the cooked meat to the skillet and toss together until evenly mixed.
- Warm the flour tortillas over the fire until hot and pliable, then serve fajita mixture with tortillas and desired toppings.


