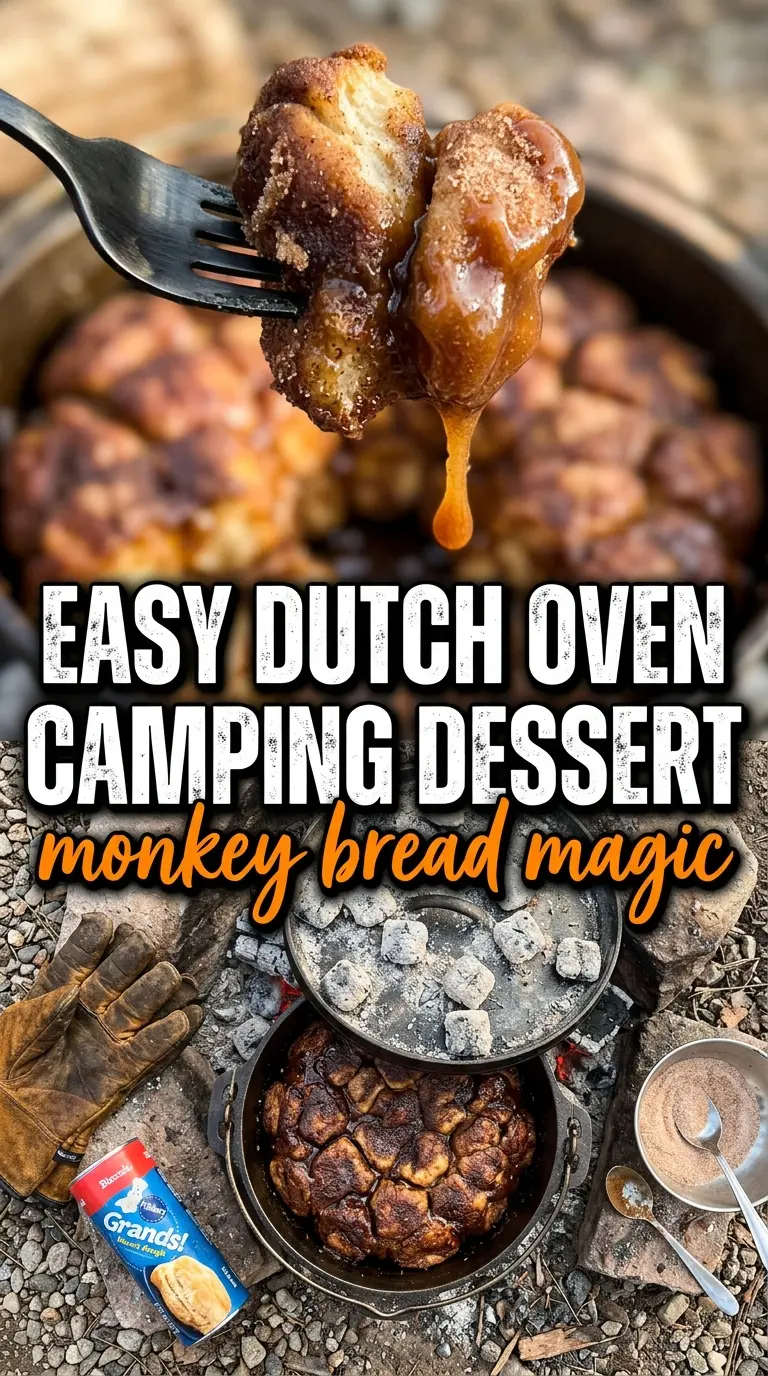
Golden, sticky campfire monkey bread is the kind of dessert that disappears fast because every piece pulls away soft from the middle and caramelized around the edges. The cinnamon sugar sinks into the biscuit dough as it bakes, and the butter-brown sugar mixture turns into a glossy glaze that clings to every nook and cranny. When it comes out of the Dutch oven, you get that perfect contrast: crisped tops, tender centers, and a sweet aroma that pulls everyone to the fire.
The trick here is layering the coated biscuit pieces loosely enough that the heat can move through the Dutch oven, but not so loosely that you lose the pull-apart texture. Cutting the biscuits into quarters gives you more surface area for the cinnamon sugar to grab, and using melted butter instead of a thicker sauce helps the glaze seep down through the bread as it bakes. The coals on top matter too. Without that top heat, the center can stay gummy while the bottom overcooks.
Below you’ll find the small details that keep this dessert from turning out doughy, plus a few smart swaps if you’re making it with what you’ve got at camp.
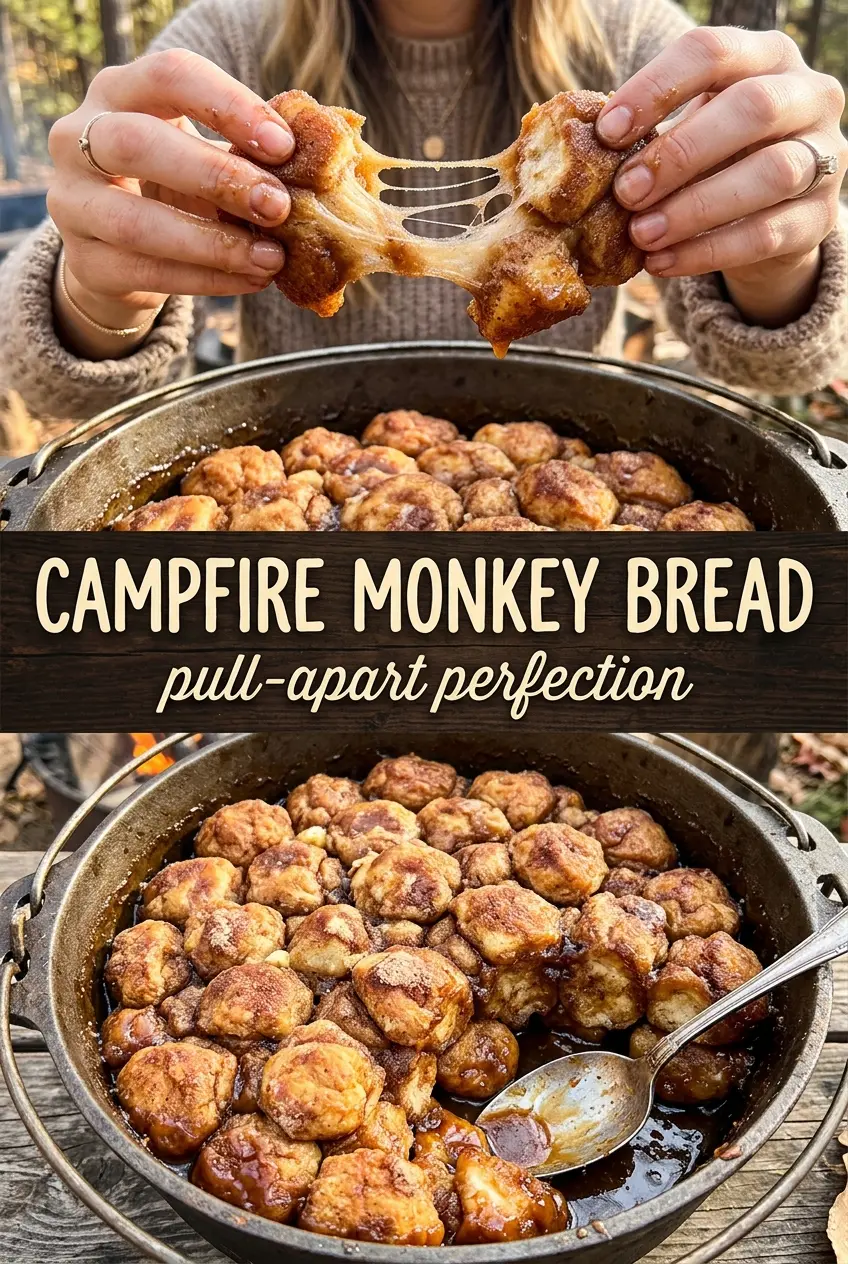
The biscuit pieces baked up soft inside with a caramelized crust, and the cinnamon sugar coating stayed in place instead of melting off. My kids kept pulling off one piece at a time until the whole Dutch oven was gone.
Save this campfire monkey bread for the next Dutch oven night when you want a gooey pull-apart dessert with a crisp cinnamon sugar crust.
The Part That Keeps Campfire Monkey Bread from Going Doughy in the Middle
The most common failure with Dutch oven monkey bread is rushing the heat. A campfire cooks unevenly, so the bottom can get dark before the center has enough time to set if the coals are too hot or the pot is sitting directly in flame. You want steady heat from below and above, which is why the lid needs coals too. That top heat is what finishes the center without scorching the base.
The other thing that matters is how the biscuit pieces are packed. If you mash them down, the glaze can’t move through the layers and the middle bakes up dense. If you pile them in too loosely, the loaf loses its pull-apart structure. The sweet spot is a full Dutch oven with room for the dough to expand, where the pieces can rise into each other and still separate cleanly when pulled apart.
What Each Ingredient Is Actually Doing in This Campfire Dessert
- Refrigerated biscuit dough — This is the shortcut that gives you the right soft, fluffy pull-apart texture without any mixing or proofing. Any standard refrigerated biscuit dough works, but don’t use the flaky-layer style if you want that classic monkey bread chew.
- Granulated sugar and cinnamon — This is the coating that creates the dry, sandy layer around each piece before the butter goes in. Pre-mixed cinnamon sugar from the store works fine here, but the ratio in the recipe gives you enough spice to stand up to the melted butter and caramel.
- Butter — Melted butter carries the brown sugar into the cracks and helps the top brown instead of drying out. Salted or unsalted both work, but if you use salted butter, the dessert tastes a little deeper and less one-note sweet.
- Brown sugar — This is what turns the bottom layer into that sticky caramel glaze. Light brown sugar is enough; dark brown sugar gives a stronger molasses note if that’s what you want around the fire.
- Cooking spray — It doesn’t add flavor, but it saves you from losing half the crust to the Dutch oven. Coat the pot well, especially the bottom and lower sides, because the caramel likes to cling there.
Building the Dutch Oven Layers So the Glaze Bakes Through
Cutting and Coating the Biscuit Pieces
Cut each biscuit into quarters so every piece gets enough cinnamon sugar on all sides. Toss them in a zip-top bag with the sugar and cinnamon until they look fully dusted, not patchy. If the bag is overcrowded, shake in batches so the coating stays even. Uneven coating means some bites taste plain while others turn overly sweet.
Setting Up the Dutch Oven
Spray the Dutch oven generously, then add the coated biscuit pieces in an even layer. Don’t press them down hard; they need a little space to expand as they bake. Once the butter and brown sugar mixture goes over the top, it should seep between the pieces instead of sitting in one puddle. If it all pools in the center, the pot was packed too tightly.
Cooking Over the Coals
Cover the Dutch oven and set it over hot campfire coals, then mound coals on the lid too. Keep the heat steady for 25 to 30 minutes until the top is deep golden and the center feels set when you lift the lid and peek. If the top is browning too fast, pull a few coals off the lid for a minute. If the center still looks pale and doughy, leave it over the coals a few minutes longer instead of turning up the heat.
Turning It Out and Serving
Let the bread rest for 5 minutes so the caramel settles slightly and doesn’t run off in a flood when you invert it. Place a plate over the Dutch oven and flip it quickly and confidently. If pieces stick, leave the pot upside down for a few seconds and let gravity work. Pull it apart while it’s still warm, when the caramel is glossy and the bread strands separate cleanly.
How to Adapt Campfire Monkey Bread for Different Camps and Cravings
Make It Dairy-Free
Swap the butter for a solid plant-based butter that melts smoothly. The glaze will still caramelize, but the flavor is a touch less rich, so lean on the cinnamon to keep it bold.
Use a Standard Oven Instead of a Campfire
Bake it covered at 350°F until golden and cooked through, then uncover for a few minutes if you want a darker top. You lose the smoky edge from the fire, but the texture stays the same and the caramel still sets up beautifully.
Add Nuts for More Crunch
Scatter chopped pecans or walnuts between the biscuit layers before adding the butter mixture. They toast in the caramel and add a little bitter contrast, which keeps the dessert from tasting flatly sweet.
Storage and Reheating
- Refrigerator: Store leftovers covered for up to 3 days. The glaze firms up, and the bread gets a little denser as it chills.
- Freezer: It freezes, but the texture softens after thawing, so I only do it if I need to save a small portion. Wrap tightly and thaw in the fridge before reheating.
- Reheating: Warm individual pieces in a low oven or microwave just until soft and glossy again. Don’t blast it on high heat or the sugar turns hard and the bread gets rubbery.
Questions I Get Asked About This Recipe
Campfire Monkey Bread
Ingredients
Equipment
Method
- Cut each refrigerated biscuit dough into quarters.
- Mix sugar and cinnamon in a large zip-top bag, add the biscuit pieces, and shake until evenly coated.
- Spray a Dutch oven with cooking spray.
- Layer the coated biscuit pieces in the Dutch oven.
- Mix melted butter and brown sugar, then pour over the biscuit pieces.
- Cover the Dutch oven and place it on campfire coals with additional coals on top of the lid.
- Cook for 25-30 minutes until golden brown and cooked through, with heat from coals under and on top of the lid.
- Let the monkey bread cool for 5 minutes.
- Invert onto a plate, then pull apart to serve.


