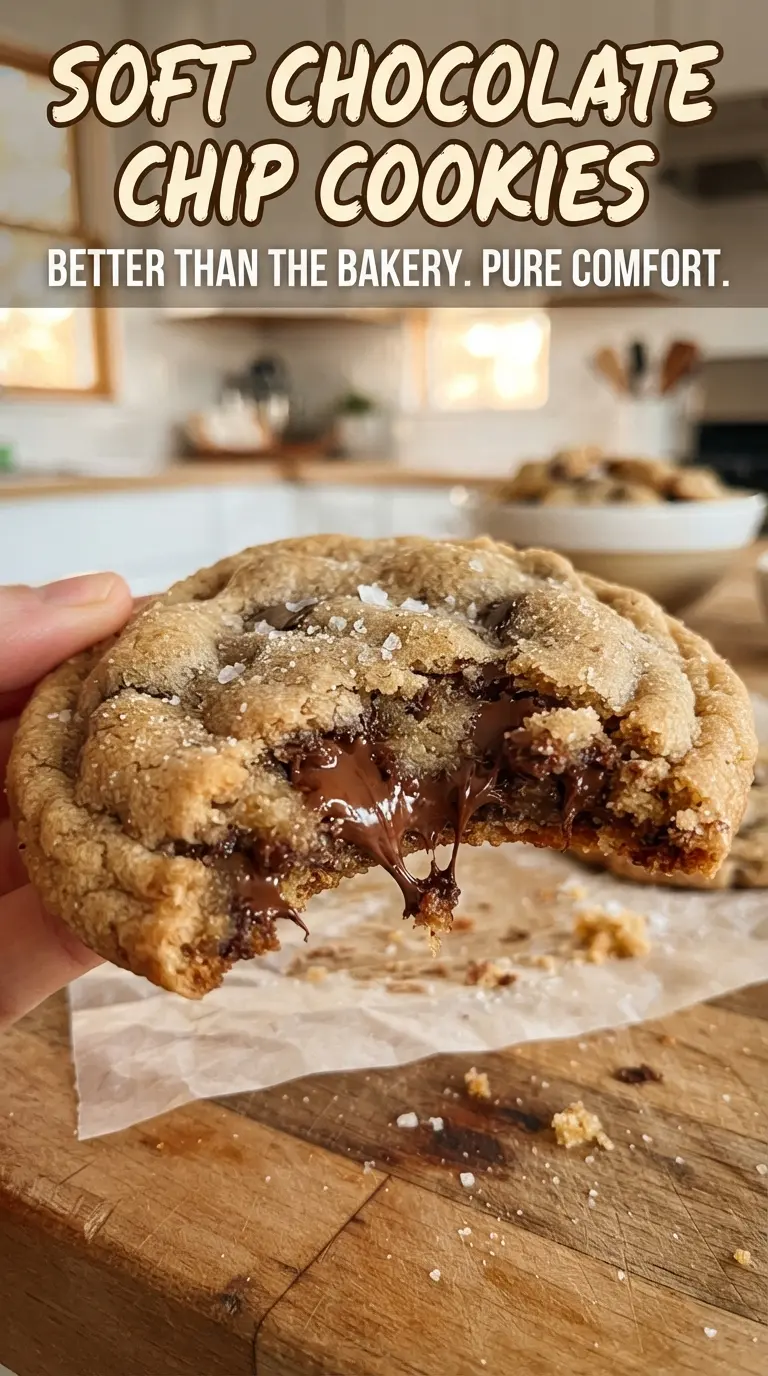
Soft chocolate chip cookies should give you a thick, pillowy center with edges that stay tender instead of turning crisp and dry. The best ones pull apart in soft layers, with melted pockets of chocolate and a buttery crumb that stays gentle even after they cool. This version lands right in that sweet spot because the dough is built to spread just enough while still holding onto its height.
Two things do most of the work here: cornstarch and a short chill. Cornstarch softens the crumb without making the cookies cakey, and chilling the dough gives the melted butter time to firm back up so the cookies bake thicker. The extra egg yolk adds richness and helps the centers stay plush. Bake them until the edges are set and the middles still look pale and puffy; they finish on the hot pan, not in the oven.
Below, I’ve included the small details that matter most, from why melted butter works here to the one mistake that can turn soft cookies into flat ones. If you want cookies that stay tender for days, this is the version to keep.
The cookies stayed thick and soft even the next day, and the cornstarch really made the centers feel pillowy instead of dense. I chilled the dough for exactly 30 minutes and they baked up with those perfect pale middles.
Love these thick, soft chocolate chip cookies? Save this recipe for the days when you want a pillowy center and melted chocolate in every bite.
The Secret to Thick Cookies That Stay Soft After Cooling
The most common reason chocolate chip cookies turn flat and dry is a dough that’s too warm when it goes into the oven. Melted butter gives these cookies their tender texture, but it also means the dough needs a short chill so the cookies don’t spread before the structure sets. That 30-minute rest is the difference between soft, tall cookies and puddles with chocolate chips.
These cookies also rely on a lower baking temperature. At 325°F, the edges set without racing the centers to dryness. If your cookies look underdone when you pull them out, that’s the point. The centers should still look pale and slightly puffy when they leave the oven.
- Cornstarch — softens the crumb and keeps the cookies tender for days. There isn’t a direct substitute that does the same job in the same way.
- Brown sugar — brings moisture and a chewy-soft bite. All white sugar will make the cookies lean crisper and less plush.
- Extra egg yolk — adds richness and helps the centers stay soft. If you only use one whole egg, the texture will be a little less lush.
- Melted butter — gives a dense, buttery dough that bakes up tender. Let it cool slightly before mixing so it doesn’t scramble the egg or make the dough greasy.
What Each Ingredient Is Doing in the Dough
Flour gives the cookies their shape, but not too much. If you pack it heavily, the dough turns stiff and the cookies bake up dry, so spoon it into the cup and level it off if you’re measuring by volume. Cornstarch lightens the texture without making the dough airy, which is why these cookies stay soft instead of cakey.
The chocolate chips matter more than people think. Semi-sweet chips hold their shape enough to create those melty pockets without making the cookies taste cloying. If you want bigger pools of chocolate, chop a bar and mix that in with the chips. The vanilla rounds out the butter and brown sugar, and the brown sugar itself keeps the centers moist long after baking.
- All-purpose flour — the structure base. A 1:1 gluten-free baking blend can work here if it contains xanthan gum.
- Cornstarch — the softness insurance. Don’t skip it if you want that pillowy middle.
- Brown sugar — keeps moisture in the dough. Dark brown sugar will make the cookies a little deeper and more caramel-like.
- Semi-sweet chocolate chips — balance the sweet dough. Milk chocolate works, but the cookies will taste sweeter and less balanced.
How to Mix, Chill, and Bake Them for a Puffy Center
Whisk the Dry Ingredients First
Combine the flour, cornstarch, baking soda, and salt before anything else. That step matters because cornstarch clumps easily, and once it’s evenly dispersed, the dough mixes more smoothly. If you skip the whisking, you can end up with a pocket of baking soda that tastes harsh in the finished cookie.
Build the Dough With Melted Butter
Whisk the melted butter with both sugars until the mixture looks glossy and smooth, then whisk in the egg, yolk, and vanilla. The dough should look thick and creamy, not oily. If the butter is too hot, the egg can curdle and the dough will turn greasy, so let it cool until it’s warm rather than hot before mixing.
Stop Mixing as Soon as the Flour Disappears
Stir in the dry ingredients just until a soft dough forms, then fold in the chocolate chips. Overmixing after the flour goes in builds too much gluten and makes the cookies tougher. The dough should look soft and a little sticky, but not wet enough to slump like batter.
Chill, Scoop, and Bake Until the Centers Still Look Pale
Cover the dough and chill it for 30 minutes, then portion it into 3-tablespoon balls and space them two inches apart. Bake until the edges are set and the centers still look puffy and pale, not fully golden all over. Let them sit on the baking sheet for 10 minutes; if you move them too soon, they’ll fall apart before the centers finish setting.
Three Ways to Change the Batch Without Losing the Soft Texture
Gluten-Free Version
Use a good 1:1 gluten-free flour blend that includes xanthan gum. The cookies will stay soft, but they may spread a touch less and taste a little more delicate. Don’t swap in almond flour by itself; it changes the structure too much and the cookies won’t hold the same pillowy shape.
Extra-Chocolate Version
Replace half the chips with chopped semi-sweet chocolate for bigger melty pools. Chips keep their shape better, while chopped chocolate melts into the dough and gives you those gooey streaks in every bite. The cookies will taste a little richer and less uniform.
Dairy-Free Version
Use a plant-based butter that’s meant for baking and keep the rest of the method the same. The flavor will be slightly less rich, but the texture stays close if the butter substitute has a similar fat content. Avoid spreadable tub margarines; they usually contain too much water and make the cookies thinner.
Freezer-Friendly Dough
Scoop the dough into balls after chilling, freeze them on a tray, then move them to a freezer bag. Bake straight from frozen and add 1 to 2 minutes. This keeps the centers soft and gives you fresh-baked cookies without thawing the whole batch.
Storage and Reheating
- Refrigerator: Store baked cookies in an airtight container for up to 5 days. They’ll stay soft, though the chocolate chips will firm back up.
- Freezer: Baked cookies freeze well for up to 2 months. Wrap tightly and thaw at room temperature so they don’t dry out.
- Reheating: Warm a cookie in the microwave for 8 to 10 seconds for a just-baked texture. Don’t overheat it or the chocolate will get greasy and the cookie will turn tough around the edges.
Answers to the Questions Worth Asking

Soft Chocolate Chip Cookies
Ingredients
Equipment
Method
- Whisk all-purpose flour, cornstarch, baking soda, and salt in a bowl until evenly combined and no dry streaks remain.
- Whisk the melted unsalted butter with brown sugar and granulated sugar until smooth, then whisk in the egg, egg yolk, and vanilla extract until glossy.
- Stir the dry ingredients into the wet mixture until a soft dough forms, then fold in the semi-sweet chocolate chips just until distributed.
- Cover the dough and refrigerate for 30 minutes so it firms up and bakes thick with a tender center.
- Preheat the oven to 325F and line baking sheets with parchment for easy release and even browning.
- Scoop and roll the dough into 3-tablespoon balls, then place them 2 inches apart on the baking sheets.
- Bake at 325F for 10-12 minutes, until the edges are set and the centers look pale and puffy.
- Cool the cookies for 10 minutes on the sheet so the centers finish setting while the outsides stay tender.