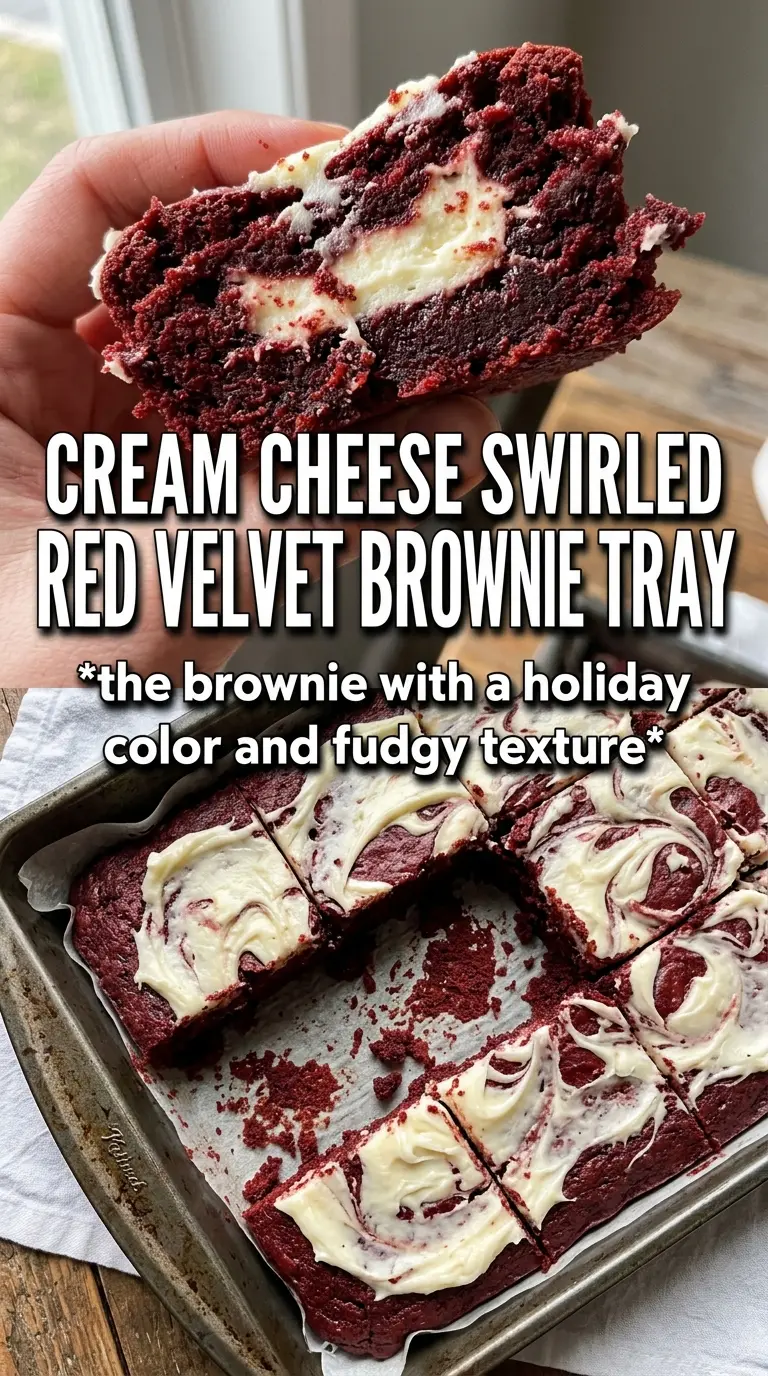
Deep red, fudgy brownies with a tangy cream cheese swirl hit that sweet spot between cake and dense chocolate fudge. The edges bake up set and chewy while the center stays soft and rich, and that ribbon of cream cheese gives each square a little lift so the whole pan doesn’t taste flat. These disappear fast because they slice cleanly once cooled and still taste even better the next day.
What makes this version work is the balance of ingredients. Melted butter keeps the crumb dense and moist, while the cocoa and vinegar give red velvet its familiar bite without turning the brownies cakey. The food coloring is there for the signature color, but the real flavor comes from the cocoa, vanilla, and tangy cream cheese swirl baked right through the middle.
Below, I’ve included the details that matter most: how to get that swirl without sinking it into the batter, what to watch for so the brownies stay fudgy, and the small swap that helps if you need to reduce the coloring without losing the look.
The brownies came out dense and fudgy, and the cream cheese swirl stayed creamy instead of disappearing into the batter. I baked them for 28 minutes and they cut into neat squares after cooling all the way.
Save these red velvet brownies for the kind of dessert that gives you a fudgy center, a crackly top, and a cream cheese swirl in every bite.
The Secret to Keeping Red Velvet Brownies Fudgy, Not Cake-Like
Brownies drift toward cakey as soon as they get too much air, too much flour, or too much baking time. This batter stays dense because the butter is melted instead of creamed, the flour is folded in just until you stop seeing streaks, and the pan comes out when the center is set but still looks a little soft. That last part matters. If you wait for the middle to look completely dry in the oven, you’ve already gone past fudgy and into dry.
The cream cheese swirl also plays a role in the texture. It adds tang and moisture, but it needs to sit on top of a thick enough batter to stay visible. If your brownie base seems loose, it usually means the flour wasn’t measured carefully or the batter was overmixed. A few extra stirs can turn a dense brownie into a tougher, airier bar than you want here.
What Each Ingredient Is Actually Doing in These Brownies
- Melted butter — This gives the brownies their dense, rich texture. Don’t swap in oil if you want the same flavor; oil can keep things moist, but butter brings the deeper bakery-style taste these need.
- Granulated sugar — Sugar does more than sweeten here. It helps form that shiny top and keeps the crumb tender. Brown sugar will make the bars softer and more molasses-heavy, which pulls them away from classic red velvet.
- Eggs — The eggs bind the batter and give the brownies enough structure to hold the swirl. Room temperature eggs blend faster and keep the batter smoother, which matters when you’re trying not to overmix.
- Cocoa powder — Use a regular unsweetened cocoa powder, not Dutch-process, unless that’s what you have and you’re comfortable with a slightly deeper, less sharp chocolate note. Cocoa is what makes these taste like red velvet instead of plain red bars.
- White vinegar — This sharp little ingredient is part of the red velvet identity. It brightens the chocolate and helps the color read more vividly, especially when the brownies bake.
- Cream cheese — Full-fat cream cheese gives the swirl the right body. Low-fat versions can loosen as they bake and won’t set as neatly. Beat it until completely smooth before swirling, or you’ll end up with lumps instead of ribbons.
How to Get the Swirl and the Bake Time Right
Building the Brownie Base
Start by whisking the melted butter and sugar until the mixture looks glossy and a little thickened, then add the eggs, vanilla, and food coloring. The batter should turn a deep red-brown before the dry ingredients go in. Fold the flour, cocoa, vinegar, and salt just until combined; a few streaks disappearing at the end is fine, but stop as soon as the batter looks uniform. Overmixing here pulls in air and makes the final bars lighter than they should be.
Making the Cream Cheese Swirl
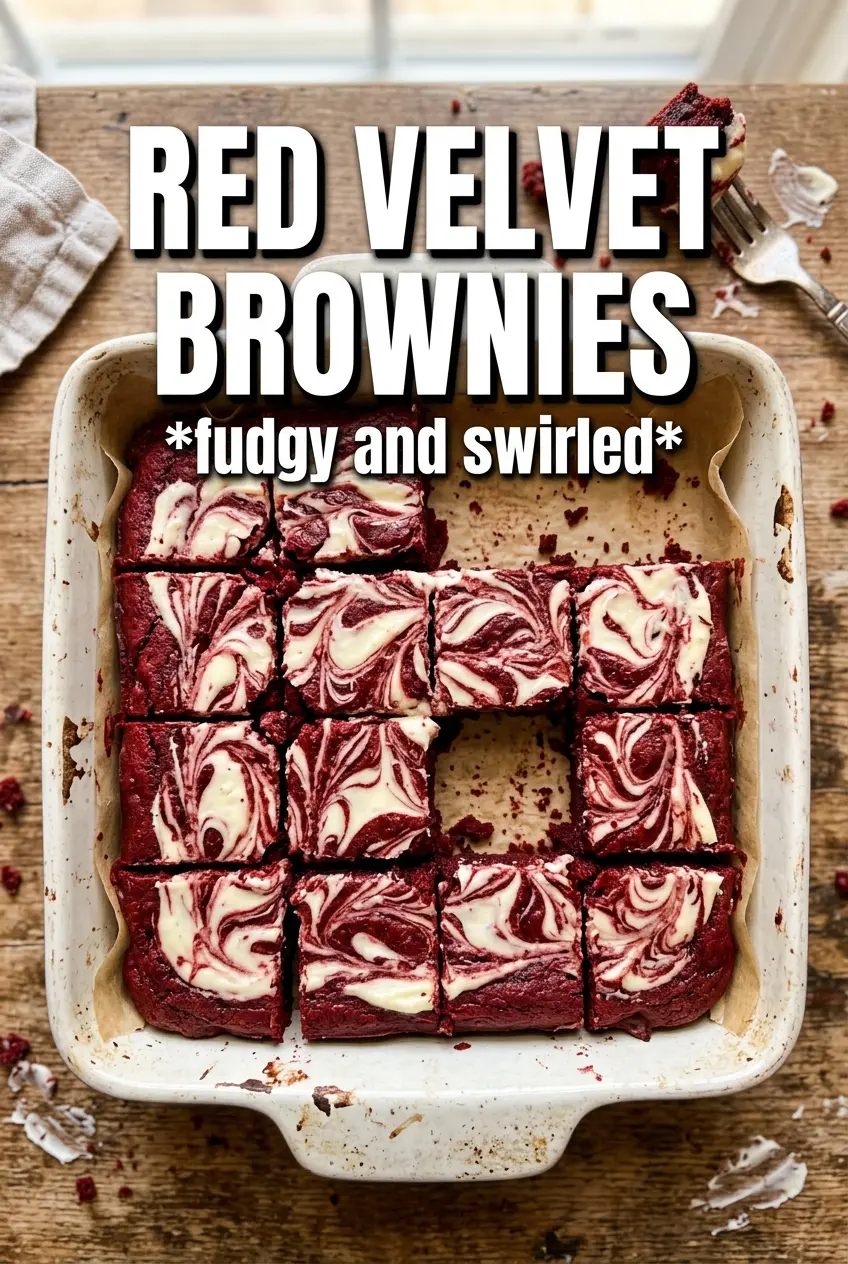
Beat the cream cheese, sugar, egg, and vanilla until smooth and creamy with no lumps left behind. If the cream cheese is cold, the swirl can leave tiny curds in the finished brownies, which bake up uneven and heavy. Dollop the mixture over the brownie batter in large spoonfuls so it stays on top long enough to swirl. Drag a knife lightly through the surface in figure-eights; don’t overdo it or the swirl will disappear into the red batter.
Baking Until Just Set
Bake until the edges look set and the center no longer sloshes when you gently nudge the pan. The top should look matte and slightly crackled, and a toothpick should come out with moist crumbs, not wet batter. If the toothpick is completely clean, the brownies are already heading toward dry. Let them cool all the way before cutting so the swirl firms up and the squares hold their shape.
How to Adapt These Brownies Without Losing the Fudgy Texture
Gluten-Free Red Velvet Brownies
A good 1:1 gluten-free baking flour works here, but the brownies will be a touch more delicate when warm. Let them cool completely before slicing, and expect a slightly softer bite rather than a chewy one.
Dairy-Free Version
Use a plant-based butter that bakes well and swap the cream cheese for a dairy-free cream cheese block-style substitute. The texture will still be rich, but the swirl may bake a little softer, so keep the marbling broad instead of thin and fussy.
Less Food Coloring, Same Red Velvet Vibe
You can cut the food coloring back to 1 to 1 1/2 tablespoons and still get a noticeable red tone, especially if you use a good cocoa powder. The color won’t be quite as dramatic, but the flavor and texture stay the same.
Storage and Reheating
- Refrigerator: Store covered for up to 5 days. The cream cheese swirl firms up in the fridge, so the brownies taste a little denser when cold.
- Freezer: Freeze tightly wrapped squares for up to 2 months. Separate layers with parchment so the swirl doesn’t stick when you pull them apart.
- Reheating: Warm a square in the microwave for 10 to 15 seconds if you want the center softer. Don’t overheat it or the cream cheese swirl can split and the brownie will dry out fast.
Questions I Get Asked About This Recipe
Red Velvet Brownies
Ingredients
Equipment
Method
- Preheat oven to 350F. Line a 9x13 pan with parchment so the brownies lift out easily after baking.
- Whisk melted butter and granulated sugar together until glossy. Add eggs, vanilla, and red food coloring and whisk until the batter turns deep red.
- Fold in all-purpose flour, cocoa powder, white vinegar, and salt just until no dry streaks remain. The batter should look thick and smooth.
- Spread the red velvet batter evenly in the prepared pan. Tap the pan lightly so the surface settles into a flat layer.
- Beat cream cheese, sugar, egg, and vanilla until smooth. Dollop the swirl mixture over the batter in small spoonfuls.
- Swirl the cream cheese into the red batter with a knife or skewer. Make visible red-and-cream ribbons across the top.
- Bake for 25-30 minutes at 350F until the center is set and the edges look slightly firm. The top should appear matte and not wet.
- Cool completely before cutting. When fully cooled, slice cleanly for fudgy squares with distinct red interior and cream swirls.


