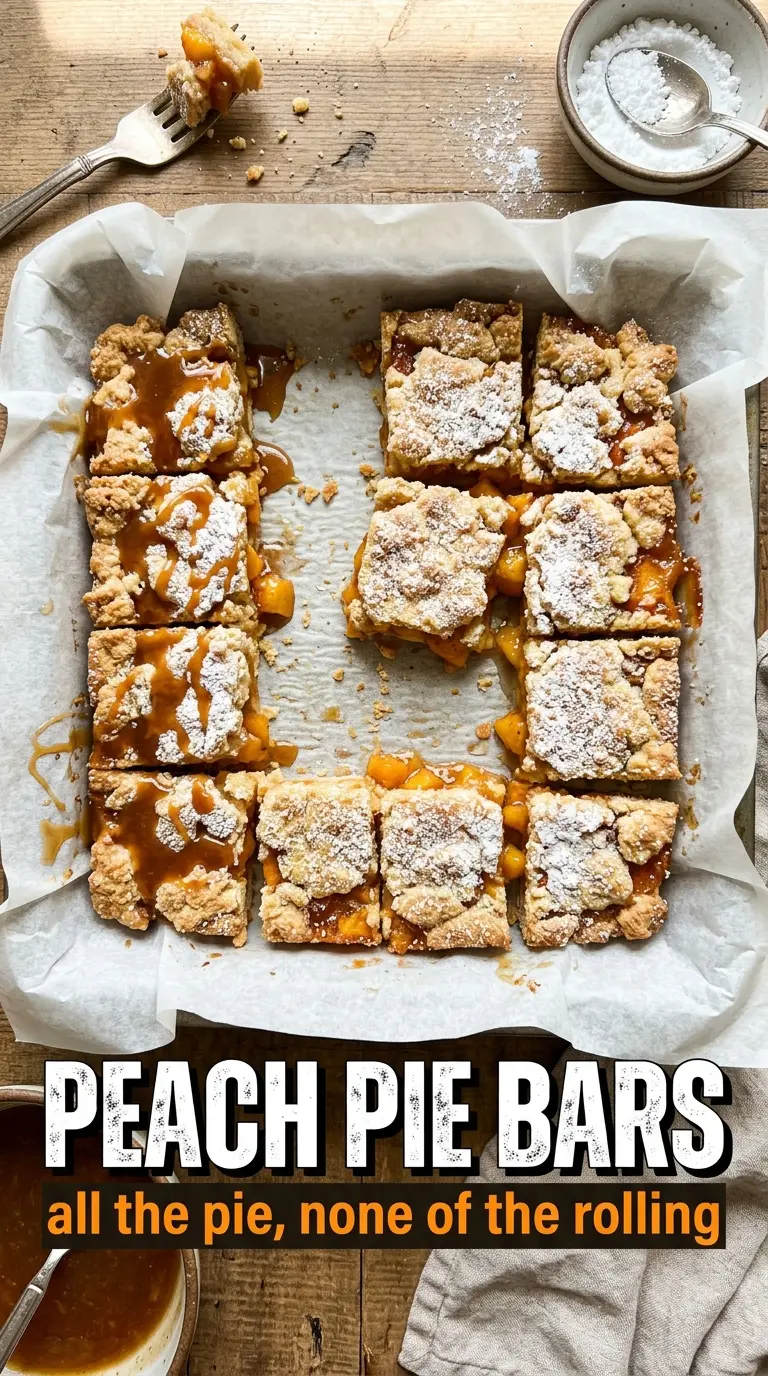
Peach pie bars give you everything worth chasing in a slice of pie: a buttery base that holds its shape, a thick layer of spiced peaches, and a crumbly golden top that turns crisp at the edges as it bakes. The best ones eat cleanly in squares but still taste soft and jammy in the middle, which is exactly what this version delivers when the filling is cooked long enough to bubble and set.
The trick is building the crust and topping from the same kind of cold, sandy dough so the bars stay balanced instead of turning heavy. Cornstarch keeps the peaches from running all over the pan, and a short pre-bake on the crust keeps the bottom from going soggy once the fruit goes in. Fresh peaches work beautifully here, but they need that lemon juice and spice to wake them up and keep the filling from tasting flat.
Below you’ll find the detail that matters most: how to know when the filling is set enough to slice cleanly, plus a couple of smart swaps if your peaches are extra juicy or not quite peak-ripe.
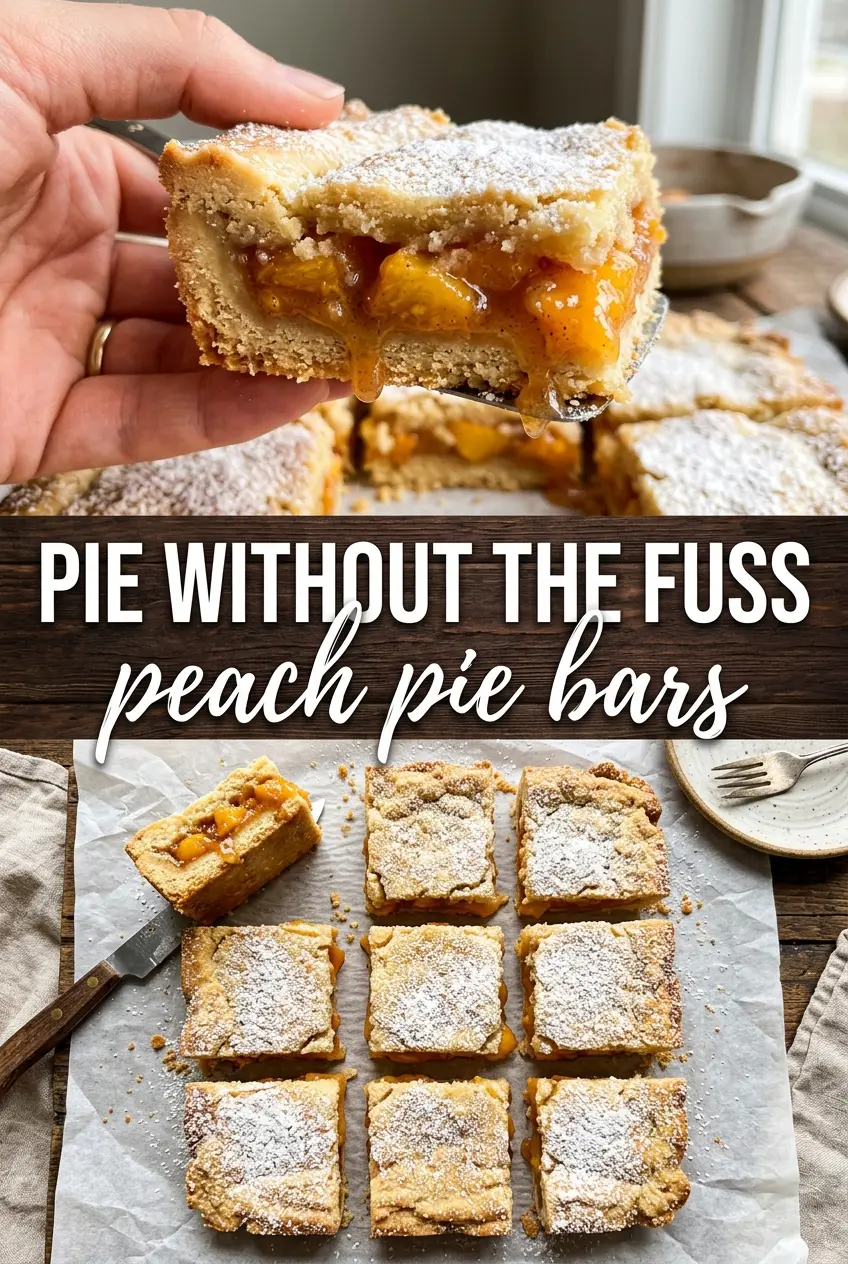
The peach layer set up perfectly after cooling, and the crust stayed buttery instead of getting wet on the bottom. I used very ripe peaches, and the bars still sliced cleanly after chilling overnight.
Love the buttery shortbread crust and juicy peach filling? Save these peach pie bars for the next time you want a hand-held peach dessert that cuts neatly and travels well.
The Reason the Bottom Crust Stays Crisp Under Juicy Peaches
Most fruit bars fail in one of two ways: the crust goes soft before the fruit sets, or the filling leaks and turns the whole pan sticky. This recipe avoids both problems by giving the crust a head start and by using enough starch to hold the peach juices in place once they hit the heat.
The pre-bake matters. Those 15 minutes firm the bottom before the filling goes on, so the crust can brown instead of steaming under a wet layer of fruit. Then the bars need a full bake until the filling is actively bubbling in the center, because bubbling is the clue that the cornstarch has reached the temperature it needs to thicken.
- Cold butter keeps the crust and crumb topping tender and sandy. If the butter softens before it goes into the flour, the texture turns pasty instead of crumbly.
- Cornstarch is what turns the peach juices into a sliceable filling. Flour can work in a pinch, but it tastes duller and needs more baking time to thicken properly.
- Lemon juice keeps the peaches bright and helps the filling taste like fruit instead of syrup. It also balances the sweetness if your peaches are very ripe.
- Fresh peaches give the best texture here. If yours are a little firm, the bars still work; if they’re extra juicy, let the tossed filling sit for a few minutes and spoon off any excess liquid before layering it in the pan.
What Each Layer Is Doing in These Peach Pie Bars
The crust and topping start with the same cold-butter method, but they behave differently once baked. The pressed-in base turns dense enough to hold the fruit, while the loose crumb topping bakes into golden clusters that give each bar a little crunch on top.
- Powdered sugar in the crust gives you a finer, more shortbread-like crumb than granulated sugar would. That little difference is what makes the base feel tender instead of cookie-like.
- Cinnamon and nutmeg don’t need to be heavy-handed here. They’re there to pull the peach flavor forward, not cover it up.
- The topping mixture should look like damp pebbles and rough crumbs, not a smooth dough. If it clumps into one mass, break it up with your fingers before sprinkling it over the peaches.
- Salt keeps the sweetness from flattening out. Even a small amount gives the crust more depth.
Building the Bars So They Slice Cleanly
Pressing and Pre-Baking the Crust
Pulse the crust ingredients until the mixture looks like coarse sand with some pea-sized bits of butter still visible, then press it firmly into the lined pan. An even layer matters more than a thick one. Bake it just until the surface looks set and pale golden at the edges. If you skip this step, the fruit will seep into the base and the bottom will lose its structure.
Making the Peach Layer Thick Enough
Toss the peaches with sugar, cornstarch, cinnamon, nutmeg, and lemon juice until every piece is coated. The filling should look glossy and a little wet, but not soupy. Spread it over the warm crust in an even layer so the bars bake uniformly. If your peaches are especially juicy, let them sit for a few minutes after tossing, then leave behind any extra liquid in the bowl.
Getting the Crumble Golden, Not Dry
Scatter the topping evenly over the peaches without packing it down. Loose crumbles brown better and leave space for steam to escape. Bake until the top is deeply golden and the filling is bubbling through the gaps all across the center of the pan. If the top is brown but the center isn’t bubbling yet, the filling hasn’t thickened enough and the bars will cut messy.
Cooling Before the First Cut
Let the pan cool completely before lifting the bars out. That wait is what turns the filling from hot and loose into a clean, sliceable layer. If you cut too soon, the peach layer will run and the crust will crumble under the knife. For the neatest squares, chill them briefly after cooling if the kitchen is warm.
How to Adapt These Bars When Your Peaches or Pantry Change
Use Frozen Peaches When Fresh Aren’t at Their Best
Frozen peaches work, but thaw them first and drain off the excess liquid. They bring a softer texture and a little less brightness than fresh fruit, so the lemon juice becomes more important for keeping the filling lively.
Make Them Gluten-Free Without Losing the Crumb
Use a good 1:1 gluten-free flour blend in both the crust and topping. The bars will still hold together, though the crumb may be a touch more delicate, so let them cool fully before lifting them from the pan.
Make the Bars Dairy-Free
Swap the butter for a solid plant-based baking stick that behaves like butter when cold. Avoid soft tub spreads, which melt too fast and make the crust greasy instead of tender.
Add a Little Almond for a More Pie-Like Finish
A small splash of almond extract or a handful of sliced almonds in the topping gives the bars a bakery-style edge. Use it lightly; too much almond can bulldoze the peach flavor instead of supporting it.
Storage and Reheating
- Refrigerator: Store covered for up to 4 days. The crust stays best the first two days, then softens slightly from the fruit.
- Freezer: These freeze well. Wrap individual bars tightly and freeze for up to 2 months, then thaw in the fridge so the filling doesn’t weep.
- Reheating: Serve them at room temperature or warm the bars briefly in a low oven. The common mistake is microwaving too long, which turns the crumb topping soft and makes the filling slip apart.
Answers to the Questions Worth Asking
Peach Pie Bars
Ingredients
Equipment
Method
- Preheat the oven to 350°F and line a 9x13 pan with parchment paper, leaving overhang for easy lifting.
- Pulse the all-purpose flour, powdered sugar, salt, and cold butter until the mixture resembles coarse crumbs, then press firmly into the bottom of the pan.
- Bake the crust for 15 minutes, until it is just set and lightly dry on the surface.
- Toss the diced peaches with granulated sugar, cornstarch, cinnamon, nutmeg, and lemon juice until evenly coated.
- Spread the peach mixture over the warm crust in an even layer.
- Combine the flour, sugar, and cold butter for the crumble until it forms coarse crumbles, then scatter it over the peach layer.
- Bake for 35 to 40 minutes at 350°F, until the topping is golden and the filling is bubbling around the edges.
- Cool completely before lifting from the pan and slicing into bars, so the filling sets and the layers hold together.


