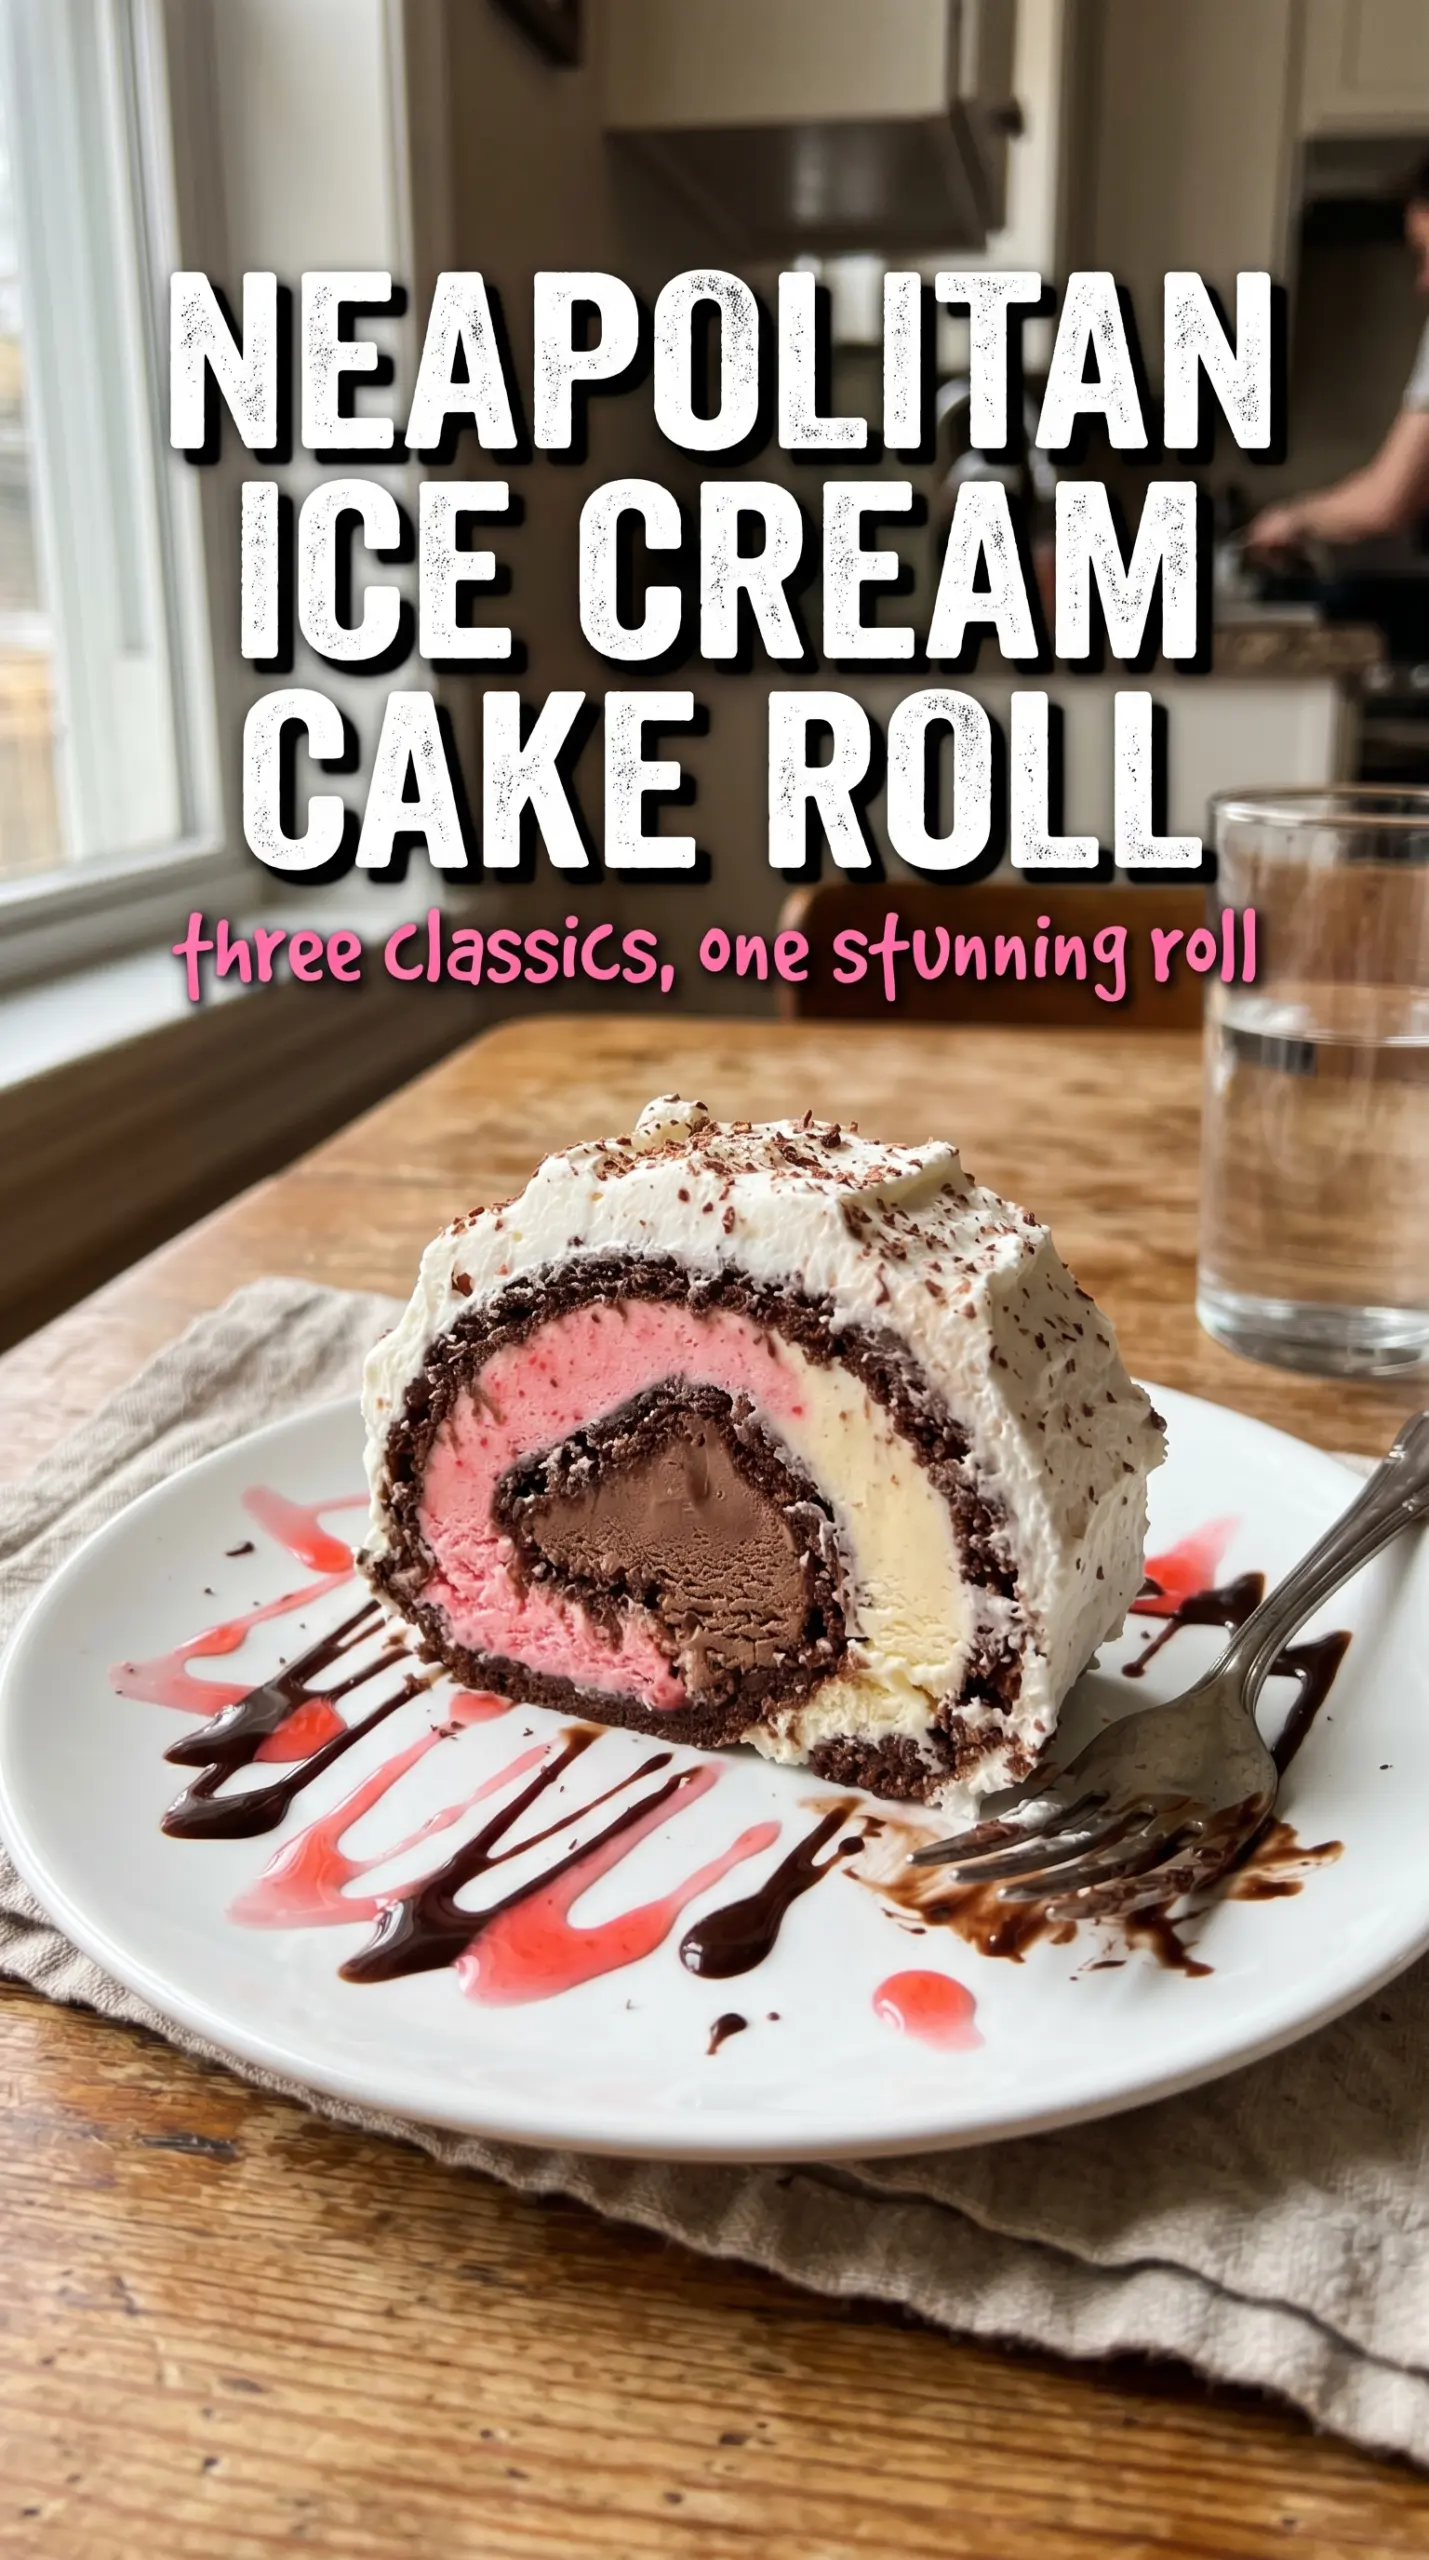
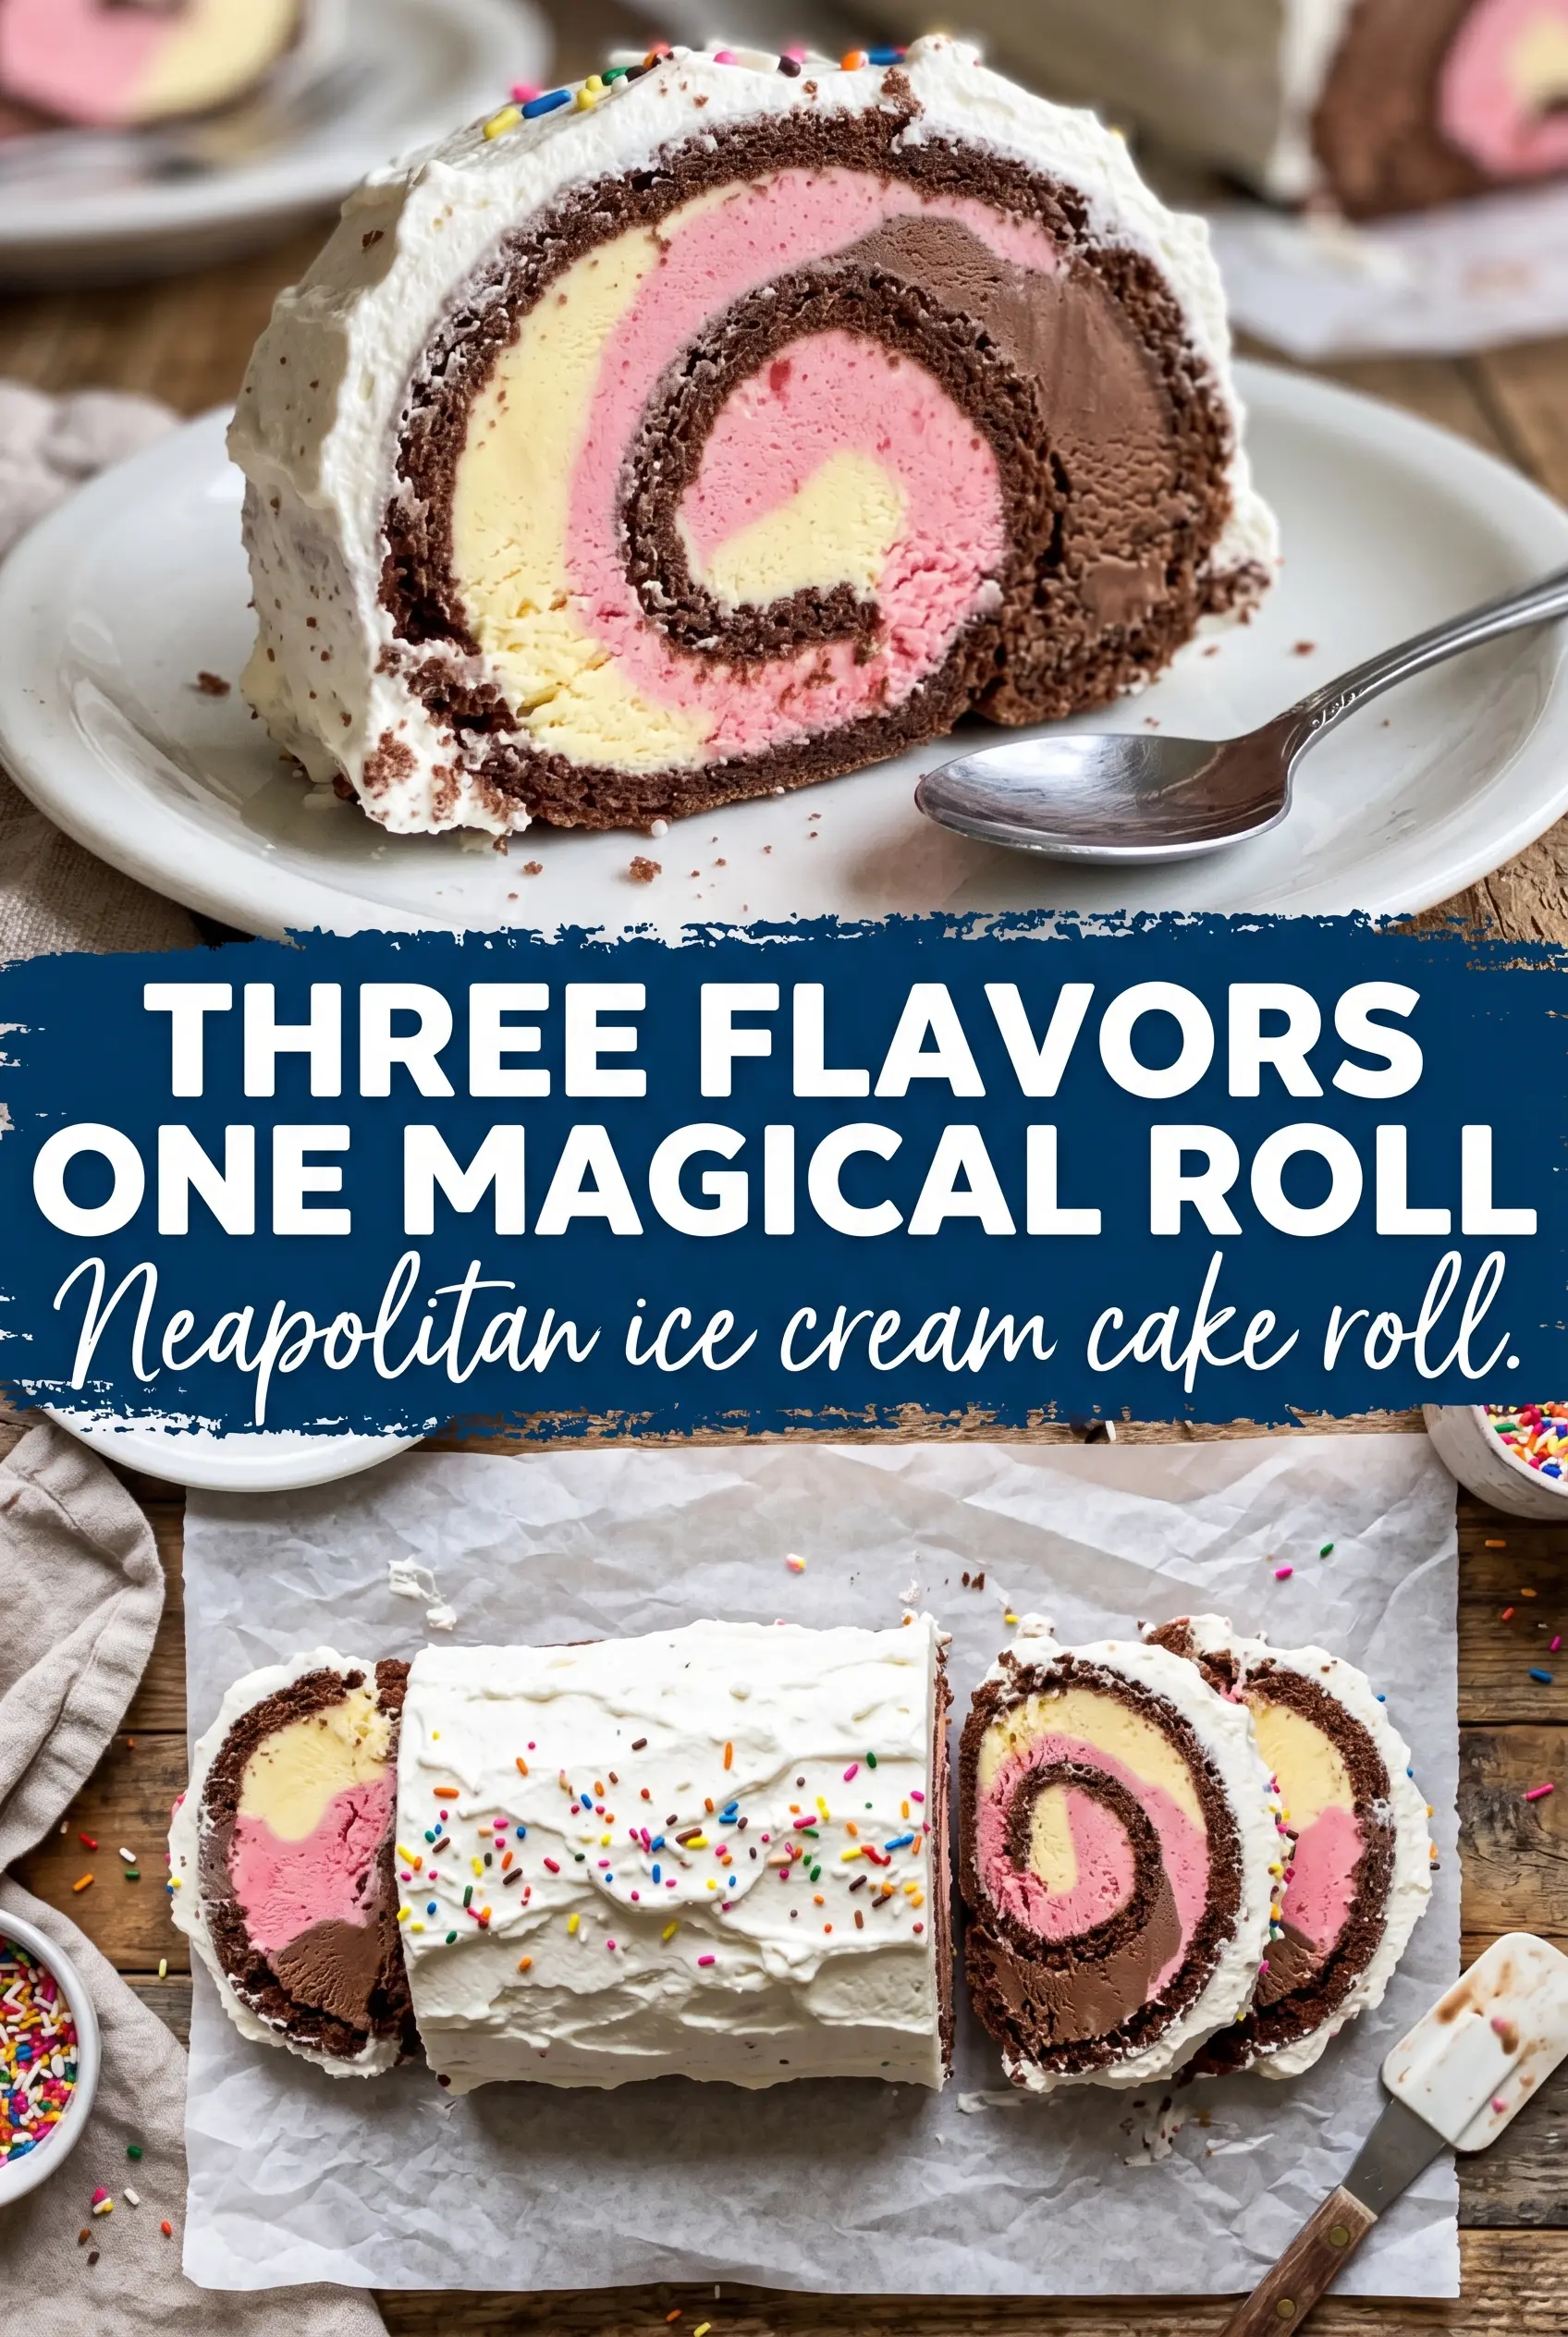
Chocolate sponge wrapped around stripes of vanilla, strawberry, and chocolate ice cream gives you neat spirals that look bakery-made the second you slice into them. The cake stays light enough to roll without cracking, but once it freezes, it cuts into clean rounds with that classic Neapolitan stripe showing through every piece.
What makes this version work is the timing. The sponge gets rolled while it’s still warm so it learns the shape before the filling goes in, and the ice cream is softened just enough to spread without melting into the cake. That balance keeps the layers distinct instead of turning into a muddy frozen block.
Below, I’ve included the one trick that keeps the cake from splitting, the ingredient details that matter most, and a few ways to change the filling without losing the swirl.
The sponge rolled without cracking, and the three ice cream stripes stayed sharp after freezing. Slicing it into rounds looked fancy, but the whole thing was easier than I expected.
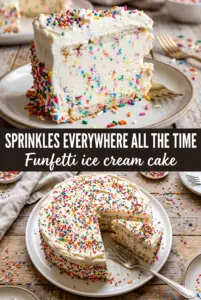
Like this Neapolitan ice cream cake roll? Save it to Pinterest for the dessert table when you want a clean tricolor spiral in every slice.
The reason the roll holds its shape instead of cracking apart
The cake itself is delicate by design, which is exactly why it works. A jelly roll sponge needs enough structure to roll, but it also has to stay flexible after baking, and that comes from whipping the whites properly and folding the batter gently. If the batter gets stirred instead of folded, the cake bakes dense and tears the first time you try to roll it.
The other place people run into trouble is the first roll while the cake is warm. That step is not optional. It trains the sponge to curve before the frozen filling goes in, so the cake doesn’t fight you later. If you skip it and wait until the cake is cool, the outer edge usually cracks right where the swirl should look cleanest.
- Eggs — Separating them gives you the lift you need. The whites create the structure, while the yolks add richness without weighing the sponge down.
- Cocoa powder — This gives the cake its dark chocolate flavor and that classic contrast against the ice cream. Dutch-process or natural both work here, but the cake will only taste as deep as the cocoa you use.
- Flour — Keep it light and don’t overmix after it goes in. Extra stirring builds gluten and makes the sponge less flexible.
- Ice cream — Soften each flavor separately until it’s spreadable but still cold. If it gets too loose, the layers blend before the roll is frozen.
What Each Ingredient Is Actually Doing in This Ice Cream Cake
- Crust or base layer (cookies, brownies, or cake) — This provides structure and texture contrast. A sturdy base keeps the whole cake from crumbling when served.
- Ice cream (the main event) — Choose quality ice cream or frozen yogurt. Soft-serve or premium ice cream works better than hard-packed store brands.
- Cake layer (optional but recommended) — A thin cake layer adds substance and keeps the cake from being all frozen texture. Make it thin so it doesn’t overpower the ice cream.
- Sauce or syrup layer (fudge, caramel, or fruit) — This adds flavor depth and prevents the cake from tasting one-dimensional. Freeze between layers so sauces stay distinct.
- Toppings (chocolate chips, cookies, candy, or nuts) — These add texture and visual appeal. Mix-ins stay crispy longer if frozen separately first.
- Frosting or whipped cream (optional topping) — This adds richness to the outside. Keep it simple or it overwhelms the cake.
- Freezing time (the patience that pays off) — Each layer needs time to set so they stay distinct when sliced. Rushing this step means layers muddy together.
- Storage and serving technique (thaw 5 minutes before slicing) — A brief thaw makes slicing clean and easy. Serve slices immediately for best texture.
Rolling the sponge warm, then filling it fast
Baking the thin sponge
Beat the egg whites until they hold stiff, glossy peaks, then fold in the yolk mixture and dry ingredients with a light hand. Spread the batter all the way to the corners of the parchment-lined pan so the cake bakes evenly and rolls without thick edges. It’s done when the top springs back lightly and the surface looks set, not wet. Overbaking dries out the sponge, and a dry sponge is the one that splits.
The first roll while the cake is still flexible
Turn the hot cake onto a powdered sugar-dusted towel right away and roll it up from the short end while it’s still warm. The towel keeps the cake from sticking, and the warm shape memory is what keeps the final roll neat. Let it cool completely in that rolled position before filling it. If it cools flat, it loses the curve and cracks when you try to reshape it.
Layering the ice cream stripes
Unroll the cooled cake gently and spread the softened ice cream in distinct horizontal bands rather than a thick all-over layer. Keep the chocolate, vanilla, and strawberry separate so the slices show clean color blocks inside the spiral. Work quickly, because the cake starts warming the ice cream the second it goes on. If the filling melts before you finish, the stripes slide together and the finished slices won’t hold their definition.
Freezing for a clean slice
Roll the filled cake back up tightly, wrap it well in plastic, and freeze it for at least six hours. A longer freeze gives you the cleanest cuts, especially if you want those picture-perfect rounds. Slice with a sharp knife that has been run under hot water and wiped dry between cuts. A dull blade drags the ice cream and smears the spiral.
How to change the filling without losing the spiral
Use all three flavors as thin stripes
This gives you the cleanest Neapolitan look. Keep each stripe narrow and even so the roll doesn’t get overloaded, which helps the cake stay tight and keeps the swirl visible in every slice.
Swap in dairy-free ice cream
A dairy-free vanilla, chocolate, and strawberry set works well as long as it softens the same way as regular ice cream. Some brands freeze a little firmer, so let the cake sit at room temperature for a few minutes before slicing.
Make it with one or two flavors instead of three
If you want a simpler look, use chocolate and vanilla or strawberry and vanilla only. The roll still slices beautifully, but the finished pattern is less dramatic, so the contrast between the cake and filling matters more.
Storage and Reheating
- Refrigerator: Not the best place for this dessert. The ice cream softens too fast and the cake turns mushy at the edges.
- Freezer: Wrap the roll tightly in plastic, then a layer of foil, and freeze for up to 1 week for the cleanest slices. After that, the texture starts to pick up freezer flavor.
- Reheating: Don’t reheat this dessert. Let it stand at room temperature for 5 to 10 minutes before slicing so the knife passes through cleanly without crushing the swirl.
Answers to the questions worth asking
Neapolitan Ice Cream Cake Roll
Ingredients
Equipment
Method
- Preheat the oven to 375F. Separate the eggs, then beat the egg whites to stiff peaks.
- Beat the sugar into the egg yolks until light, then fold the yolk mixture into the whites.
- Sift in the flour, cocoa, and salt. Fold gently, then mix in the vanilla extract.
- Spread the batter in a parchment-lined 10x15 jelly roll pan. Bake for 10-12 minutes at 375F.
- Turn the cake immediately onto a powdered sugar-dusted towel. Roll it up in the towel while warm.
- Cool the rolled cake seam-side down until it reaches room temperature. Keep the towel lightly floured with powdered sugar to prevent sticking.
- Unroll the cake completely. Spread the chocolate ice cream in horizontal stripes, then add vanilla, then strawberry in a line pattern.
- Re-roll tightly into a neat log. Wrap the cake roll in plastic and freeze for at least 6 hours.
- Remove from the freezer and slice into rounds to reveal the chocolate-vanilla-strawberry tricolor Neapolitan swirl in every cut.