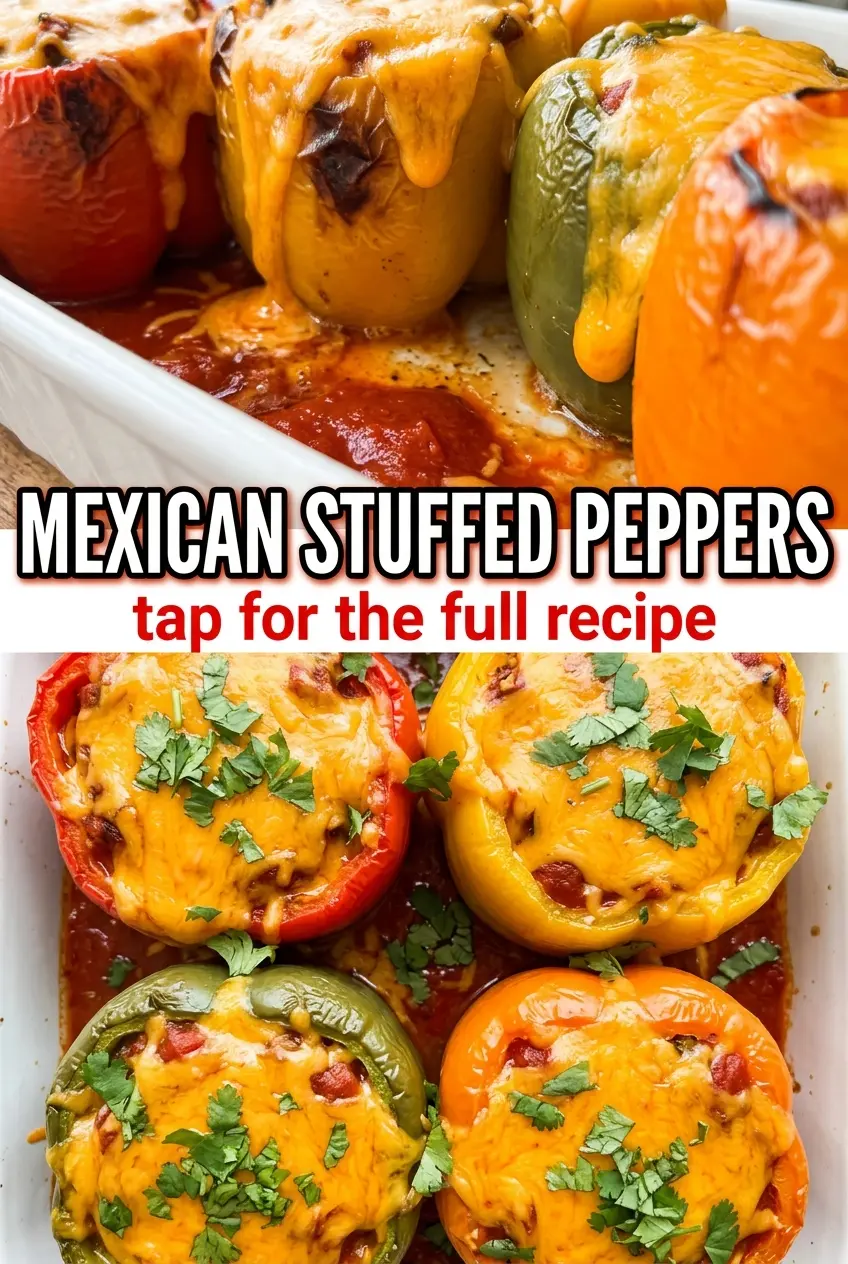
Roasted peppers packed with seasoned beef, rice, beans, corn, and melted cheese turn into a full meal that lands somewhere between comfort food and a smart pantry dinner. The peppers stay tender but still hold their shape, the filling stays hearty instead of watery, and the salsa roja ties everything together with just enough heat and tang to keep each bite interesting.
What makes this version work is the layering of flavor before the peppers ever hit the oven. Charring the peppers first softens the skins and gives the filling a smoky edge, while simmering the beef mixture for a few minutes lets the rice, beans, corn, and salsa settle into one cohesive filling instead of falling apart on the plate. Using a sturdy cheese like Oaxaca or mozzarella gives you that molten top without burying the other flavors.
Below, I’ll walk through the part that keeps stuffed peppers from turning soggy, plus a few swaps that make this recipe work whether you’ve got bell peppers, poblanos, or just whatever’s in the fridge.
The peppers held their shape and the filling stayed nice and thick instead of sliding out. I used poblano peppers and the little bit of char from roasting made the whole dish taste like something from a restaurant.
Save these Mexican stuffed peppers for the night you want a smoky, cheesy one-pan dinner with a filling that actually stays put.
The Trick to Stuffed Peppers That Don’t Collapse in the Oven
The biggest mistake with stuffed peppers is treating the pepper and the filling like they cook at the same speed. They don’t. If you start with raw peppers and a filling that’s already wet, you often end up with peppers that are either still too firm or a filling that leaks liquid into the pan. Roasting the peppers first changes the equation. It softens the flesh just enough so they finish in the oven without turning mushy, and the steam step loosens the skins so they peel away cleanly.
The filling matters just as much. This version cooks the beef and onion first, then folds in the rice, beans, corn, salsa, and cheese so the mixture thickens before it goes into the peppers. If your filling looks loose in the skillet, keep it on the heat for a few more minutes. It should mound on a spoon, not run across the pan. That little bit of restraint is what keeps the finished peppers neat enough to serve without losing half the filling on the plate.
What Each Ingredient Is Actually Doing in This Dish
- Poblano or bell peppers — Poblanos bring a little gentle heat and a deeper, earthier flavor, while bell peppers give you a sweeter, milder result. Bell peppers are easier to source and a little more structured; poblanos are my pick when you want the dish to taste a bit more layered.
- Ground beef — This gives the filling its savory backbone. Use an 80/20 blend if you can, because a little fat carries the spices and keeps the mixture from tasting dry after baking. Ground turkey works, but add a splash of oil and don’t overcook it in the skillet.
- Rice, black beans, and corn — These stretch the filling in a way that feels intentional, not cheap. The rice absorbs the salsa and beef drippings, the beans add body, and the corn brings little sweet pops that keep every bite from tasting flat.
- Salsa roja — This is the sauce element inside the filling, so use one you’d actually eat with chips. A thinner salsa can make the filling too loose, so if yours is especially watery, simmer it a minute longer before stuffing the peppers.
- Oaxaca or mozzarella cheese — Oaxaca melts with a stretchy, creamy finish that works beautifully here. Mozzarella is the easiest substitute and still gives you a clean melt. If you use a hard cheese, you’ll get more of a salty cap than that gooey top layer.
Building the Filling So It Stays Thick and Spoonable
Charring and Steaming the Peppers
Put the peppers directly over a gas flame or under a hot broiler until the skins blister and blacken in spots all over. Don’t rush this stage by stopping at a few pale patches; you want enough char that the skins slip off after steaming. Slide them into a bag or covered bowl for about 10 minutes so the trapped heat loosens the skins. Peel carefully, then make a slit down one side and pull out the seeds without tearing the pepper wide open.
Cooking Down the Filling
Brown the beef with the onion until the meat has lost its pink color and the onion turns translucent at the edges. Add the garlic for just a minute so it smells fragrant without turning bitter. Stir in the rice, beans, corn, half the cheese, salsa, tomato, cumin, salt, and pepper, then let the mixture cook for about 5 minutes. You’re looking for a filling that is cohesive and thick, not soupy; if there’s liquid pooling in the pan, keep simmering until it tightens up.
Stuffing and Baking
Pack the filling into each pepper with a spoon so it fills the cavity all the way to the top, then nestle the peppers into a baking dish so they stand upright. Add the remaining cheese over the top and bake at 350°F until the cheese is melted and the peppers are tender at the edges, about 20 minutes. If the tops brown before the peppers feel done, tent the dish loosely with foil. Let them rest for 5 minutes before serving so the filling settles instead of spilling out when you cut in.
Three Ways to Make These Peppers Fit What’s in Your Kitchen
Make It Vegetarian Without Losing the Hearty Filling
Swap the beef for an extra cup of black beans, pinto beans, or a mix of beans and sautéed mushrooms. Mushrooms bring that savory, meaty bite that keeps the filling from feeling like a side dish. Cook the mushrooms down first so they lose their moisture before you add the salsa and rice.
Go Dairy-Free Without Changing the Structure
Leave out the cheese inside the filling and on top, or use a good melting dairy-free cheese if you already know one you like. The peppers still work because the filling gets its body from the rice, beans, and beef. If you skip the cheese completely, add a tablespoon of olive oil to the skillet for a little extra richness.
Use Ground Turkey or Chicken
Ground turkey or chicken makes a lighter filling, but it needs a little help. Add a drizzle of oil when browning and don’t let it sit in the pan until it dries out. The flavor stays bright if you keep the cumin and salsa in the mix, but the texture will be a touch leaner than beef.
Storage and Reheating
- Refrigerator: Store in an airtight container for up to 4 days. The peppers soften a little more as they sit, but the flavor gets even better the next day.
- Freezer: They freeze well, especially if you wrap each pepper tightly and store them in a freezer-safe container. Freeze for up to 2 months. Thaw overnight in the fridge before reheating so the centers warm evenly.
- Reheating: Reheat covered in a 350°F oven until hot through, about 15 to 20 minutes. The common mistake is blasting them in the microwave long enough to make the peppers collapse and the cheese split; gentle heat keeps the filling moist and the peppers intact.
Answers to the Questions Worth Asking
Mexican Stuffed Peppers
Ingredients
Equipment
Method
- Roast the poblano or bell peppers directly over a gas flame or under the broiler until charred all over, about 5 minutes, turning as needed for even blistering.
- Place the charred peppers in a plastic bag and steam for 10 minutes so the skins loosen.
- Peel off the charred skin and discard it, leaving the peppers intact.
- Make a careful slit down the side and gently remove the seeds, keeping the pepper intact for stuffing.
- Brown the ground beef with the diced onion in a large skillet over medium-high heat until the beef is no longer pink.
- Add the minced garlic and cook for 1 minute, stirring, until fragrant.
- Stir in the cooked rice, black beans, corn, 1/2 cup cheese, salsa roja, diced tomato, cumin, and salt and pepper to taste.
- Simmer the mixture for 5 minutes until hot and well combined, then remove from heat.
- Stuff each roasted pepper with the meat mixture and place them in a baking dish.
- Top with the remaining cheese and bake at 350°F for 20 minutes until the cheese is melted and bubbling.
- Garnish with chopped fresh cilantro before serving.