Bright green filling, a clean tang from Dijon and vinegar, and those little olive spiders on top make these Halloween deviled eggs disappear fast. They look playful on a platter, but they still eat like a proper deviled egg: creamy, balanced, and just punchy enough to keep people reaching back for another one.
The trick is in the texture. The yolks need to be mashed until completely smooth before the mayonnaise goes in, and the food coloring should be stirred in at the very end so you can stop at a vivid spooky green instead of a muddy shade. A short chill after assembling helps the filling set up and keeps the olive spiders in place when the platter hits the table.
Below, I’ll show you the easiest way to get smooth filling, a neat piping look, and spider legs that stay put. There’s also a few smart swaps and make-ahead notes, which matter a lot when you’re putting together party food with ten other things happening at once.
The filling turned out super smooth and that little hit of vinegar kept the eggs from tasting heavy. The olive spiders held up perfectly after chilling, and my kids thought they were the best part.
Save these Halloween deviled eggs for a spooky party platter with bright green filling and olive spider tops.
The Secret to Bright Green Filling That Still Tastes Like Deviled Eggs
The color is what makes these festive, but the flavor still has to read as deviled egg, not food coloring project. That balance comes from keeping the base familiar: mayonnaise for richness, Dijon for sharpness, and vinegar for lift. The green gel coloring belongs in the yolk mixture after everything else is smooth, because stirring it in too early can make it harder to judge the final shade.
Overcooking the eggs is the most common problem here. If the yolks get that gray-green ring, the filling tastes a little dull and the texture turns drier. The covered-off-heat method gives you tender yolks that mash into a creamy filling without needing extra mayonnaise just to loosen them.
What Each Ingredient Is Actually Doing in These Halloween Deviled Eggs
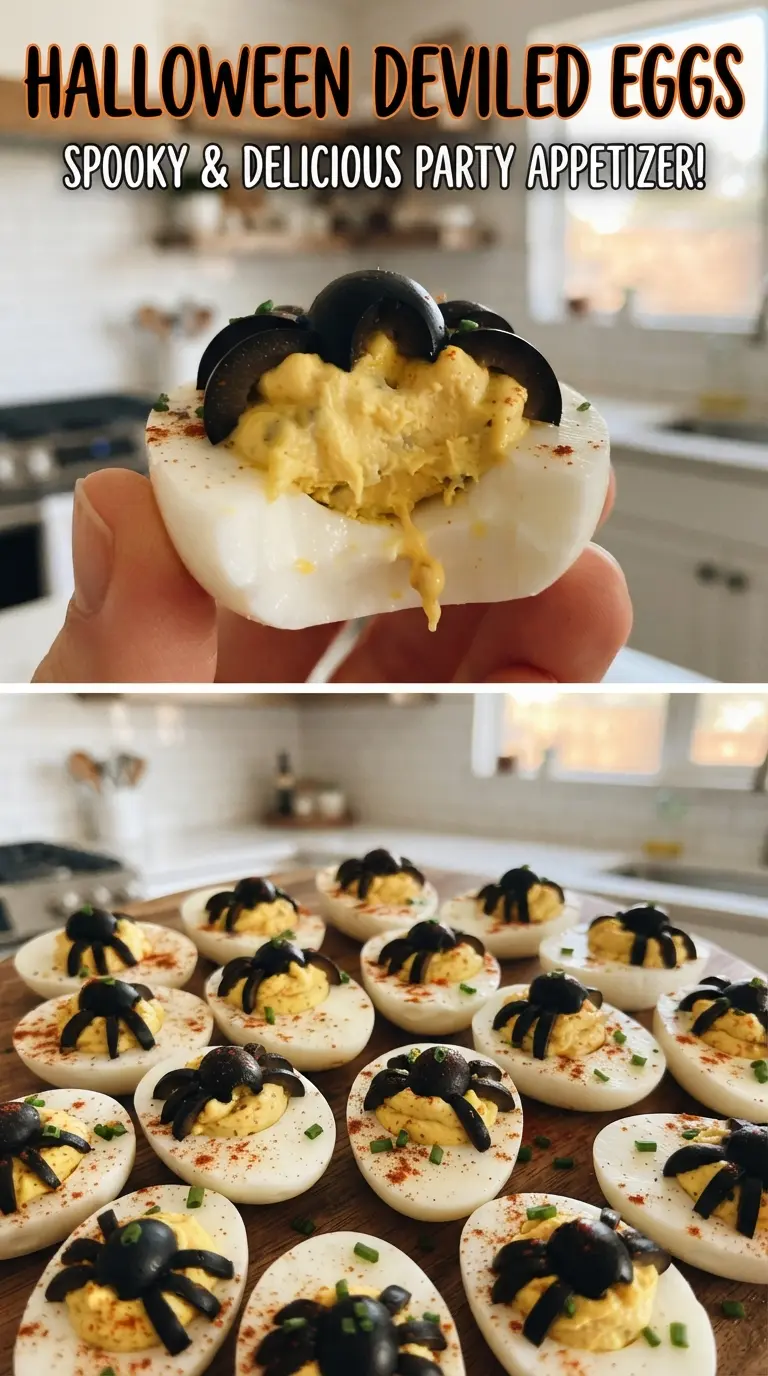
- Eggs — Large eggs give you enough filling for a nice, rounded mound in each white. Older eggs peel a little easier than very fresh ones, which matters here because torn whites make the spider design look messy.
- Mayonnaise — This is what turns the yolks into something smooth and pipeable. Use a mayonnaise you already like the taste of, because its flavor comes through more than you’d expect.
- Dijon mustard — Dijon adds sharper, cleaner heat than yellow mustard. It keeps the filling from tasting flat and balances the richness of the mayo.
- White vinegar — This gives the filling a little bite and brightens the yolks. Lemon juice can work in a pinch, but it changes the flavor and can be a touch more obvious.
- Green gel food coloring — Gel coloring gives you a stronger spooky green without thinning the filling. Liquid coloring works, but you may need more of it, which can soften the texture.
- Black olives — These do double duty as garnish and contrast. Pitted olives are easiest to slice into spider bodies and legs without fighting around the pit.
Building the Filling and the Spider Tops Without a Mess
Cooking the Eggs Just Long Enough
Set the eggs in cold water before you bring the pot up to a boil. Once the water boils, cover the pot, pull it off the heat, and let the eggs stand for 12 minutes. That method keeps the whites tender instead of rubbery, and it’s the difference between a clean, creamy deviled egg and one with chalky edges. Move them straight to an ice bath so the cooking stops and the shells loosen.
Mashing the Yolks Until They’re Completely Smooth
Halve the eggs lengthwise and pop the yolks into a bowl. Mash them first before adding the mayonnaise, Dijon, vinegar, and salt, or you’ll chase little dry lumps around the bowl forever. A fork works fine, but a small masher or the back of a spoon gives you a smoother base faster. Stir in the green coloring last and stop as soon as the shade looks bright and even.
Piping and Decorating for the Cleanest Finish
Spoon the filling into a piping bag or a zip-top bag with the corner snipped off. Pipe from the center outward so the tops look full and polished instead of smeared. For the spiders, lay one olive half dome-side up on each egg, then slice the remaining olive halves into thin strips for legs. Press the legs gently into the filling so they stay put, then chill the tray until serving.
How to Adapt These Deviled Eggs for Different Crowds
Dairy-Free Party Platter
These are already dairy-free as written, so you don’t need to change the base recipe. Just check that your mayonnaise is made without dairy ingredients, which most standard brands are. The texture stays creamy and the filling still pipes cleanly.
A More Tangy Filling
Add another half teaspoon of Dijon or a few extra drops of vinegar if you want the filling to cut through the richness a little more. Go slowly, because too much acid can thin the yolk mixture and make it harder to pipe. The result is sharper and a bit less classic, but it works well if the eggs are part of a larger snack spread.
Making Them Ahead for a Party
You can boil, peel, and halve the eggs a day ahead, then store the whites and filling separately. Assemble the spiders just before serving so the olive legs stay neat and don’t dry out at the edges. If you assemble the whole tray early, cover it well and chill it, but the decoration looks freshest within a few hours.
No Piping Bag, No Problem
A zip-top bag with the corner snipped off works just as well as a piping bag. Cut a small opening so the filling comes out in control, not in a blob. If the filling feels stiff, stir in a teaspoon of mayonnaise rather than trying to force it through a bigger hole.
Storage and Reheating
- Refrigerator: Store assembled deviled eggs covered for up to 2 days. The filling may firm up a little, but the flavor holds well.
- Freezer: Don’t freeze these. The whites turn spongy and watery after thawing, and the filling loses its smooth texture.
- Reheating: These are served cold, so don’t reheat them. If they’ve been chilled for a long time, let them sit at room temperature for 10 to 15 minutes before serving so the filling tastes softer and the flavors come through.
Answers to the Questions Worth Asking
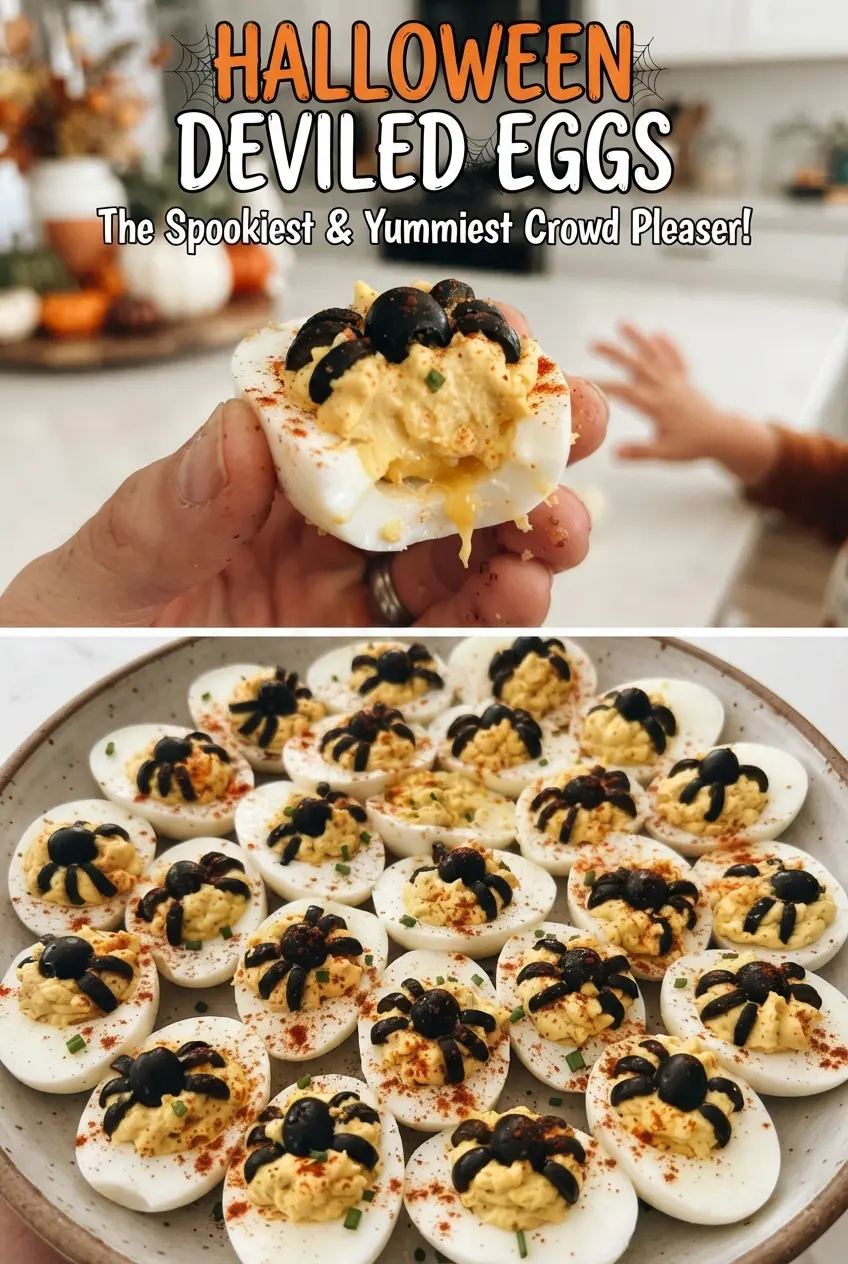
Halloween Deviled Eggs
Ingredients
Equipment
Method
- Place 12 large eggs in a pot, cover with cold water, and bring to a boil. Once boiling, cover and remove from heat, then let stand 12 minutes.
- Chill the eggs in an ice bath for 10 minutes. Peel and halve them lengthwise, keeping the yolks and whites separated.
- Mash the egg yolks with mayonnaise, Dijon mustard, white vinegar, and salt until smooth. Stir in green gel food coloring until bright green.
- Pipe the filling into the egg whites for a neat, ridged look. Stop when each cavity is filled level with the top.
- Halve the 12 pitted black olives lengthwise, keeping one half for the spider bodies. Place one half dome-side up on each egg.
- Slice the remaining olive halves into thin strips and arrange 8 legs around each body. Chill until serving so the topping stays firm.