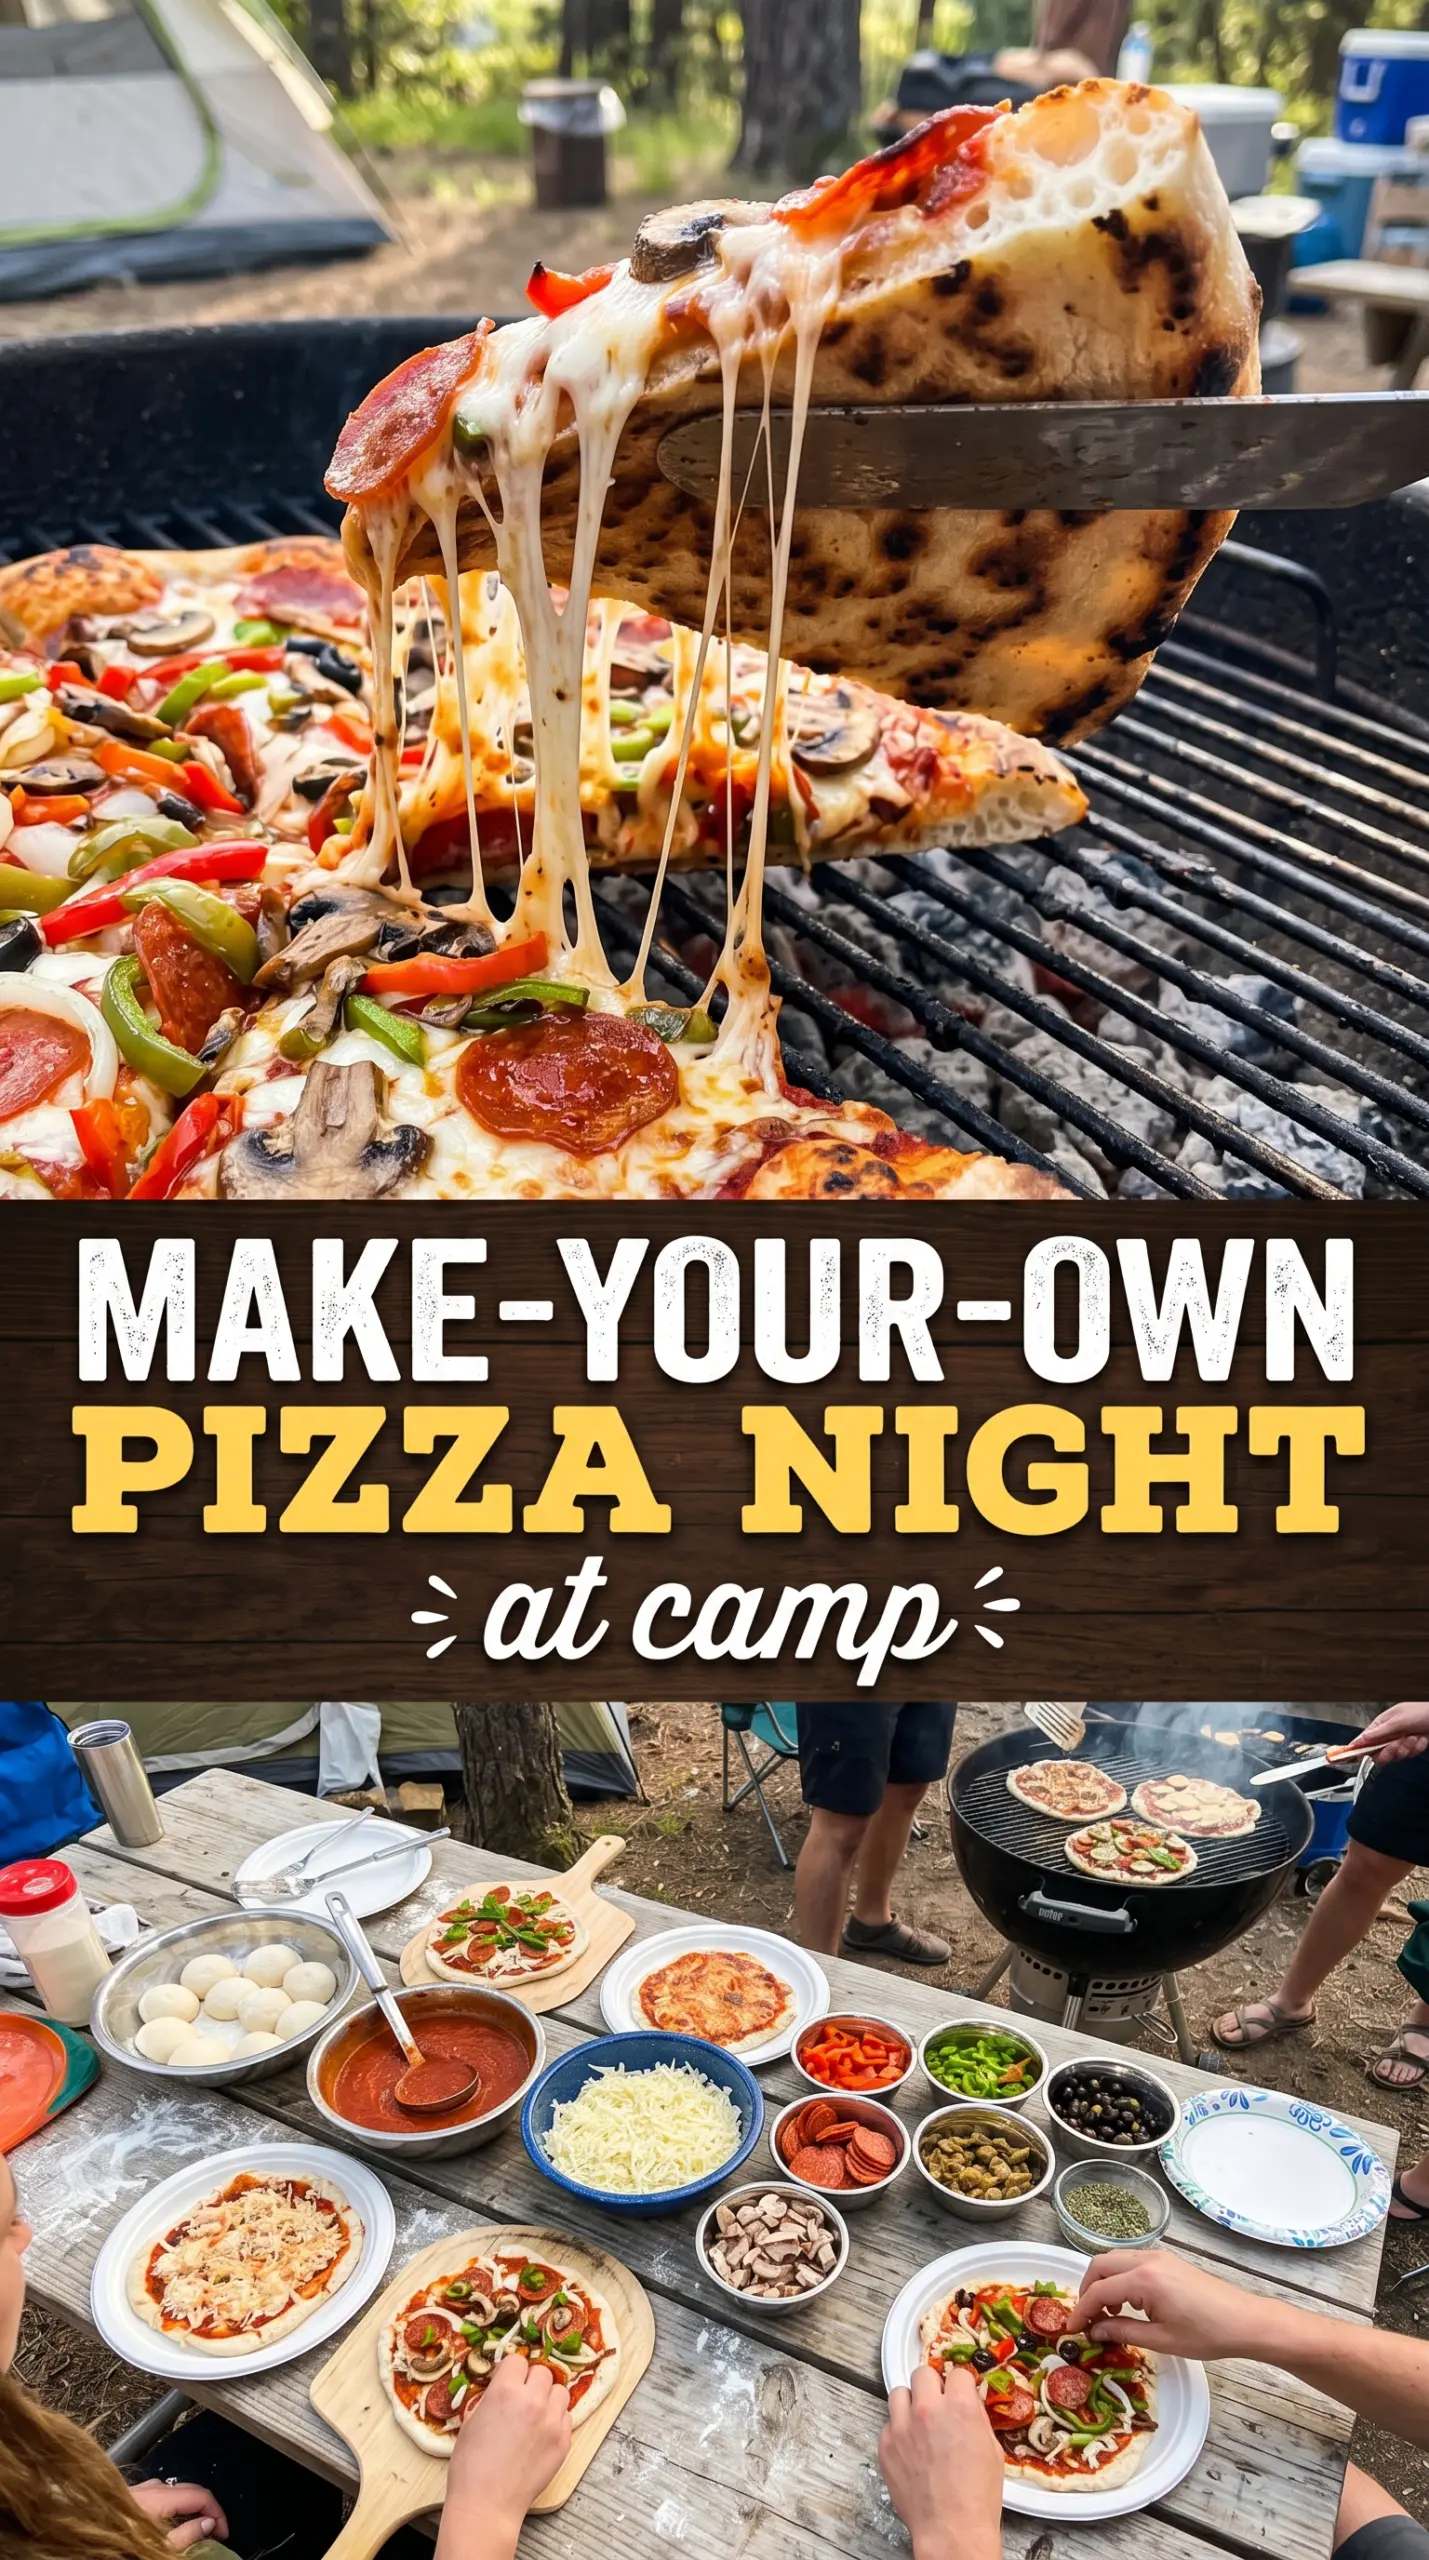
Grilled campfire pizza gives you the part everyone fights over first: a crisp, blistered crust with smoky edges and cheese that melts into bubbling pockets before the bottom overcooks. The dough picks up a little char from the grate, the sauce stays bright, and the whole pizza tastes like it came off a wood-fired oven, even if you’re working over a simple campfire setup.
The trick is to cook the dough first on one side, then flip it and build the pizza on the grilled surface. That keeps the crust from turning soggy and gives you enough structure to add sauce, cheese, and toppings without the whole thing sagging through the grates. A light brush of olive oil also helps the dough release cleanly and encourages those dark, crisp spots that make grilled pizza worth making in the first place.
You’ll find the exact timing that keeps the crust crisp instead of burnt, plus the small adjustments that help when your fire is hotter than expected or your toppings are a little heavy. Once you’ve made pizza this way, it’s hard to go back to hauling a sheet pan out to the oven.
The crust got those perfect char marks and the cheese melted just enough before the bottom turned too dark. We made pepperoni and mushroom, and everybody wanted their own pizza.
Grilled campfire pizza with smoky crust and bubbling cheese is the one to pin for your next outdoor dinner.
The Reason Most Campfire Pizzas Burn Before the Cheese Melts
Most grilled pizzas fail because the fire is treated like an oven instead of a fast, uneven heat source. The bottom catches before the toppings have time to warm through, and once the dough softens over the grates, it can tear or drip straight into the coals. Cooking the first side alone gives the crust enough strength to hold its shape when you flip it.
That first blast of heat also sets the dough so it releases more easily from the grate. If the dough sticks, it usually means it wasn’t brushed with enough oil or it moved too soon. Let the first side develop real color before you try to lift it.
- Thin dough matters. Thick rounds stay doughy in the center before the outside has time to crisp.
- Medium heat is enough. A roaring fire makes the crust black before the cheese melts.
- Oil is part of the structure. It helps the dough release and creates the crisp, blistered finish.
- Keep toppings light. Heavy layers drag down the middle and make the pizza harder to move.
What the Dough, Cheese, and Sauce Are Each Doing Here
- Pizza dough — Store-bought dough works fine here if it’s rested and easy to stretch. Homemade dough gives you more flavor, but the key is elasticity, not perfection. If it keeps snapping back, let it rest for 10 to 15 minutes before shaping.
- Olive oil — This keeps the dough from welding itself to the grate. A thin, even brush is all you need; too much oil can cause flare-ups and greasy spots. Use a neutral oil if that’s what you have, but olive oil gives the best flavor.
- Pizza sauce — Use a thick sauce, not something watery. Thin sauce leaks through the crust and softens the center before the cheese has a chance to melt. If your sauce is loose, simmer it briefly first or drain off excess liquid.
- Mozzarella — Low-moisture shredded mozzarella melts more evenly than fresh mozzarella on the grill. Fresh mozzarella works, but it releases water, so use it sparingly. Shred your own if you can; pre-shredded cheese melts fine, but freshly shredded gives the cleanest melt.
- Toppings — Pre-cook anything that releases a lot of moisture or needs longer than a few minutes to heat through. Raw sausage, dense mushrooms, and thick vegetables can slow the melt and weigh down the crust.
- Parmesan and basil — Add these at the end. Parmesan brings salt and sharpness, and basil stays brighter if it doesn’t spend time over the fire.
How to Build the Pizza Fast Enough for the Crust to Stay Crisp
Shaping the Dough for the Grate
Divide the dough into four pieces and stretch each one into a thin round, leaving the center slightly thinner than the edge. If the dough fights you, let it rest and come back in a few minutes; forcing it just makes it spring back harder. Aim for an even thickness so no section burns while another stays pale and soft.
Grilling the First Side
Brush one side of the dough with olive oil and place it oil-side down over medium heat. Within a couple of minutes, the underside should develop deep grill marks and turn crisp enough to lift without drooping. If the fire is too hot, move the dough to a cooler spot on the grate; the goal is color and structure, not a blackened bottom.
Flipping and Topping Without Delay
Flip the dough so the grilled side is facing up, then move quickly with the sauce and cheese. Spread the sauce in a thin layer, because too much sauce keeps the center wet and slows the melt. Add toppings sparingly; this is the moment people overdo it, and a heavy pizza is the one most likely to collapse before it finishes.
Melting Under the Cover
Cover the pizza with a lid or foil so the heat traps around the toppings and melts the cheese. You’re looking for fully melted mozzarella, bubbling edges, and a second side that’s crisp but not burnt. Pull it off as soon as the cheese looks done, because the residual heat keeps cooking the crust for another minute or two.
Make It Meatless and Keep the Fire Flavor
Skip the sausage and pepperoni and load the pizza with thin-sliced peppers, onions, mushrooms, or olives. The crust and cheese still give you that smoky, savory bite, but the toppings stay lighter and cook faster. This version works especially well if you want a vegetarian main dish that still feels substantial.
Gluten-Free Dough That Can Handle the Grate
Use a gluten-free pizza dough that’s meant for stretching or rolling, not a batter-style crust. Gluten-free dough is often more fragile, so work it a little thicker and turn the heat down slightly to give it time to set before you flip. The result is less chewy than wheat dough, but still crisp and satisfying.
How to Prep This for a Bigger Crowd
Shape all the dough rounds before you start grilling and keep them lightly covered so they don’t dry out. Pre-portion the sauce and toppings into separate bowls, because once the crusts come off the grate, you have only a short window before they need to be topped and covered. This setup turns pizza night into a smooth assembly line instead of a scramble.
Storage and Reheating
- Refrigerator: Store leftovers in an airtight container for up to 3 days. The crust softens a bit, but it still reheats well.
- Freezer: Freeze fully cooled slices wrapped tightly in foil and placed in a freezer bag for up to 1 month. The texture won’t be quite as crisp after freezing, but it works in a pinch.
- Reheating: Warm slices in a skillet over medium-low heat or in a hot oven until the cheese loosens and the bottom crisps back up. Skip the microwave if you can; it makes the crust rubbery and the toppings watery.
Answers to the Questions Worth Asking

Grilled Campfire Pizza
Ingredients
Equipment
Method
- Divide the pizza dough into 4 portions and stretch each into a thin round for quick, even grilling.
- Brush one side of each dough round with olive oil so it browns and crisps on the grate.
- Place the dough oil-side down on the campfire grate over medium heat and cook for 2-3 minutes until the bottom is charred and crispy.
- Flip the dough and quickly add sauce, mozzarella cheese, and toppings to the grilled side so the toppings start heating immediately.
- Cover with a lid or foil and cook for 3-5 minutes until the cheese melts and the bottom is crispy.
- Remove from the grill, top with grated Parmesan cheese and fresh basil, then slice and serve while the cheese is still bubbly.


