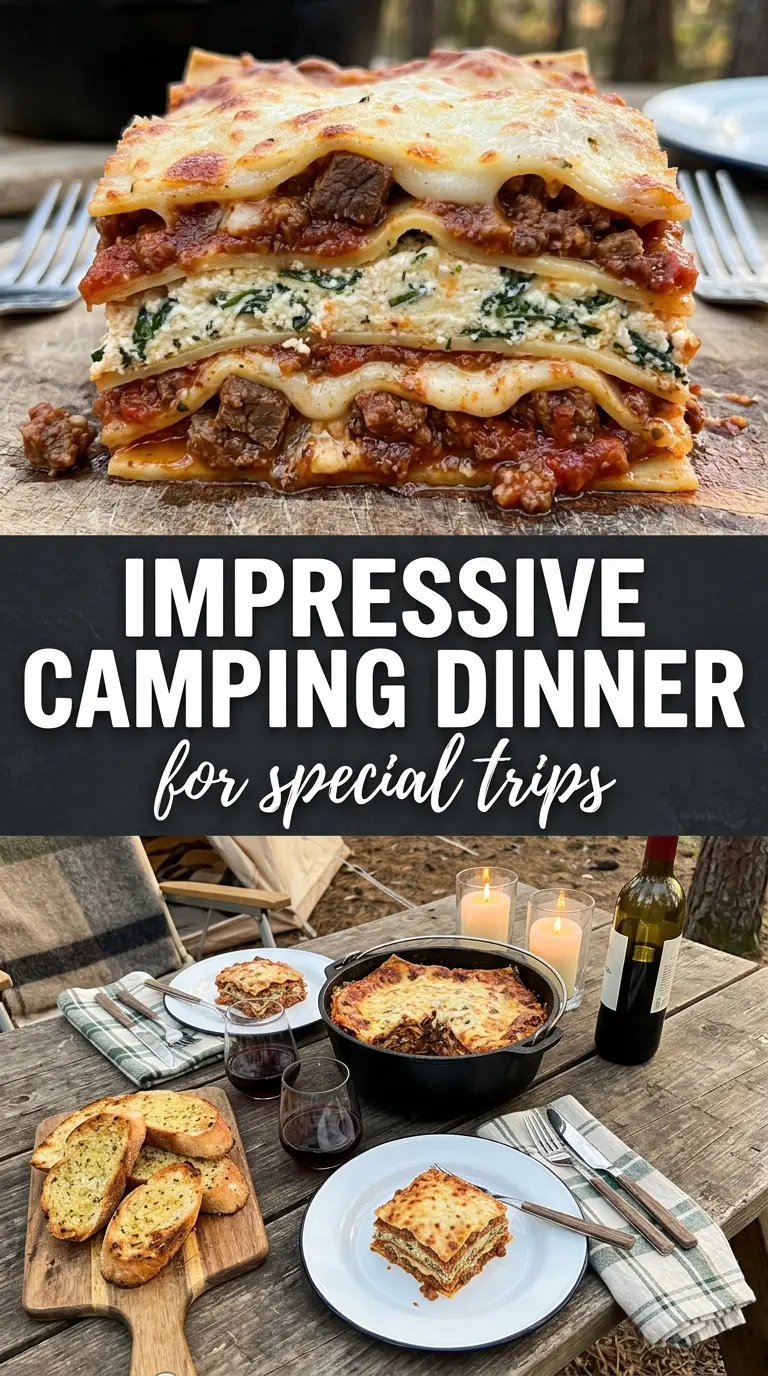
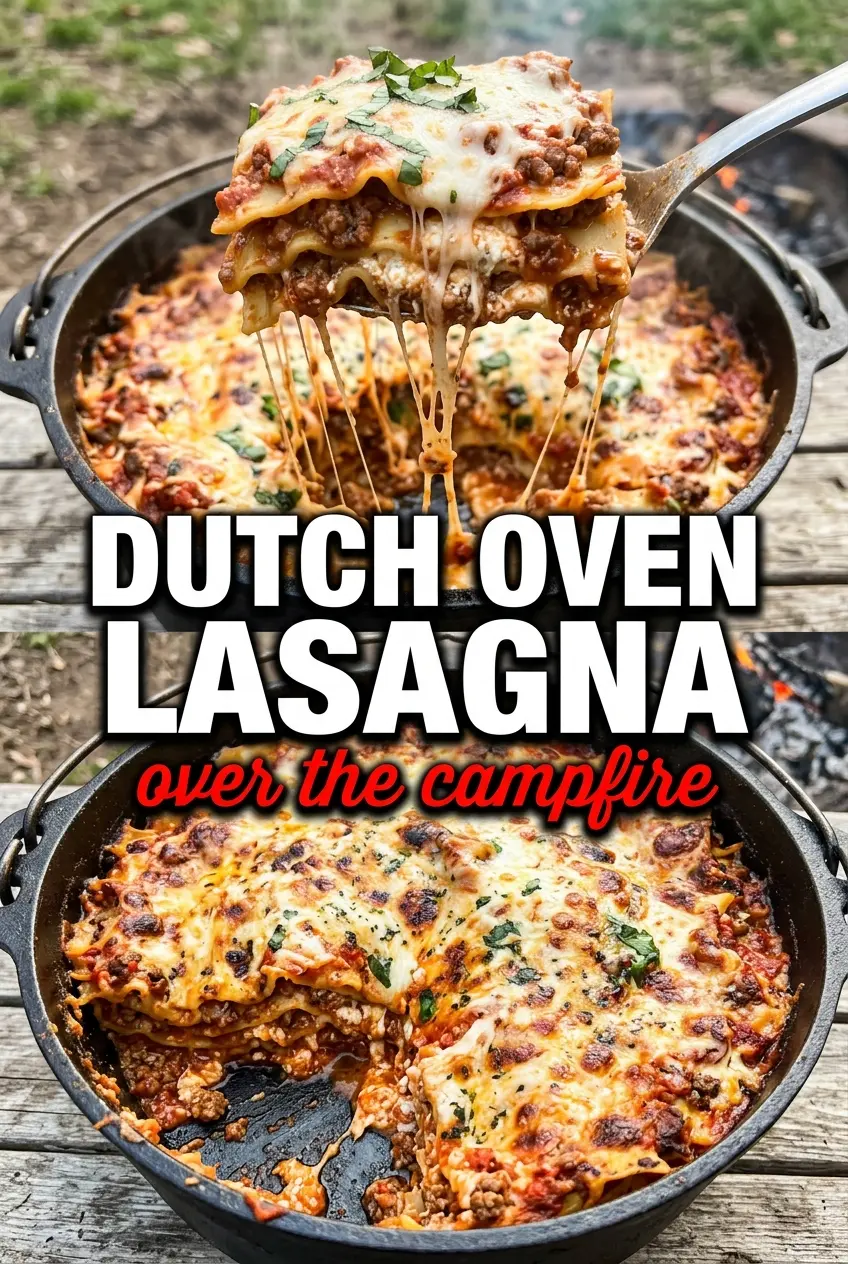
Hearty, cheesy Dutch oven lasagna turns out with tender noodles, a rich meat sauce, and a browned top that tastes like it came out of a backyard oven, not a campsite. The layers hold together once it rests, so you get clean slices instead of a loose scoop of pasta and cheese. It’s the kind of meal that feeds a crowd without needing a second pot or a complicated sauce.
The trick is building enough moisture into the pan so the uncooked noodles soften evenly while the sauce cooks around them. A thin layer of meat sauce on the bottom keeps the pasta from sticking, and the final layer of sauce on top protects the noodles while the cheese melts into a bubbling lid. I’ve found that breaking the noodles to fit the Dutch oven matters more than trying to force whole sheets into place.
Below, I’ve included the layering order that keeps the lasagna from turning watery, plus a few practical swaps for making it work at home or over coals. If you’ve ever had camp lasagna come out uneven in the middle, the details here will save you from that.
The noodles cooked through perfectly in the Dutch oven and the cheese on top turned golden without burning. I was nervous about the center, but after the rest time it sliced cleanly and fed everyone at camp.
Like this Dutch oven lasagna? Save it for your next camping trip or backyard cookout when you want a bubbling, crowd-size pasta dinner.
The Part That Keeps Dutch Oven Lasagna from Turning Soupy
The biggest mistake with Dutch oven lasagna is flooding it with too much sauce and then expecting the noodles to sort themselves out. They won’t. Uncooked noodles need steady moisture, not a puddle, and the sauce has to be thick enough to cling to the pasta while it bakes under coals.
That’s why the bottom layer matters. It gives the noodles heat from the base and keeps the first layer from welding itself to the pot. The rest time matters just as much as the cooking time; if you cut it too soon, the cheese and sauce will run, and the whole thing will feel looser than it should.
What the Cheese and Noodles Are Doing Here
- Ground beef — This gives the lasagna its backbone and turns the jarred sauce into something with enough body for a campfire bake. A leaner beef works fine, but if it’s very lean, add a splash of oil so the filling doesn’t dry out.
- Spaghetti sauce — Use a thick sauce, not a thin marinara. The thicker texture helps the noodles cook evenly without the lasagna collapsing into extra liquid at the bottom.
- Ricotta cheese — Ricotta keeps the middle creamy and rich. Cottage cheese can stand in if that’s what you have, but drain it first so the filling doesn’t loosen as it heats.
- Mozzarella — One cup goes into the ricotta mixture for stretch; the rest melts on top into that browned, bubbling finish. Pre-shredded cheese works, but freshly shredded melts a little smoother.
- Parmesan — This sharpens the filling and keeps the cheese layer from tasting flat. The grated shelf-stable kind is fine here.
- Uncooked lasagna noodles — These are the key to making this a true one-pot Dutch oven meal. Break them to fit the pot, and don’t overlap them too much or the center can stay firm.
Building the Layers So the Center Cooks Through
Brown the beef and thicken the sauce
Cook the ground beef until there’s no pink left and a few browned bits are stuck to the pan. Those browned spots add depth once the spaghetti sauce goes in, and they’re worth keeping. Stir the sauce into the beef and let it simmer just long enough to look cohesive, not watery. If the mixture looks loose now, it will stay loose in the Dutch oven.
Mix the ricotta filling
Combine the ricotta, one cup of mozzarella, Parmesan, egg, and Italian seasoning until the mixture looks evenly blended. The egg helps the cheese layer set instead of melting into the sauce. If you leave the filling streaky, you’ll get pockets of plain ricotta in the finished lasagna, which is a common failure in layered pasta dishes.
Stack the noodles with purpose
Spray the Dutch oven well, then spread a thin layer of meat sauce across the bottom before adding the first noodles. Break them to fit the shape of the pot, but don’t leave large gaps; the sauce needs to contact as much pasta as possible. Layer half the ricotta mixture and half the remaining sauce, then repeat. Finish with the last noodles and the rest of the sauce, then cover the top with the remaining mozzarella.
Cook under coals, then let it settle
Set the Dutch oven on campfire coals and put coals on the lid for even heat. Cook until the cheese is melted and the edges are bubbling hard, about 45 to 50 minutes. If the top browns too fast, the heat is too aggressive and the middle may still be firm. Let the lasagna rest for 10 minutes before serving so the layers hold together when you scoop it out.
How to Adapt This Dutch Oven Lasagna for Different Camps and Crowds
Make it meatless with sautéed mushrooms
Swap the ground beef for finely chopped mushrooms cooked until their moisture cooks off. You’ll get a deeper, earthier lasagna that still holds its structure, but the filling will be a little lighter and less rich than the beef version.
Use cottage cheese for a lighter filling
Cottage cheese can replace ricotta if you want a tangier, less heavy middle layer. Drain it first or pulse it briefly if you want a smoother texture, since extra liquid is what makes the filling run.
Gluten-free version with no-boil gluten-free noodles
Use gluten-free lasagna noodles that are meant for baking, and add a little extra sauce if they seem dry in the package directions. Gluten-free noodles can bake up softer and more fragile, so give the lasagna the full rest time before serving.
Increase the batch for a larger group
Double the ingredients only if your Dutch oven is big enough to handle the height. If the layers get too tall, the center takes longer to cook, and the top can overbrown before the middle is done.
Storage and Reheating
- Refrigerator: Store leftovers in an airtight container for up to 4 days. The noodles will absorb more sauce as it sits, so the texture gets a little firmer.
- Freezer: It freezes well in portions for up to 2 months. Wrap tightly and thaw in the refrigerator before reheating so the cheese doesn’t separate.
- Reheating: Warm in a covered oven-safe dish at 350°F until hot through, or microwave smaller portions with a splash of sauce or water. Reheat gently; blasting it on high dries out the edges before the center heats.
Questions I Get Asked About This Recipe
Dutch Oven Lasagna
Ingredients
Equipment
Method
- Brown the ground beef until no longer pink, then mix it with the spaghetti sauce until evenly combined.
- Mix ricotta cheese, 1 cup mozzarella, Parmesan, egg, and Italian seasoning until smooth and thick, with no visible egg streaks.
- Spray the Dutch oven with cooking spray, then spread a thin layer of meat sauce on the bottom.
- Layer 3 uncooked lasagna noodles (broken to fit), then spread half the ricotta mixture and spoon half the remaining meat sauce over the noodles.
- Repeat the layers once more, using 3 noodles (broken to fit), the rest of the ricotta mixture, and the remaining meat sauce.
- Top with the final 3 uncooked noodles and the remaining sauce, then sprinkle with the remaining mozzarella for a cheesy surface.
- Cover the Dutch oven and place it on campfire coals with additional coals on the lid, baking for 45-50 minutes until the top is golden and bubbly.
- Let the lasagna rest for 10 minutes before serving, so the layers set and the first scoop holds together.


