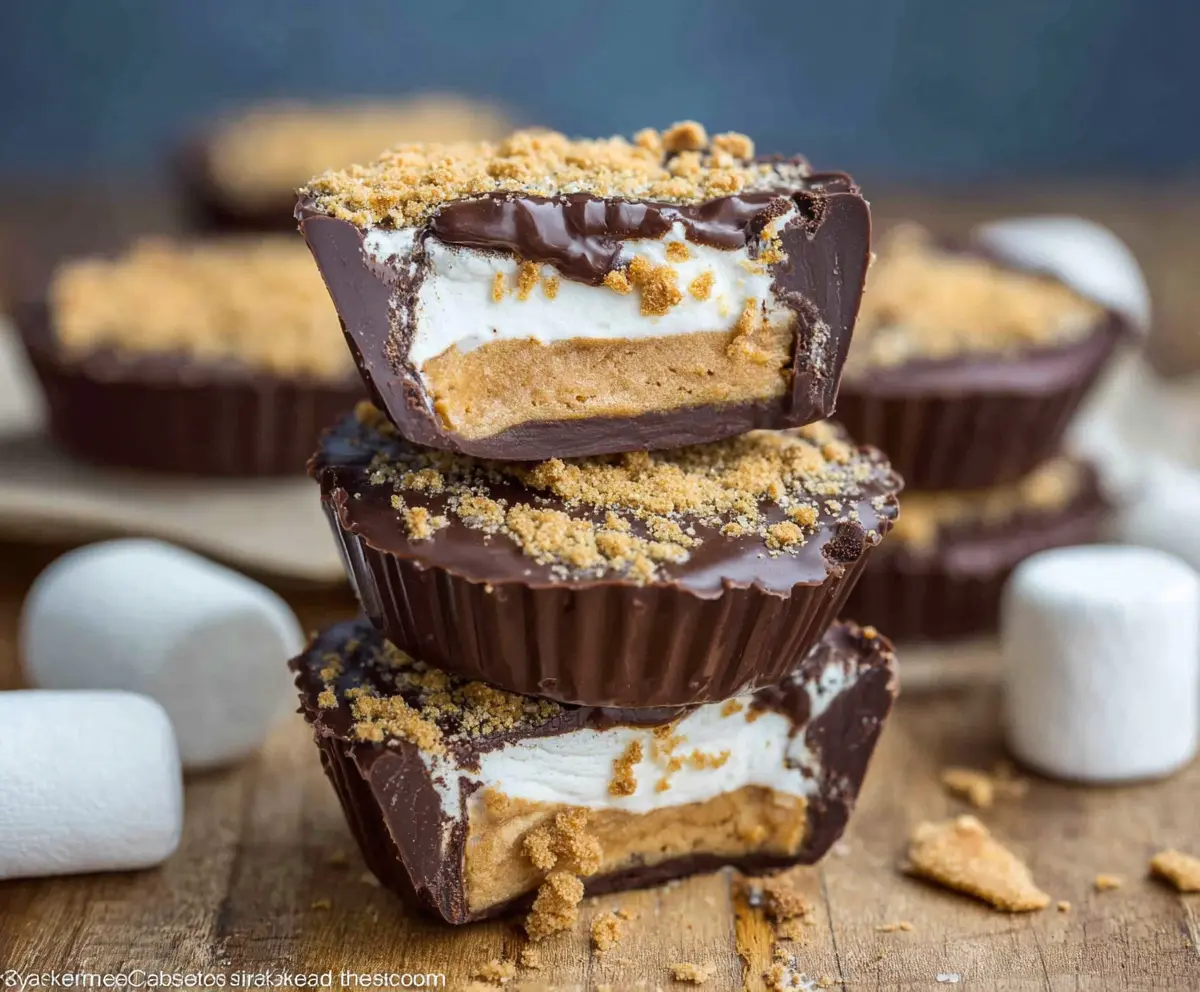
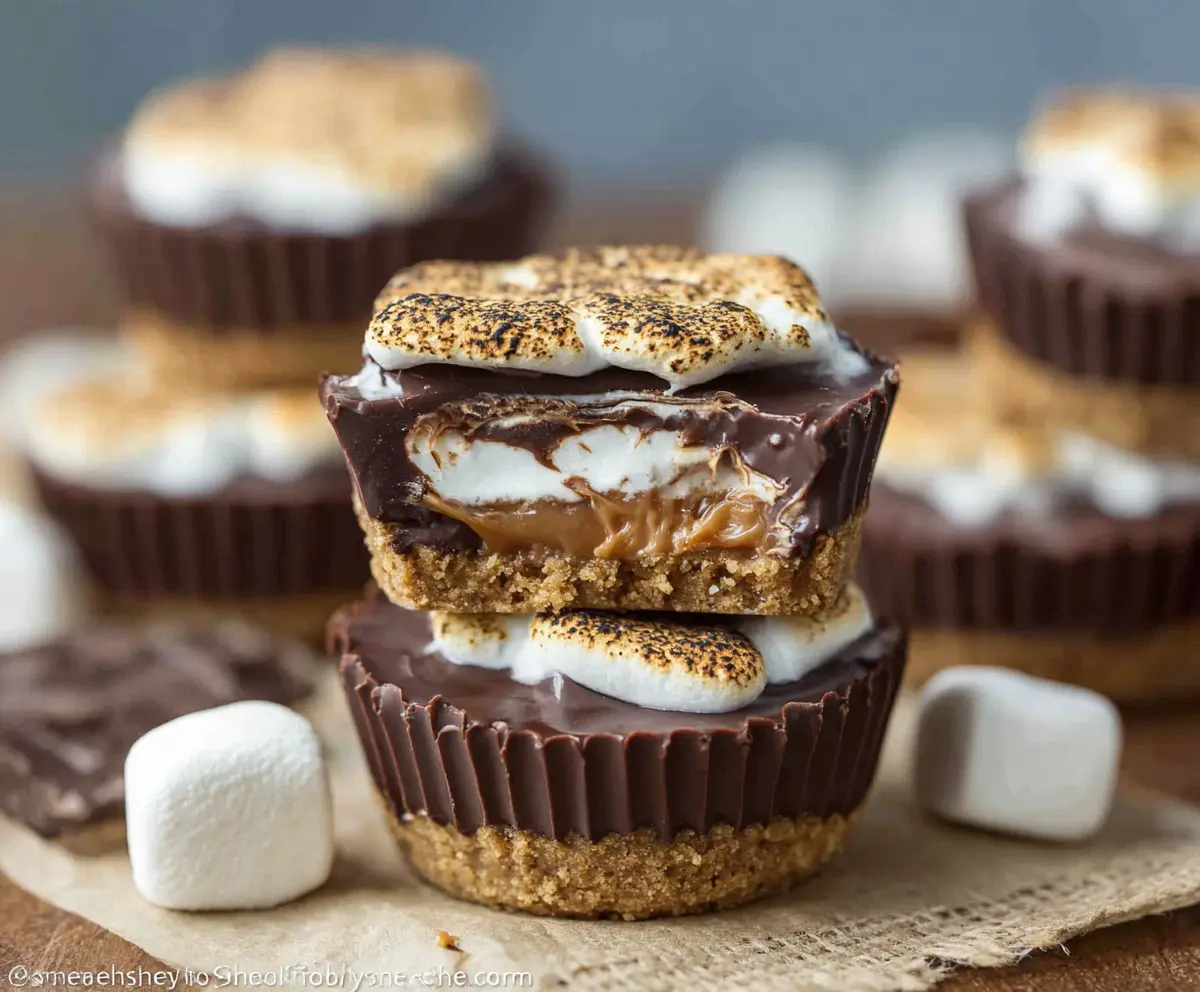
S’mores Peanut Butter Cups are a sweet treat that brings together chocolate, peanut butter, and crunchy graham crackers. You’ll love every bite of this sweet mix!
Making these is almost as fun as eating them! I find myself sneaking a few bites before they even set—who could resist that gooey goodness? 🍫
These are perfect for sharing or keeping all to yourself. I love serving them at gatherings since everyone gets excited. Plus, they’re super easy to whip up!
Key Ingredients & Substitutions
Chocolate Chips: Semisweet chocolate chips are great, but feel free to swap them out for dark or milk chocolate, depending on your taste. Some like a richer flavor with dark chocolate, while others prefer a sweeter bite with milk chocolate.
Peanut Butter: Creamy peanut butter gives a smooth texture. If you’re looking for a nut-free option, sunflower seed butter or tahini works well. Just remember, the flavor will slightly change but can still be tasty!
Mini Marshmallows vs. Marshmallow Fluff: You can use either mini marshmallows for a fun texture or marshmallow fluff for easy spreading. If using marshmallows, cut them down a bit to fit better.
Graham Crackers: The classic choice, but if you want a twist, try teddy grahams or even crushed-up shortbread cookies for a different flavor. It’s fun to experiment!
How Do I Melt Chocolate Smoothly?
Melted chocolate can be tricky, but with a few tips, you’ll make it perfectly! Use gentle heat to avoid burning. Here are two simple methods:
- Double Boiler: Place a heatproof bowl over a pot of simmering water. This indirect heat will melt the chocolate slowly.
- Microwave: Use a microwave-safe bowl, heat in 30-second bursts, stirring between sessions until fully melted.
Whichever method you choose, stir frequently and keep an eye on it. If it seems too thick, you can add a teaspoon of coconut oil to make it smoother!
What’s the Best Way to Layer the Filling?
Layering is key to getting those perfect bites! After the chocolate bottom has set, spoon your peanut butter filling gently on top. It’s important not to overstuff—just a heaping teaspoon works well. Then, add your marshmallows and cover with more melted chocolate.
For a smooth finish, try tapping the mold gently on the counter before refrigerating to settle everything and eliminate air bubbles. This helps ensure each layer stays intact!
How to Make S’mores Peanut Butter Cups
Ingredients You’ll Need:
For the Cups:
- 2 cups semisweet chocolate chips (or dark/milk chocolate as preferred)
For the Peanut Butter Filling:
- 3/4 cup creamy peanut butter
- 1/4 cup powdered sugar
- 1/2 teaspoon vanilla extract
- Optional: 1 tablespoon unsalted butter (for making peanut butter filling smoother)
For the S’mores Layer:
- 1 cup mini marshmallows or marshmallow fluff
- 6-8 graham crackers, crushed finely
How Much Time Will You Need?
This delightful treat takes about 20 minutes of prep time and an additional 1 hour of chill time for the cups to set. Perfect for an afternoon treat or a fun dessert after dinner!
Step-by-Step Instructions:
1. Prepare the Peanut Butter Filling:
In a medium bowl, mix together the peanut butter, powdered sugar, vanilla extract, and optional butter (if you want a creamier filling). Stir until the mixture is smooth and well combined. This will be your delicious peanut butter layer!
2. Melt the Chocolate:
Using a double boiler or a microwave, melt the chocolate chips. If using the microwave, heat in 30-second intervals, stirring in between, until the chocolate is completely smooth and melted. Be careful not to burn the chocolate!
3. Mold the Chocolate Base:
Line a muffin tin or silicone mold with paper cupcake liners. Spoon about 1 tablespoon of the melted chocolate into each liner, spreading it evenly to cover the bottom and a bit up the sides of the liners. Pop the molds in the fridge for about 10 minutes to let the chocolate harden.
4. Add the Peanut Butter Layer:
Once the chocolate has set, take the molds out of the fridge. On top of the hardened chocolate base, add a heaping teaspoon of the peanut butter mixture. Flatten it slightly, leaving some space for the marshmallows and topping.
5. Add the Marshmallow Layer:
Now, spoon mini marshmallows or marshmallow fluff on top of the peanut butter layer. If you’re using mini marshmallows, gently press them down into the peanut butter. Return the molds to the fridge for another 5-10 minutes to firm up the marshmallow layer.
6. Top with Chocolate and Graham Cracker Crumbs:
Pour the remaining melted chocolate over the marshmallow layer, covering it completely and sealing the edges. Then, sprinkle crushed graham cracker crumbs generously on top for that classic S’mores crunch!
7. Chill and Set:
Place your peanut butter cups in the fridge for at least 1 hour to allow them to set fully. This will ensure they hold their shape when you bite into them!
8. Serve:
Once they are set, carefully remove the cups from the molds and peel off the liners. Enjoy your homemade S’mores Peanut Butter Cups right away, or store any leftovers in an airtight container in the refrigerator!
Enjoy this sweet combination of flavors that brings the joy of a campfire treat right to your kitchen! 🌟
Can I Use Different Types of Chocolate?
Absolutely! You can substitute semisweet chocolate chips with dark or milk chocolate if you prefer a different flavor. Each type of chocolate will bring its own unique taste to the S’mores Peanut Butter Cups!
How Should I Store Leftover Peanut Butter Cups?
Store any leftovers in an airtight container in the refrigerator for up to a week. Just make sure to separate layers with parchment paper to prevent sticking.
Can I Make These Vegan?
Yes! Use dairy-free chocolate chips and natural peanut butter without added sugar or oils. You can also substitute the butter in the peanut butter filling with a plant-based alternative.
What If I Don’t Have Graham Crackers?
If you don’t have graham crackers, you can use crushed vanilla wafers or shortbread cookies as a substitute! They’ll provide a similar buttery sweetness and crunch to your peanut butter cups.