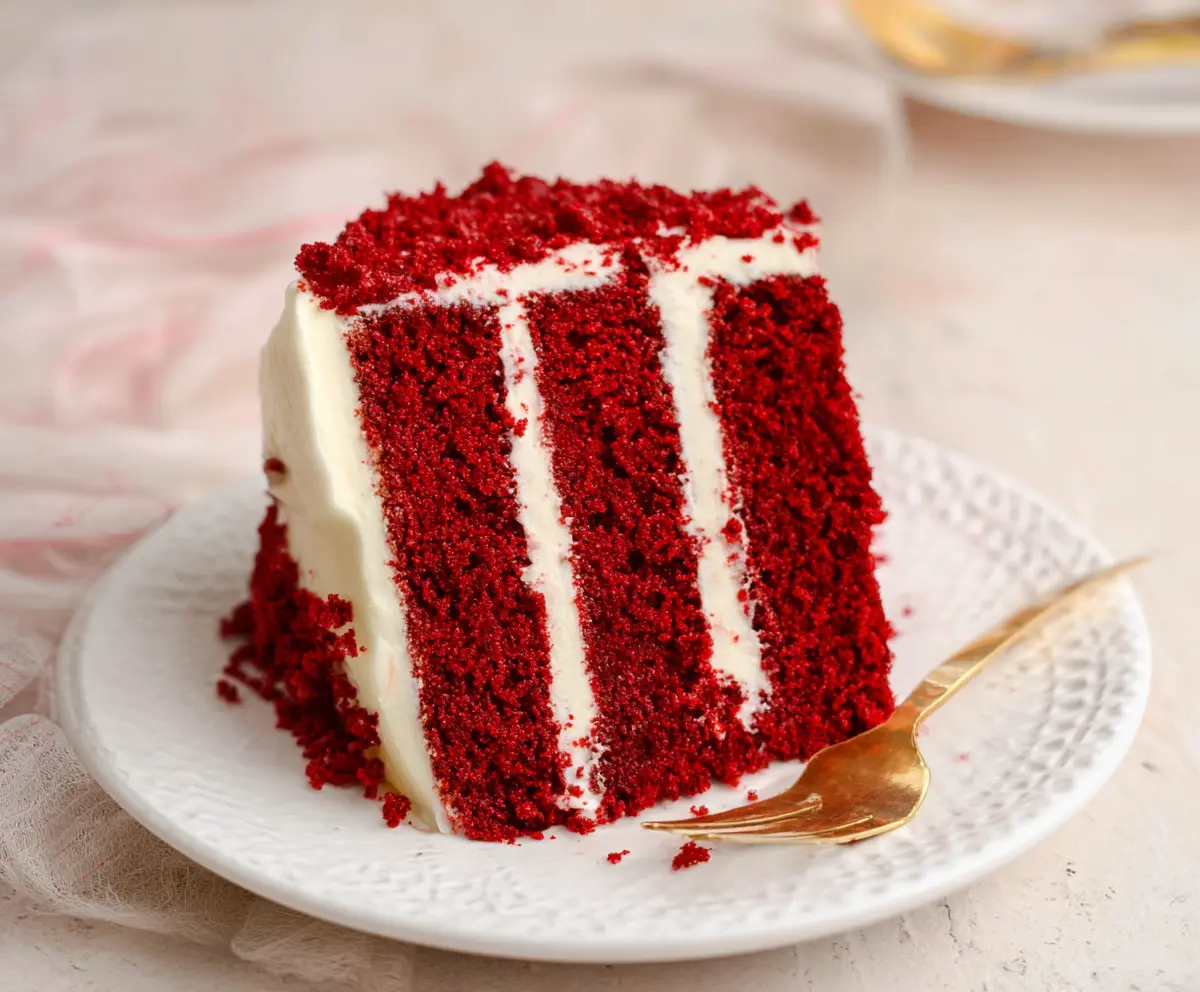
This Red Velvet Cake is a stunning dessert with its deep red color and smooth cream cheese frosting. It’s soft, moist, and simply delicious, perfect for celebrations!
Every time I bake this cake, I feel like a baking superstar! The combination of flavors is so tempting, I can’t resist sneaking a slice before sharing. You’re definitely going to love it! 😊
Key Ingredients & Substitutions
All-Purpose Flour: This is the backbone of your cake. If you’re looking for a gluten-free option, use a 1:1 gluten-free baking flour, and it should work just fine!
Buttermilk: Adds a tangy flavor and tender texture. If you don’t have any, you can mix milk with a tablespoon of vinegar or lemon juice, letting it sit for 5 minutes to create a substitute.
Red Food Coloring: This gives the cake its beautiful color. If you’d like a natural alternative, consider using beet juice. It’s not as vibrant but adds a nice hue.
Cream Cheese: For frosting, it’s the star! If you want a lower-fat option, try using Greek yogurt mixed with a little powdered sugar.
Why is Mixing Ingredients Important for Texture?
The way you mix your ingredients plays a crucial role in the cake’s texture. It’s essential to combine wet and dry ingredients gently to avoid overmixing. Overmixing can lead to a dense cake instead of the light, fluffy texture we aim for.
- Start by mixing the wet ingredients and sugar until smooth.
- When adding the dry ingredients and buttermilk, alternate between them. This method keeps the batter lighter.
- Stop mixing as soon as the ingredients are just combined. A few lumps are okay!
What’s the Best Way to Frost a Cake?
Frosting can seem tricky, but following these simple steps will help you achieve a beautiful finish:
- Make sure your cake layers are completely cool before frosting to avoid melting the cream cheese.
- Use a spatula to spread a thick layer of frosting on the first layer, then add the second layer on top.
- Repeat for the third layer and finish by frosting the top and sides of the cake.
- For a clean look, run your spatula under hot water, dry it off, and smooth the frosting.
With these tips, your Red Velvet Cake will turn out perfect and impress everyone at your gathering!

How to Make Red Velvet Cake
Ingredients You’ll Need:
For the Cake:
- 2 1/2 cups (312.5g) all-purpose flour
- 1 1/2 cups (300g) granulated sugar
- 1 teaspoon baking soda
- 1 teaspoon fine salt
- 1 teaspoon cocoa powder (unsweetened)
- 1 1/2 cups (360ml) vegetable oil
- 1 cup (240ml) buttermilk, at room temperature
- 2 large eggs, at room temperature
- 2 tablespoons (30ml) red food coloring
- 1 teaspoon white distilled vinegar
- 1 teaspoon vanilla extract
For the Cream Cheese Frosting:
- 16 oz (454g) cream cheese, softened
- 1/2 cup (113g) unsalted butter, softened
- 4 cups (480g) powdered sugar, sifted
- 1 teaspoon vanilla extract
Time Estimate:
The total time for making this delicious Red Velvet Cake is about 1 hour and 30 minutes. This includes about 30 minutes for preparation, 30-35 minutes for baking, and about 30 minutes for cooling and frosting. Perfect for an afternoon treat or special event!
Step-by-Step Instructions:
1. Preheat Oven and Prepare Pans:
Start by preheating your oven to 350°F (175°C). While the oven is heating, grease and flour three 9-inch round cake pans or line the bottoms with parchment paper circles to prevent sticking.
2. Mix Dry Ingredients:
In a medium bowl, sift together the all-purpose flour, baking soda, salt, and cocoa powder. Mixing these ingredients first helps to ensure an even rise. Set this bowl aside while you prep the wet ingredients.
3. Mix Wet Ingredients:
In a large mixing bowl, whisk together the granulated sugar and vegetable oil until they’re well combined. Add the eggs one at a time, making sure to beat well after each addition to incorporate air and help with leavening.
4. Add Color and Flavor:
Next, mix in the red food coloring, vanilla extract, and white distilled vinegar until everything is evenly combined. The vinegar adds a nice tangy flavor that balances the sweetness.
5. Combine with Buttermilk and Flour:
Now, alternately add the dry ingredient mixture and the buttermilk to your wet mixture, starting and ending with the dry ingredients. Mix until just combined; do not overmix or your cake may turn out dense.
6. Bake:
Carefully divide the batter evenly among the three prepared cake pans. Bake in your preheated oven for 25-30 minutes or until a toothpick inserted into the center comes out clean.
7. Cool:
Once baked, remove the cakes from the oven and let them cool in the pans for about 10 minutes. After that, turn them out onto a wire rack to cool completely. This is important to ensure the frosting doesn’t melt when you frost the cake.
8. Prepare Frosting:
While the cakes cool, prepare the cream cheese frosting. In a large bowl, use an electric mixer to beat the softened cream cheese and unsalted butter until smooth and creamy. Gradually add in the sifted powdered sugar, mixing on low speed until combined. Once combined, increase to medium-high speed and beat until light and fluffy. Finally, mix in the vanilla extract.
9. Assemble the Cake:
Now it’s time to assemble! Place one cake layer on your serving plate or cake stand. Spread a layer of cream cheese frosting evenly over the top. Add the second cake layer on top and repeat with another layer of frosting. Add the third layer, and then frost the top and sides of the entire cake with the leftover frosting.
10. Decorate and Serve:
For a nice finishing touch, you can sprinkle some cake crumbs or your favorite decorations on top. Let the cake chill for about 30 minutes to allow the frosting to set before slicing and serving. Enjoy this rich, moist Red Velvet Cake with a delicious cream cheese frosting that everyone will love!
Happy baking! 🎂
Can I Use Different Food Coloring?
Yes, you can! While red food coloring is traditional for Red Velvet Cake, you can use beet juice or a different gel food coloring if you prefer. Just keep in mind that the final color may vary slightly.
Can I Make This Cake Gluten-Free?
Absolutely! Substitute the all-purpose flour with a 1:1 gluten-free baking blend. Ensure that it contains xanthan gum or add it separately as per the blend’s instructions for the best texture.
How Should I Store Leftover Cake?
Store any leftover cake in an airtight container in the refrigerator for up to 4 days. For longer storage, you can freeze slices in plastic wrap and then in a zip-top bag for up to 3 months. Thaw in the fridge before serving!
Can I Make the Cake Ahead of Time?
Yes, you can! Bake the cake layers in advance and let them cool completely. Wrap each layer tightly in plastic wrap and refrigerate for up to 2 days or freeze for longer storage. Frost when ready to serve.