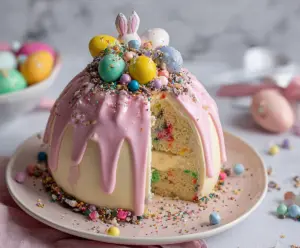
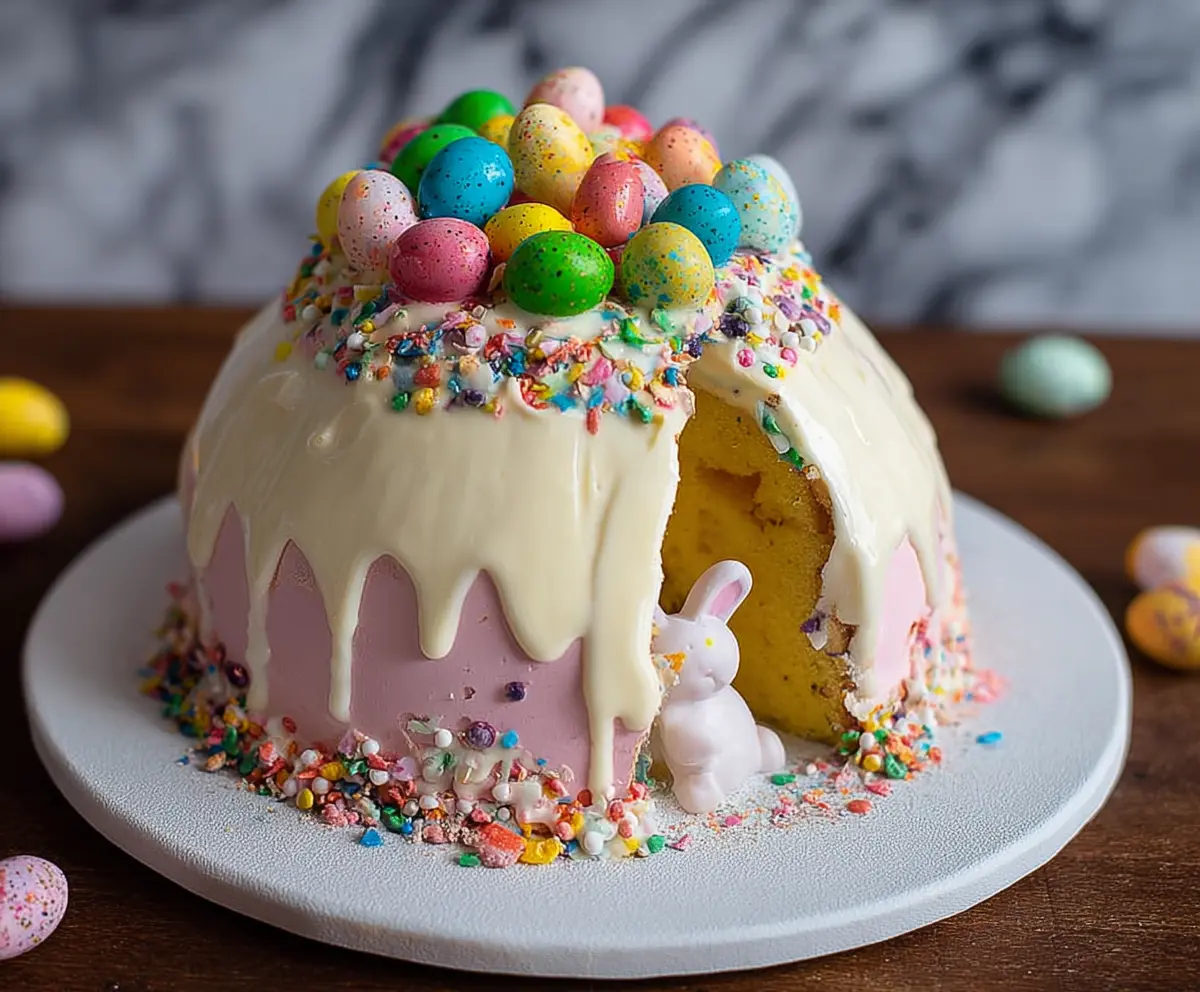
This Epic Easter Egg Smash Cake is a fun and colorful treat that’s sure to bring smiles. With layers of fluffy cake and creamy frosting, it’s topped with candy eggs just waiting to be smashed!
Baking this cake feels like a party! I love watching the kids get excited as they crack the eggs open to reveal the tasty surprises inside. It’s sweet fun in every slice! 🎉
Key Ingredients & Substitutions
All-Purpose Flour: This is the backbone of your cake, giving it structure. If you need a gluten-free option, use a 1:1 gluten-free flour blend, which works well in most baking recipes.
Unsalted Butter: Butter adds rich flavor. If you prefer, you can swap half of it with oil for a moister cake, but keep in mind it might change the taste slightly.
Cream Cheese: This is perfect for the filling! If you want a lighter option, consider using Greek yogurt or mascarpone cheese. Just know that the flavor will vary a bit.
White Chocolate Melts: They create that beautiful shell! If you can’t find them, use regular white chocolate bars, but chop them up before melting.
Sprinkles: These add fun and color! Feel free to use any type you like, including chocolate sprinkles, or even swap for chopped nuts for a unique twist.
How Do You Create a Perfect Chocolate Dome?
Making a chocolate dome can seem tricky, but it’s fun! The key is to ensure a smooth coat. A few simple steps can help you succeed:
- Melt the white chocolate carefully. A double boiler works best to avoid seizing.
- If using a balloon, inflate it to the desired size and ensure it’s clean.
- Dip the balloon in the melted chocolate, covering it evenly. Don’t rush—let each layer set slightly before adding more for firmness.
- After coating, place it upside down on parchment. Chill until hard, then gently deflate the balloon or remove the mold.
Personal tip: If your chocolate is too thick when dipping, add a small amount of vegetable oil to thin it out and create a smoother finish!
How to Make an Epic Easter Egg Smash Cake!
Ingredients You’ll Need:
For the Cake:
- 2 ½ cups all-purpose flour
- 2 ½ tsp baking powder
- ½ tsp salt
- 1 cup unsalted butter, softened
- 1 ¾ cups granulated sugar
- 4 large eggs
- 1 tbsp vanilla extract
- 1 cup whole milk
- 1 cup colorful sprinkles (candy-coated)
For the Cream Cheese Filling:
- 8 oz cream cheese, softened
- ½ cup unsalted butter, softened
- 2 cups powdered sugar
- 1 tsp vanilla extract
For the White Chocolate Shell:
- 16 oz white chocolate melts or candy coating
For the Pink Drip:
- ½ cup white chocolate melts
- Pink gel food coloring
Decorations:
- Assorted colorful chocolate Easter eggs (solid and speckled)
- Mini candy-coated chocolate balls
- Edible glitter or confetti sprinkles
- Small edible bunny decoration (optional)
How Much Time Will You Need?
This delightful cake will take approximately 1 hour for preparation and baking, plus about 1-2 hours for chilling and decorating. It’s a bit of work, but it’s totally worth it for that stunning Easter dessert!
Step-by-Step Instructions:
1. Prep the Cake Pans:
First, preheat your oven to 350°F (175°C). Grease and flour two 6-7 inch round cake pans or dome molds. For an easier release, line the bottom with parchment paper.
2. Make the Cake Batter:
In a medium bowl, whisk together the flour, baking powder, and salt until well combined. In a larger bowl, beat the softened butter and granulated sugar together until it becomes light and fluffy. Add the eggs one at a time, mixing well after each one. Stir in the vanilla extract.
Now, alternate adding the flour mixture and milk to the butter mixture, starting and finishing with the flour. Mix until just combined, and gently fold in the colorful sprinkles to add some fun inside the cake!
3. Bake:
Evenly divide the batter between the prepared pans. Place them in the preheated oven and bake for 25-30 minutes, or until a toothpick inserted into the center comes out clean. Once done, let the cakes cool completely in the pans before carefully removing them.
4. Prepare the Cream Cheese Filling:
While the cakes are cooling, prepare the filling! Beat the softened cream cheese and butter together in a bowl until it’s smooth and creamy. Gradually mix in the powdered sugar and vanilla until everything is nice and fluffy. Set aside in the fridge until you’re ready to assemble the cake.
5. Assemble the Cake Layers:
If needed, level the tops of the cooled cake layers with a knife. Place one layer on a cake board or serving plate, then spread a generous layer of cream cheese filling on top. Gently place the second layer on top of the first one, pressing down lightly.
6. Create the Chocolate Dome:
Melt the white chocolate according to the package instructions. If you’re using a clean, smooth balloon, inflate it to a small to medium size. Dip the balloon or dome mold into the melted chocolate, coating it evenly to form a thick shell. Let the coated dome set on parchment paper in the fridge.
7. Cover Cake with Chocolate Shell:
Once your chocolate dome is set, place the assembled cake inside it. Use some melted white chocolate to seal any gaps around the edges and return the whole thing to the fridge for a little while longer to set.
8. Make Pink Chocolate Drip:
Melt the white chocolate melts, then stir in pink gel food coloring to your desired shade. Allow it to cool a bit—it should still be pourable but not too runny. Drizzle this colorful drip over the top of the dome, allowing it to trickle down the sides.
9. Decorate Top:
While the pink drip is still tacky, decorate the top with colorful chocolate eggs, mini candy balls, and a sprinkle of edible glitter. If you have a cute edible bunny decoration, place it in the center for an extra festive touch!
10. Serve and Enjoy:
Chill the cake until you’re ready to serve it. When it’s time, carefully slice through the chocolate shell and cake layers to reveal all those fun sprinkles inside! Don’t forget to serve with all those delightful candy decorations for a truly epic Easter treat!
This show-stopping cake is a festive treat bursting with flavor and color—perfect for any Easter celebration and guaranteed to impress friends and family!
Can I Use Different Colors of Chocolate for the Shell?
Absolutely! While white chocolate is traditional, you can use milk chocolate or dark chocolate for a different flavor. Just melt it down the same way, and follow the instructions as usual.
What If I Don’t Have a Balloon for the Chocolate Dome?
No problem! You can use a dome mold if you have one. Just ensure it’s well-greased or lined with parchment for easy removal. If you’re using a bowl for shaping, make sure it has a smooth surface for a clean finish.
How Should I Store Leftovers?
Store any leftover cake in an airtight container in the fridge for up to 3 days. If the chocolate shell gets soft, you can always chill it briefly before serving to help it regain its shape.
Can I Make This Cake Gluten-Free?
Yes! Use a 1:1 gluten-free flour blend to replace the all-purpose flour in the recipe. Just double-check that your other ingredients (like baking powder and sprinkles) are also gluten-free to keep the cake safe for those who are avoiding gluten.