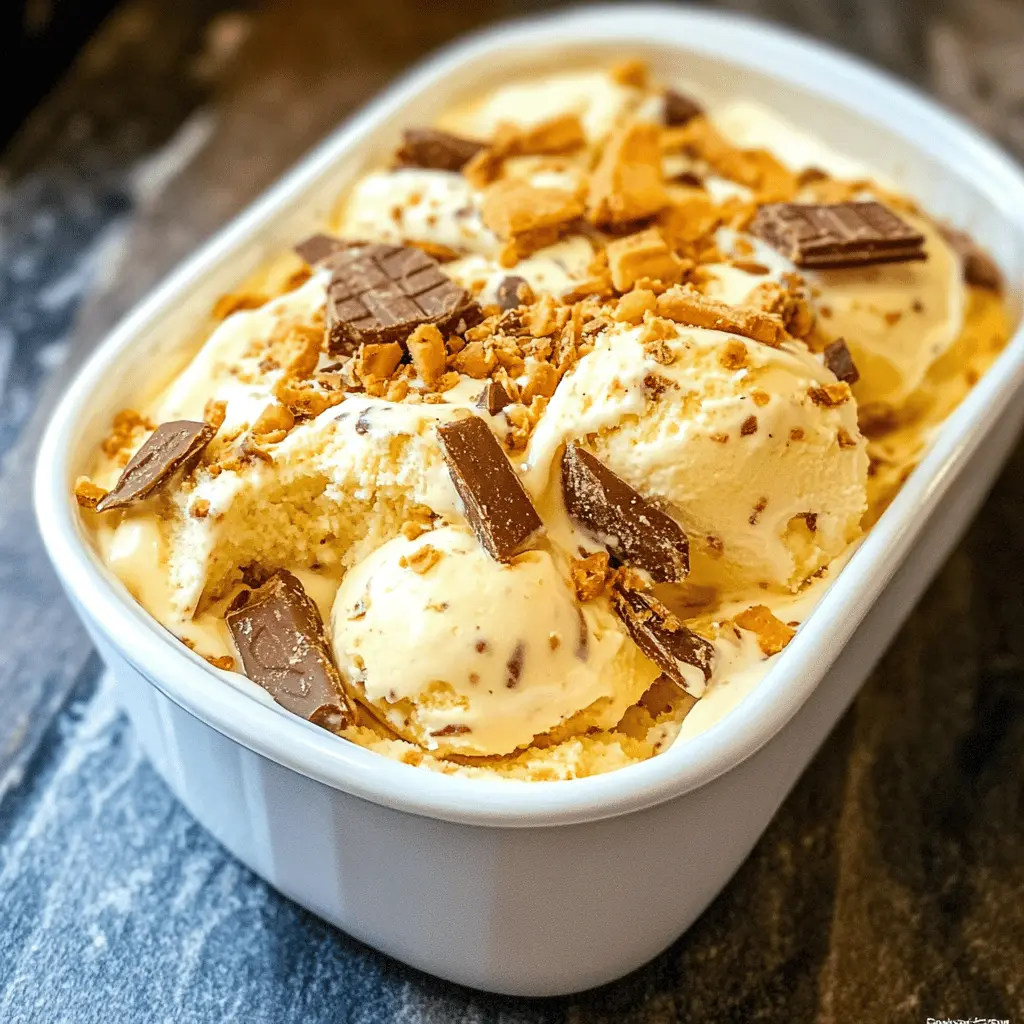
This creamy ice cream is loaded with crunchy Butterfinger pieces, making it a sweet treat everyone will love. It’s super easy to whip up and perfect for hot days!
Honestly, who could resist that chocolate-peanut butter combination? I keep a stash of this ice cream in the freezer for emergencies (or my late-night cravings)! 🍦
I appreciate how simple it is to make—just mix, freeze, and enjoy! It’s like having a soft version of a favorite candy bar in a bowl. Yum!
Key Ingredients & Substitutions
Heavy Cream: This ingredient gives the ice cream its rich and creamy texture. If you’re looking for a lighter option, you can replace it with half-and-half or even a combination of whole milk and a bit of butter, though it won’t be as creamy.
Whole Milk: You can use 2% milk for a lower fat alternative, but the ice cream may be less creamy. For a dairy-free version, try coconut milk, though it will have a coconut flavor.
Granulated Sugar: If you prefer a healthier option, use honey or maple syrup. Keep in mind that they may change the flavor slightly and could require adjustments in the liquid ratios.
Vanilla Extract: Pure vanilla extract is best for flavor, but in a pinch, imitation vanilla works too. You could also experiment with almond extract for a different twist.
Butterfinger Candy Bars: For those who want a nut-free version, try substituting with crushed peanut butter candy, or use a similar chocolate candy like Reese’s or Oreo cookies for a fun variation!
How Do You Get the Best Texture in Homemade Ice Cream?
Achieving a creamy texture in homemade ice cream is all about properly mixing and freezing. First, make sure to whisk your mixture until the sugar dissolves completely, which helps in creating a smooth base.
- Churn the ice cream mix until soft-serve consistency is achieved—this usually takes 20-25 minutes.
- Add in the Butterfinger chunks during the last 5 minutes of churning. This helps to mix them evenly without them melting completely.
- Finally, for the perfect scoop, let the ice cream sit out for a few minutes before serving—it will soften slightly for easier scooping!
Easy Homemade Butterfinger Ice Cream
Ingredients You’ll Need:
- 2 cups heavy cream
- 1 cup whole milk
- 3/4 cup granulated sugar
- 1 teaspoon vanilla extract
- 1 cup Butterfinger candy bars, chopped into small pieces
How Much Time Will You Need?
This delightful ice cream takes about 10 minutes of prep time, plus around 20-25 minutes to churn in the ice cream maker, and at least 2-4 hours to freeze until firm. So, you can whip it up quickly and let it set while you wait to enjoy a tasty treat!
Step-by-Step Instructions:
1. Mix the Base:
In a medium bowl, combine the heavy cream, whole milk, granulated sugar, and vanilla extract. Whisk everything together until the sugar is completely dissolved. This will create a smooth and tasty ice cream base.
2. Churn the Mixture:
Pour the mixture into your ice cream maker. Churn according to the manufacturer’s instructions, which usually takes about 20-25 minutes. Keep an eye on it until it reaches a soft-serve consistency; it should be thick but pourable.
3. Add the Butterfingers:
During the last 5 minutes of churning, gently add in the chopped Butterfinger pieces. This will help distribute them throughout the ice cream without melting them away. Yum!
4. Freeze the Ice Cream:
Once it’s churned and fluffy, transfer the ice cream to an airtight container. Freeze it for at least 2-4 hours until it’s firm enough to scoop. Patience is key for the perfect creamy texture!
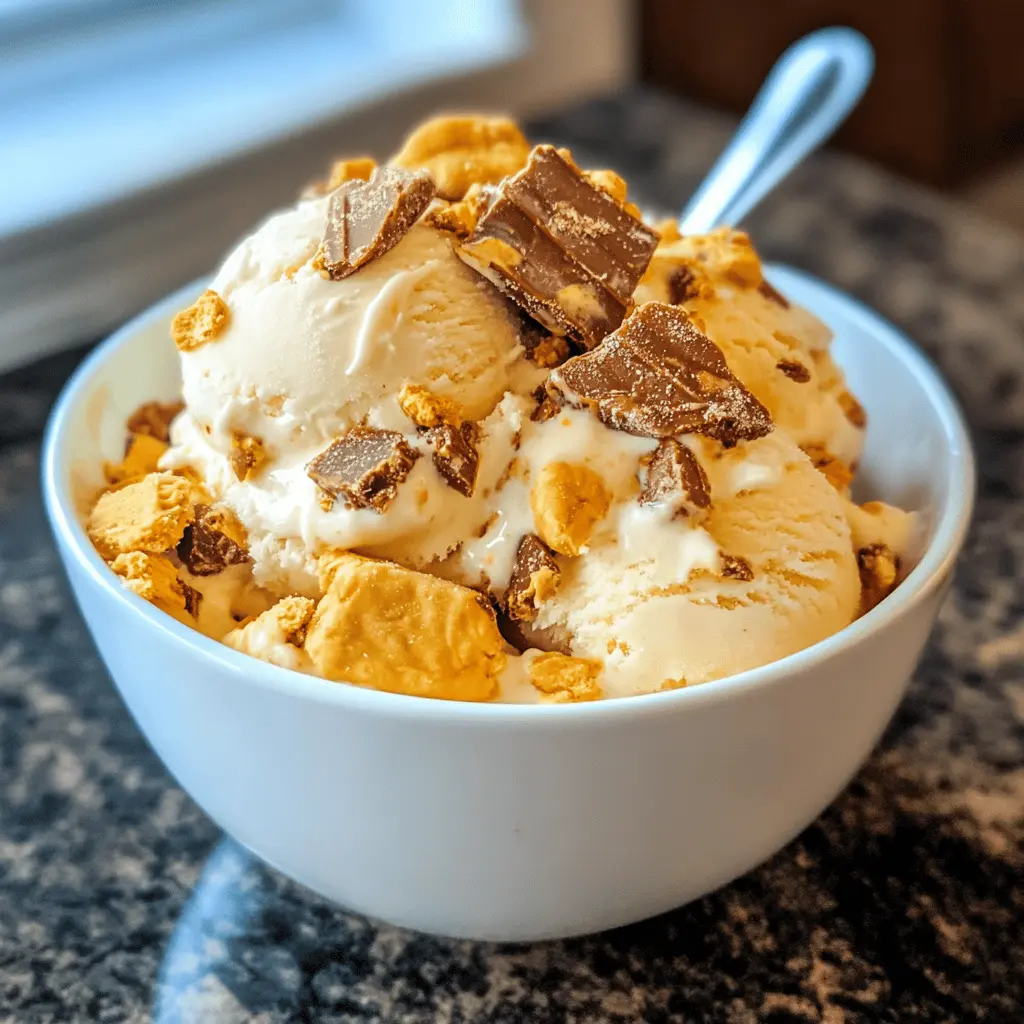
5. Serve and Enjoy!
When you’re ready to enjoy your homemade ice cream, scoop it into bowls and dig in! Get ready for the delicious combination of creamy ice cream and crunchy Butterfinger pieces in every bite.
This recipe yields a rich and creamy homemade ice cream with chunks of crunchy Butterfinger candy bars mixed throughout, delivering that delicious peanut butter and chocolate flavor that makes it a delightful treat any time of year!
Frequently Asked Questions (FAQ)
Can I Use Different Types of Milk?
Absolutely! If you’re looking for a lighter version, you can use 2% milk instead of whole milk. For a dairy-free option, consider using coconut milk, which will give a nice flavor but will change the overall taste slightly.
Can I Make This Without an Ice Cream Maker?
Yes, you can! Simply follow the recipe steps to mix your ingredients, then pour the mixture into a shallow dish and freeze it. Every 30-45 minutes, stir the mixture with a fork to break up any ice crystals, until it’s fully set (about 4-6 hours).
How Should I Store Leftover Ice Cream?
Store any leftover ice cream in an airtight container in the freezer. It can last for up to 1-2 weeks. To enjoy, let it sit out for a few minutes before scooping to soften, making it easier to serve.
Can I Substitute the Butterfinger Bars?
Definitely! If you prefer a different flavor, you can substitute the Butterfinger with other candy bars like Reese’s, Snickers, or even crushed Oreos. Just chop them up into small pieces and add them the same way as the Butterfinger!