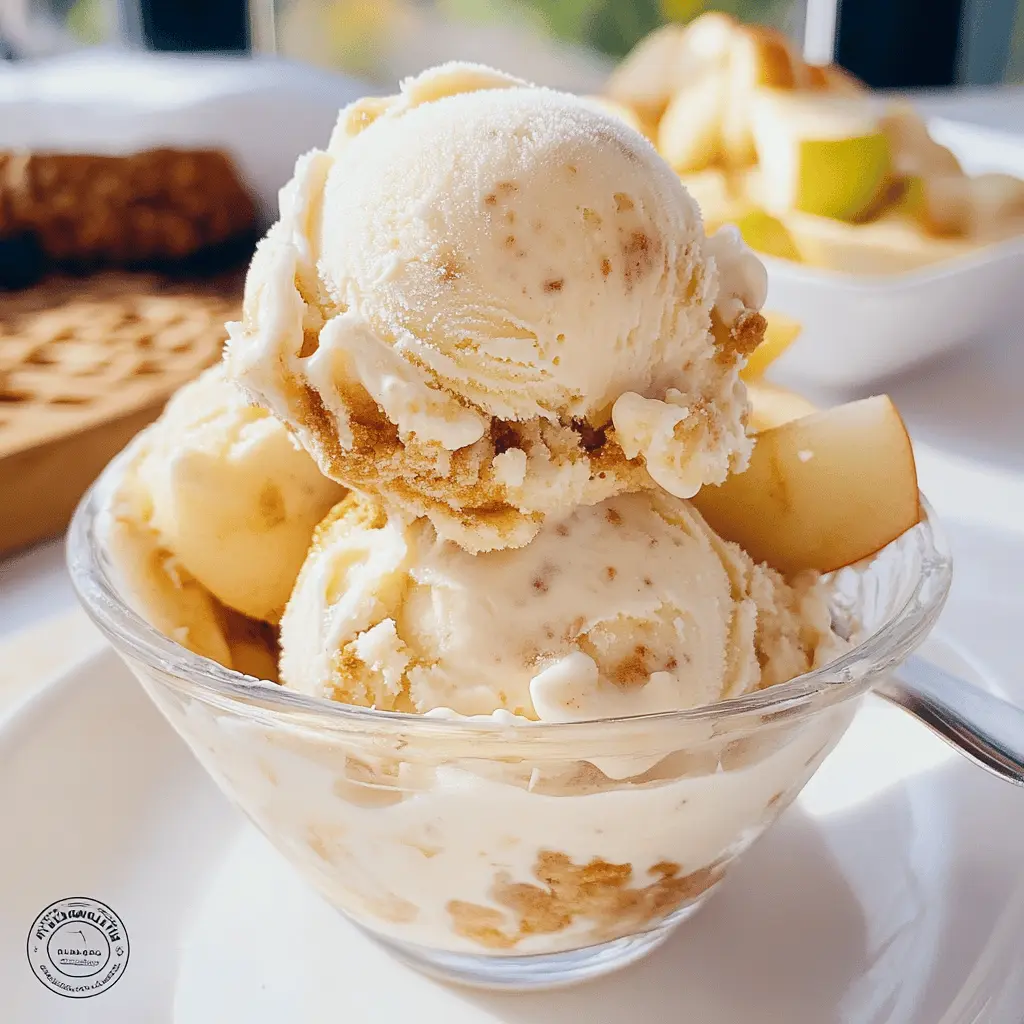
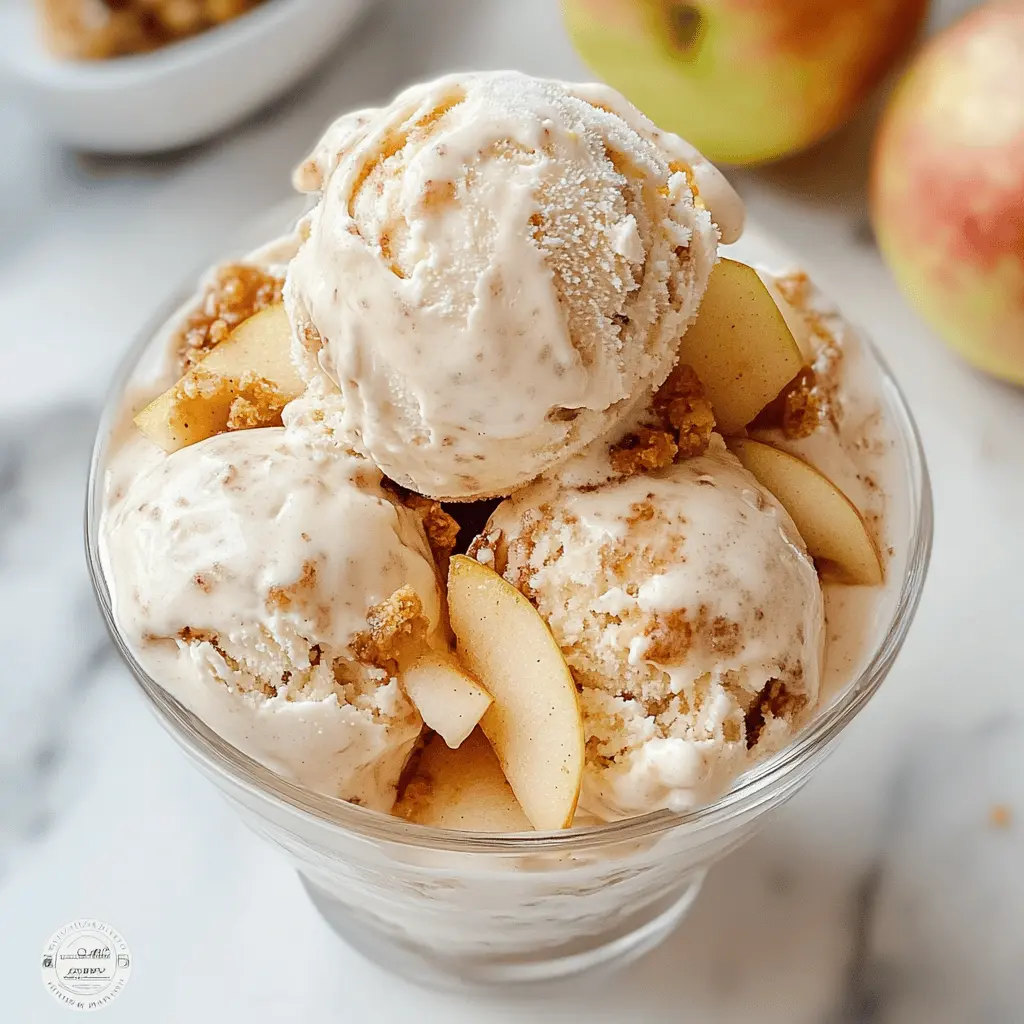
This Easy Homemade Apple Pie Ice Cream mixes creamy goodness with buttery apple pie flavors. It’s packed with real apple chunks and a sprinkle of cinnamon—yum!
Making this ice cream is a blast! I love how it reminds me of cozy fall days. Just churn, freeze, and share to make everyone smile. Who can say no to ice cream? 🍦
Key Ingredients & Substitutions
Apples: Granny Smith or Honeycrisp gives the best tartness and sweetness combo. If those aren’t available, Fuji or Gala can work too. For a twist, try using pears!
Butter: Unsalted butter is what I recommend for precise control over salt. If you’re dairy-free, coconut oil can be a suitable substitute for cooking the apples.
Brown Sugar: Light brown sugar brings a nice caramel flavor. If you only have granulated sugar, use that, but you might miss some depth. Coconut sugar is also a good alternative.
Graham Crackers: For that crunchy texture, they add an awesome pie-like feel. If you’re gluten-free, use gluten-free graham crackers or crushed nuts instead.
How Do I Ensure Creamy Ice Cream Without Ice Crystals?
A common issue is icy texture in homemade ice cream. Here are tips to maintain creaminess:
- Use full-fat dairy: Whole milk and heavy cream help create a rich base.
- Chill your base: Ensure the mixture is really cold before churning. This promotes better texture.
- Churn properly: Don’t skip on the churning time. It incorporates air, making the ice cream fluffy.
- Quick freeze: Once done churning, transfer to the freezer promptly to avoid forming ice crystals.
By following these steps, you can enjoy luscious homemade apple pie ice cream without those pesky ice crystals! Happy scooping!
Easy Homemade Apple Pie Ice Cream
Ingredients You’ll Need:
For the Apple Pie Filling:
- 2 medium apples (Granny Smith or Honeycrisp), peeled, cored, and diced
- 1 tablespoon unsalted butter
- 2 tablespoons brown sugar
- 1/2 teaspoon ground cinnamon
- Pinch of ground nutmeg (optional)
For the Ice Cream Base:
- 1 cup whole milk
- 3/4 cup granulated sugar
- 2 cups heavy cream
- 1 teaspoon vanilla extract
- 1/4 teaspoon salt
For Optional Pie Crust Texture:
- 1 cup crushed graham crackers or cinnamon graham cracker crumbs
How Much Time Will You Need?
This recipe will take about 20 minutes of active preparation time, plus 4-6 hours for chilling and freezing. It’s a great project for a fun afternoon, and it’s well worth the wait for the delicious homemade treat!
Step-by-Step Instructions:
1. Prepare the Apple Pie Filling:
Start by melting the butter in a medium skillet over medium heat. Once it’s melted, add the diced apples, brown sugar, cinnamon, and nutmeg (if using). Stir everything together and cook until the apples are tender and caramelized, around 8-10 minutes. When done, remove from heat and allow the mixture to cool completely. This will add great flavor to your ice cream!
2. Make the Ice Cream Base:
In a large mixing bowl, whisk together the whole milk and granulated sugar until the sugar dissolves completely. Then, add in the heavy cream, vanilla extract, and salt. Mix everything together well, making sure it’s smooth and creamy. This will be the base for your ice cream.
3. Chill the Base:
Cover the bowl with plastic wrap or a lid and place it in the refrigerator for at least 2 hours. This chilling step is super important; it helps ensure a creamy texture when you churn it!
4. Churn the Ice Cream:
After the base is chilled, pour it into your ice cream maker. Follow the manufacturer’s instructions for churning, which usually takes about 20-25 minutes until the ice cream reaches a soft-serve consistency. Be sure not to skip this crucial step, as it helps incorporate air into the mix!
5. Add the Apple Pie Mix-Ins:
During the last 5 minutes of churning, carefully add the cooled apple pie filling and any crushed graham cracker crumbs (if you’re using them). This will help distribute them evenly throughout the ice cream, adding great texture and flavor!
6. Freeze Until Firm:
Once churning is complete, transfer the ice cream into an airtight container. Make sure it’s sealed well and place it in the freezer for at least 4 hours to become firm and scoopable. The waiting will be tough, but you’ll be rewarded soon!
7. Serve and Enjoy:
When you’re ready to enjoy your homemade apple pie ice cream, scoop it into bowls or cones and dive into that delightful combination of flavors! The taste of apple pie in a creamy frozen treat is sure to impress anyone who tries it!
This homemade apple pie ice cream perfectly captures the warm flavors of apple pie with tender cinnamon-spiced apples and a velvety custard base, making it perfect for a cozy dessert any time of year!
Frequently Asked Questions (FAQ)
Can I Use Different Types of Apples?
Absolutely! While Granny Smith and Honeycrisp are great choices for their balance of tartness and sweetness, you can use other apples like Fuji, Gala, or even a mix. Just keep in mind that the flavor profile will vary slightly based on your choice!
Is There a Dairy-Free Option for This Ice Cream?
Yes! To make a dairy-free version, substitute the whole milk and heavy cream with coconut milk or almond milk, and use dairy-free butter for the apple filling. Just make sure any other ingredients you use are also dairy-free!
How Should I Store Leftover Ice Cream?
Store any leftover ice cream in an airtight container in the freezer. It can last up to 2-3 weeks, but for the best texture, try to consume it within a week. If it gets too hard, let it sit at room temperature for a few minutes before scooping to soften.
Can I Add More Mix-Ins?
Definitely! Feel free to add nuts like pecans or walnuts for extra crunch, or even toffee bits for an additional sweet layer. Just ensure that any mix-ins don’t overwhelm the apple pie flavor!